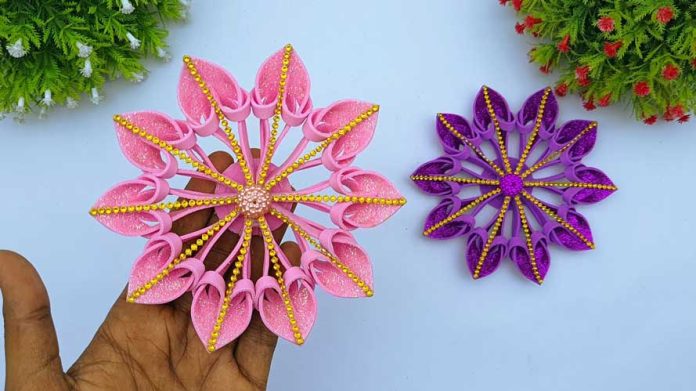
The holiday season brings with it a magical charm that is often associated with snowflakes gently falling from the sky. Creating 3D Christmas snowflakes can be a wonderful way to capture this enchanting ambiance and add a touch of elegance to your festive decor. In this step-by-step guide, we’ll take you through the process of crafting intricate 3D snowflakes that will bring a unique and beautiful element to your home this Christmas.
Materials Needed:
- White paper or cardstock
- Scissors
- Ruler
- Pencil
- Glue or adhesive tape
- Hole punch (optional)
- String or fishing line for hanging
Step 1: Gather Inspiration: Before you begin crafting, take some time to gather inspiration. Browse through magazines, websites, or even take a walk outside to observe the diverse patterns of snowflakes. This will help you design your own unique 3D snowflake patterns.
Step 2: Choose Your Patterns: Decide on the patterns you want for your 3D snowflakes. You can go for classic designs or get creative by combining different shapes and sizes. Sketch these patterns on paper using a pencil and ruler.
Step 3: Prepare Your Materials: Lay out your materials, ensuring you have a variety of paper sizes for different snowflake sizes. Thicker paper or cardstock is preferable, as it will hold its shape better.
Step 4: Cut Out the Patterns: Using your sketched patterns as a guide, carefully cut out the snowflake shapes from the paper. Take your time and ensure clean, precise cuts to achieve the best results.
Step 5: Create the 3D Effect: To give your snowflakes a three-dimensional look, you’ll need to create multiple layers of the same design in descending sizes. Each layer should be slightly smaller than the previous one. This can be achieved by simply resizing your original pattern and cutting it out multiple times.
Step 6: Adding Intricate Details: For an extra touch of intricacy, consider using a hole punch to create tiny decorative holes along the edges of your snowflakes. This will not only add visual interest but also allow light to shine through, creating a mesmerizing effect.
Step 7: Assemble the Layers: Layer the cut-out snowflakes on top of each other, starting with the largest at the bottom and gradually placing smaller ones on top. Use a small amount of glue or adhesive tape to secure the layers together at their centers. Be cautious not to use too much glue, as it could dampen the 3D effect.
Step 8: Allow to Dry: Once you’ve assembled the layers, set your 3D snowflake aside to allow the glue to dry completely. This will ensure that the layers adhere securely.
Step 9: Add Hanging Mechanism: Attach a piece of string or fishing line to the top of your snowflake to create a hanging mechanism. This will allow you to display your snowflakes in windows, from chandeliers, or on your Christmas tree.
Step 10: Display with Delight: Now that your 3D Christmas snowflakes are complete, it’s time to display them with pride. Hang them in various spots around your home to create a whimsical winter wonderland. Watch as the intricate patterns and 3D effect capture the attention of your guests and add a touch of enchantment to your holiday decor.
Conclusion: Crafting beautiful 3D Christmas snowflakes can be a delightful and rewarding activity during the festive season. The intricate designs and three-dimensional nature of these snowflakes will undoubtedly bring a sense of elegance and charm to your holiday decor. So, gather your materials, let your creativity flow, and enjoy the process of creating these stunning pieces of art that will transform your home into a winter paradise.


