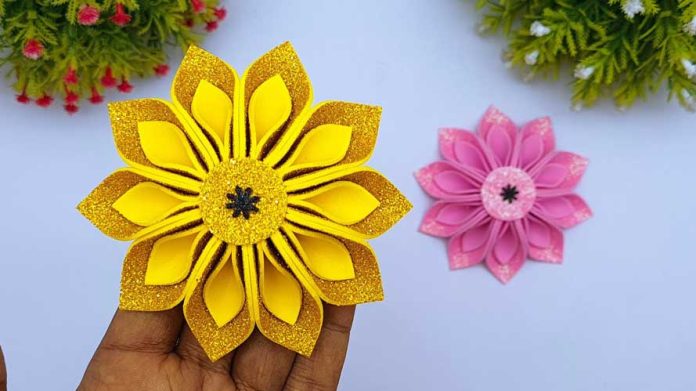
Unleash your creativity with our step-by-step guide on crafting “EVA Foam Paper Christmas Snowflakes.” Dive into the world of whimsical decorations as we explore the art of making charming snowflakes from EVA foam paper.
Materials You’ll Need:
To embark on this delightful crafting adventure, gather the following materials:
- EVA foam paper: In various colors for a playful and vibrant touch.
- Crafting scissors: Sharp and precise for detailed cutting.
- Crafting glue: To securely assemble foam pieces.
- Ribbons or strings: Essential for hanging your snowflakes.
- Optional embellishments: Glitter, sequins, or other decorations to add a touch of sparkle.
EVA Foam Paper Christmas Snowflakes
Now, let’s dive into the step-by-step process of creating EVA Foam Paper Christmas Snowflakes:
Step 1: Choose Your Snowflake Design
Start by selecting a snowflake design that resonates with your holiday theme. Opt for simple patterns to keep the crafting process enjoyable and stress-free.
Step 2: Trace and Precision Cut
Place your chosen snowflake template on the EVA foam paper. Use crafting scissors to precisely trace and cut along the lines. This step ensures that your snowflakes have a clean and polished finish.
Step 3: Introduce Color and Creativity
Experiment with various colors of EVA foam paper to add a playful and creative element to your snowflakes. Mix and match hues to suit your festive decor.
Step 4: Assemble the Snowflakes
Use crafting glue to securely assemble the different pieces of your snowflakes. This step allows you to bring your chosen design to life with ease.
Step 5: Attach Ribbons or Strings
Attach ribbons or strings to the back of your EVA Foam Paper Christmas Snowflakes using crafting glue. This ensures that your snowflakes are ready for hanging on your holiday tree.
Step 6: Optional Embellishments for Sparkle
If desired, add a touch of sparkle to your snowflakes by incorporating glitter, sequins, or other optional embellishments. This step allows you to infuse your creations with a festive shimmer.
Step 7: Allow for Drying Time
Allow your EVA Foam Paper Christmas Snowflakes to dry completely. This ensures a sturdy finish and guarantees that they will last throughout the holiday season.
Step 8: Hang and Enjoy the Whimsy
Once dry, hang your whimsical snowflakes on your holiday tree or around your home. Admire the charm and creativity they bring to your festive decor.
Conclusion:
Crafting EVA Foam Paper Christmas Snowflakes is a delightful way to infuse your holiday decor with whimsy and creativity. Follow this step-by-step guide to create charming and vibrant snowflakes that will add a playful touch to your festive season. Happy crafting!


