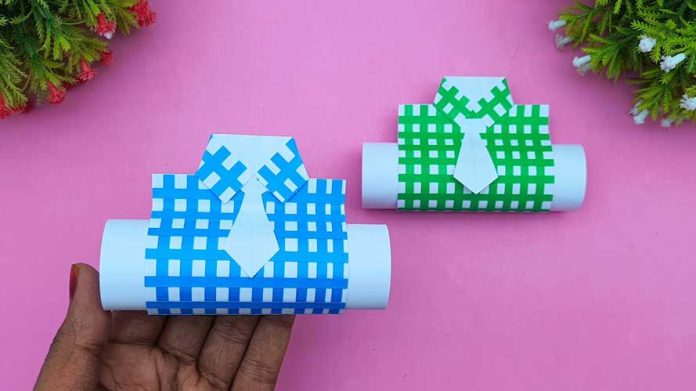
Paper shirts are a delightful and creative way to add a personal touch to gifts, decorations, or cards. They can be used for Father’s Day, birthdays, or any special occasion. In this guide, we’ll walk you through How To Make Beautiful Paper Shirts step by step. This fun and easy craft project is perfect for all ages and skill levels.
Materials Needed:
- A square sheet of paper (preferably origami paper, but any square paper will work)
- A flat, clean surface to work on
- Ruler (optional)
- Pencil (optional)
Step 1: Prepare Your Paper
To start, you need a square piece of paper. If you’re using a rectangular sheet, you’ll need to cut it into a square:
- Measure and Cut (if necessary):
- Fold one corner of the paper diagonally to the opposite edge to form a triangle.
- Cut off the excess rectangle, leaving you with a perfect square when you unfold the triangle.
- Choose Your Paper:
- Select a paper with a pattern or color that you like. Double-sided paper works well as it shows different designs for the shirt and collar.
Step 2: Fold the Paper in Half
- Fold Vertically:
- Lay the paper flat with the colored side facing down.
- Fold the square in half vertically, creasing well, then unfold it to leave a center crease.
- Fold Horizontally:
- Fold the square in half horizontally, creasing well, then unfold it. Now you have a cross crease.
Step 3: Create the Sleeves
- Fold the Top and Bottom Edges:
- Fold the top edge down to meet the center crease.
- Fold the bottom edge up to meet the center crease.
- Form the Sleeves:
- Turn the paper over.
- Fold the top left and right corners diagonally towards the center crease to form the sleeves.
Step 4: Create the Shirt Collar
- Fold Down the Top:
- Fold down the top edge about 1/4 of the way from the top to create a horizontal crease.
- Create the Collar:
- Fold the top corners diagonally towards the center crease, aligning the points with the edge of the top fold. This will form the collar of the shirt.
Step 5: Shape the Shirt Body
- Fold Up the Bottom:
- Fold the bottom edge of the paper upwards, tucking it under the collar. The folded edge should meet the bottom of the collar.
- Smooth and Crease:
- Adjust the fold to ensure the shirt looks even and the collar is well-defined.
Step 6: Add Details (Optional)
- Draw Buttons and Pockets:
- Use markers or pens to draw buttons down the front of the shirt and add pocket details.
- Attach a Tie or Bow:
- Cut a small piece of contrasting paper to create a tie or bow. Fold and attach it under the collar for a more formal look.
- Personalize:
- Add any other decorations, such as stickers, small patterns, or even a monogram for a personal touch.
Step 7: Display or Gift Your Paper Shirt
- As a Card:
- Attach the paper shirt to a folded card base to create a unique greeting card.
- As a Gift Tag:
- Punch a small hole at the top and thread a ribbon through it to use as a gift tag.
- As a Decoration:
- Use your paper shirts as part of a larger decoration, such as a banner or scrapbook page.
Conclusion
Making paper shirts is a simple and enjoyable craft that can be used in various ways to add a personal touch to your gifts and decorations. By following this guide on How To Make Beautiful Paper Shirts, you can create stylish and unique paper shirts that are perfect for any occasion.
Gather your materials and start folding your beautiful paper shirts today. Happy crafting!


