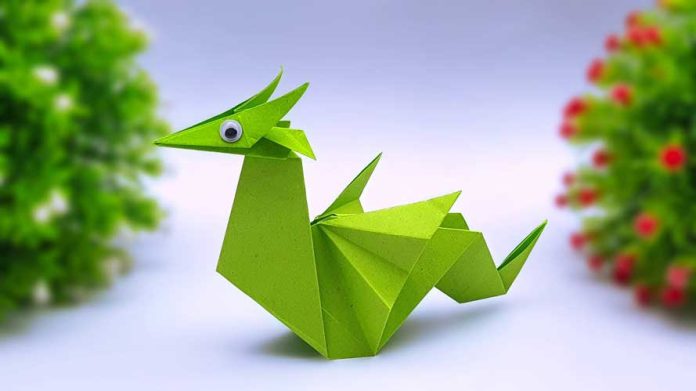
Origami, the traditional Japanese art of paper folding, has captivated the imagination of people around the world for centuries. Among the myriad of origami creations, the dragon stands out as a symbol of strength and mythical beauty. In this step-by-step guide, we’ll explore the enchanting world of origami and learn how to create your very own Easy and Simple Origami Dragon.
Gather Your Materials
Before embarking on your paper-folding adventure, ensure you have the following materials ready:
- Square origami paper (preferably colored, 15×15 cm)
- A flat, clean surface to work on
Step 1: Choose the Right Paper
Begin with a square sheet of origami paper. The color you choose can add a personal touch to your dragon, so feel free to experiment!
Step 2: Start with a Valley Fold
Fold the paper diagonally in half, forming a triangle. Make sure the edges align perfectly, then press down to create a sharp crease. This is known as a “valley fold.”
Step 3: Create Another Valley Fold
Fold the triangle in half again by bringing the right corner to the left corner. Press down to create a second valley fold.
Step 4: Unfold and Repeat
Unfold the paper to reveal a smaller triangle with the creases forming a grid. Repeat steps 2 and 3 in the opposite direction by folding the paper diagonally from the other two corners.
Step 5: Form a Square Base
Hold the paper with the open end facing you. Push the sides toward the center, collapsing the paper into a square shape. You now have a square base.
Step 6: Make Two Squash Folds
Fold the right and left flaps of the square base down to meet in the center, forming a smaller square. These are known as “squash folds.”
Step 7: Create a Kite Shape
Flip the paper over. Fold the top layer of the bottom point up, aligning it with the top edge. Repeat on the other side. This creates a kite shape.
Step 8: Make Rabbit Ear Folds
Fold the top layer of the kite shape down, bringing the top point to the bottom. This forms two “rabbit ear” flaps.
Step 9: Fold the Dragon’s Head
Fold the top point of the rabbit ear flaps down to create the dragon’s head. Shape it by folding the sides slightly inward.
Step 10: Shape the Body
Fold the bottom edge of the dragon’s head upward, creating the body. Adjust the wings by folding them down slightly.
Step 11: Finish with Details
Add your personal touch by drawing eyes, scales, or other details to bring your origami dragon to life.
Congratulations! You’ve successfully created your very own Easy and Simple Origami Dragon. Feel free to experiment with different colors and sizes to expand your origami dragon collection. Enjoy the journey of folding paper into fantastical creatures, and let your creativity soar!


