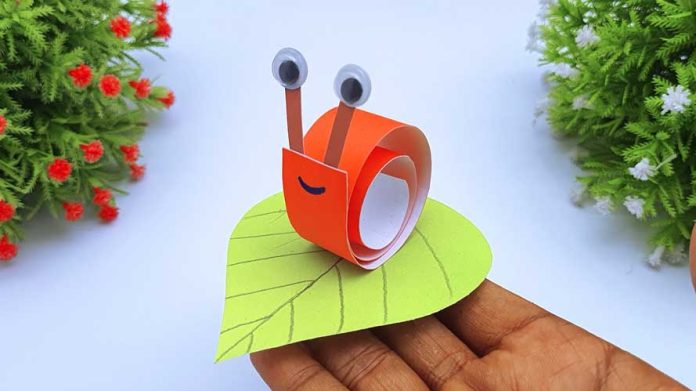
Crafting paper animals is a delightful way to explore your creativity and create unique decorations. In this step-by-step guide, we will walk you through the process of making a charming paper snail. Get ready to dive into the world of paper crafting and bring a cute little snail to life!
Materials Needed:
- Colored paper or construction paper
- Scissors
- Glue or adhesive tape
- Marker or pen
- Googly eyes (optional)
- Decorative materials (such as stickers, sequins, or markers)
Step 1: Gather Your Materials Collect all the materials needed for this project, ensuring you have a variety of colored papers to choose from. Prepare your workspace with a flat and clean surface.
Step 2: Create the Shell Start by cutting out a spiral shape from the colored paper. You can make it as big or as small as you like, depending on the desired size of your snail. Begin cutting from the outer edge of the paper, moving inwards, following a spiral pattern. Leave a small circular shape in the center to serve as the snail’s body.
Step 3: Form the Snail’s Body Roll up the small circular shape at the center of the spiral to create the snail’s body. Glue or tape the rolled section to secure it in place. This forms the base for attaching the shell.
Step 4: Attach the Shell Apply glue or tape to the bottom of the shell spiral and carefully position it on top of the snail’s body. Make sure it aligns well with the body and is firmly attached.
Step 5: Add Eyes and Details Using googly eyes or drawing with a marker, give your paper snail some adorable eyes. You can also use decorative materials like stickers, sequins, or markers to add patterns, spots, or other details to the shell and body. Get creative and personalize your snail!
Step 6: Create Antennae Cut two small strips of colored paper and curl them using a pencil or your fingers. Attach these strips near the snail’s eyes to form the antennae.
Step 7: Personalize and Decorate Now is the time to let your imagination run wild! Decorate your snail further with additional embellishments. Use markers, stickers, or other materials to add more personality and color to your creation.
Step 8: Display or Play Once your paper snail is complete, find a special spot to display it or use it as a playful addition to a craft project. You can create multiple snails in different colors and sizes to build your own little snail family!
Conclusion: Congratulations! You have successfully made a charming paper snail using simple materials and a dash of creativity. With each step, you have brought your snail to life, showcasing your artistic skills and imagination.
Remember, the beauty of paper crafts lies in the endless possibilities. Feel free to experiment with different colors, patterns, and sizes to create unique snails of your own. Encourage others to join in the fun by sharing this step-by-step guide with friends and family.


