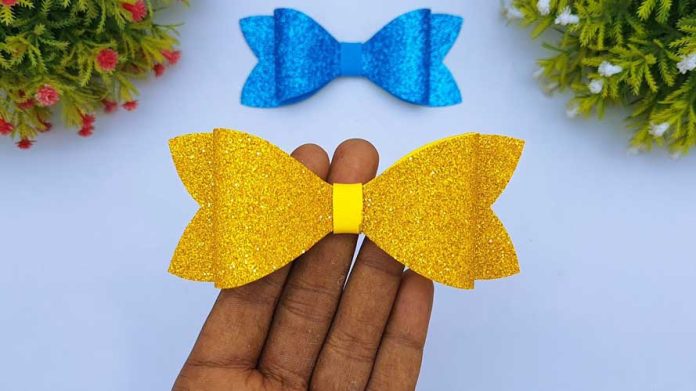
Add a touch of elegance and charm to your gifts, crafts, and decor with our DIY decorative bow making tutorial. Whether you’re wrapping presents for loved ones, embellishing handmade cards, or adding flair to home decor projects, mastering the art of bow making will elevate your creations to the next level. In this step-by-step guide, we’ll show you how to create beautiful bows from ribbon, fabric, or paper, allowing you to personalize your creations with style and sophistication. Let’s get started on this delightful crafting journey together!
Materials Needed:
- Ribbon, fabric, or paper strips
- Scissors
- Tape or glue (optional)
- Embellishments (optional, such as beads, buttons, or floral accents)
Step 1: Choose Your Material
Begin by selecting the material for your decorative bow. You can use ribbon, fabric, or paper strips, depending on your preference and the intended use of the bow. Choose a material that complements your project and adds visual interest.
Step 2: Cut Your Material
Cut your chosen material into strips of the desired length and width. The length of the strips will determine the size of your bow, so adjust accordingly based on your preferences. For a classic bow, aim for longer strips with narrower widths.
Step 3: Create Loops
Take one strip of material and form a loop by crossing one end over the other. Adjust the size of the loop to your liking, keeping in mind that larger loops will result in a fuller bow. Secure the loop in the center with your fingers or a small piece of tape.
Step 4: Form Additional Loops
Repeat step 3 with additional strips of material, creating multiple loops of the same size. The number of loops you create will depend on the desired fullness of your bow. For a traditional bow, aim for at least four loops.
Step 5: Stack and Arrange Loops
Stack the loops on top of each other, alternating the direction of each loop to create a layered effect. Play around with the arrangement until you’re satisfied with the overall shape and fullness of the bow.
Step 6: Secure the Center
Once you’ve arranged the loops to your liking, secure the center of the bow with a piece of ribbon, fabric, or paper strip. Wrap the center tightly around the stacked loops and tie it securely in the back.
Step 7: Fluff and Adjust
Gently fluff and adjust the loops of the bow to give it volume and dimension. Pull apart the layers of loops to create a fuller and more textured appearance. Tweak the positioning of the loops as needed until you achieve the desired look.
Step 8: Add Embellishments (Optional)
To add extra flair to your decorative bow, consider embellishing it with beads, buttons, or floral accents. Glue or sew these embellishments onto the center of the bow or scatter them throughout the loops for a festive touch.
Step 9: Attach to Your Project
Your DIY decorative bow is now complete and ready to be attached to your project. Use tape or glue to affix the bow to gift wrap, cards, wreaths, or any other craft or decor project. Admire your handiwork and enjoy the compliments!
Conclusion:
Congratulations! You’ve mastered the art of DIY decorative bow making. With just a few simple steps, you can create beautiful bows to elevate your gift wrapping, crafting, and decor projects. Experiment with different materials, sizes, and embellishments to customize your bows to suit any occasion or style. Enjoy the creative process and spread joy with your handmade creations!


