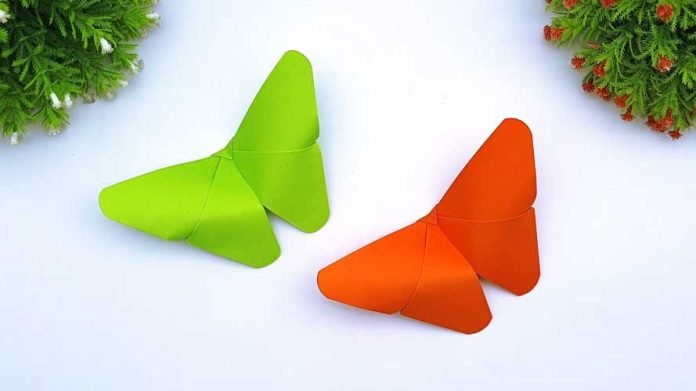
Origami, the ancient Japanese art of paper folding, offers a meditative and creative way to create intricate designs with simple materials. In this step-by-step guide, we’ll explore how to make an origami butterfly, a classic and elegant symbol of transformation and beauty. Whether you’re new to origami or looking to expand your folding skills, crafting your own origami butterfly is a rewarding and enjoyable experience. Let’s spread our wings and delve into the world of paper folding together.
Materials Needed:
- Square sheet of origami paper or any square paper (6×6 inches recommended)
- Flat surface for folding
Step 1: Choose Your Paper
Start by selecting a square sheet of paper for your origami butterfly. Origami paper is ideal for this project, but you can also use any square paper, such as wrapping paper or even plain printer paper. Choose a color or pattern that inspires you and complements the beauty of the butterfly.
Step 2: Fold Diagonally
Place your square paper on a flat surface with the colored side facing down. Fold the paper diagonally from one corner to the opposite corner, creating a triangle. Ensure the edges align perfectly and crease the fold firmly.
Step 3: Fold in Half
Next, fold the triangle in half horizontally, bringing the bottom corner to meet the top corner. Press down on the fold to create a crease, then unfold the paper.
Step 4: Fold the Bottom Corner Up
Take the bottom corner of the triangle and fold it upwards, aligning it with the top edge of the triangle. Crease the fold well to secure it in place.
Step 5: Fold the Top Corner Down
Now, take the top corner of the triangle and fold it downwards, tucking it under the flap created in the previous step. This will create a smaller triangle shape at the top of the paper.
Step 6: Fold in Half Again
Fold the entire paper in half vertically, bringing the left side over to meet the right side. Press down on the fold to create a crease, then unfold the paper.
Step 7: Create the Butterfly Shape
Using the existing creases as a guide, gently push the sides of the paper towards the center, collapsing it into a diamond shape. This will form the body of the butterfly.
Step 8: Fold the Wings
With the diamond shape facing you, fold down the top flap on the left side to create the left wing of the butterfly. Repeat this step on the right side to create the right wing. Adjust the wings as needed to achieve your desired butterfly shape.
Step 9: Final Adjustments
Gently lift the wings of the butterfly to give it depth and dimension. You can also curl the tips of the wings upwards for a more lifelike appearance. Your origami butterfly is now complete!
Conclusion:
Congratulations! You’ve successfully learned how to make an origami butterfly. This timeless and elegant design is perfect for embellishing greeting cards, decorating gifts, or simply adding a touch of beauty to your surroundings. Experiment with different colors and sizes of paper to create a colorful flock of butterflies. Enjoy the process of folding and let your imagination take flight!


