


Handmade paper toys are a unique and creative way to bring joy and entertainment to people of all ages. Made from eco-friendly materials, these toys are not only fun to play with but also sustainable and environmentally friendly. Each handmade paper toy is crafted with care and attention to detail, ensuring that every piece is truly unique.
From whimsical animals and characters to intricate puzzles and games, there is no limit to the creativity and imagination that can be expressed through handmade paper toys. Whether you’re a collector, a gift giver, or simply someone who appreciates the artistry and beauty of handmade crafts, there is something special about these one-of-a-kind creations. So why not add a little bit of handmade charm and fun to your life with a handmade paper toy?
1. Moving Paper Toy Shark Making Ideas | Handmade Paper Shark Easy Tutorial
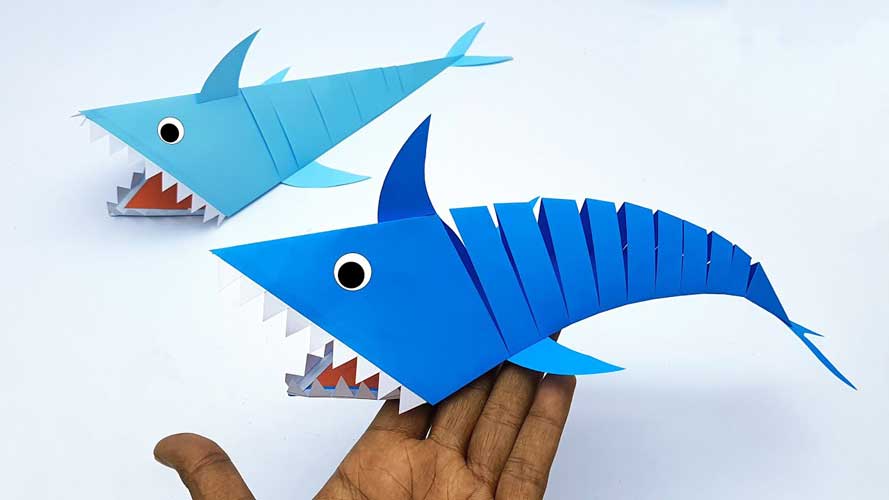
Moving paper toy sharks are a fun and unique way to bring a bit of the ocean to life. With just a few materials and some basic folding and cutting techniques, you can create your own moving paper toy shark that can be enjoyed by kids and adults alike. In this step-by-step guide, we will show you how to create your own moving paper toy shark, along with some creative ideas to make your toy truly one-of-a-kind.
Step 1: Gather your materials To make your moving paper toy shark, you will need some colored paper or cardstock, scissors, glue, and a pen or marker. You can choose any colors you like, but blue, gray, and white are great choices for creating a realistic-looking shark.
Step 2: Create the body Start by folding your paper in half vertically and cutting out a half-body shape along the fold. This will create a symmetrical body when you unfold the paper. You can use any shape you like, but a shark shape with a long pointed tail and a triangular head will work best.
Step 3: Add fins and tail Next, cut out fins and a tail from another piece of colored paper or cardstock. Use a marker or pen to draw details such as fins and scales on the fins and tail pieces.
Step 4: Attach the fins and tail Using glue, attach the fins and tail to the body. Be sure to leave some space between the fins and tail to allow for movement.
Step 5: Create the pivot point To create the pivot point for the moving parts, fold a small piece of paper in half and cut out a small rectangle shape. Attach this rectangle to the body of the shark, near the tail, using glue.
Step 6: Create the moving parts Cut out two small rectangles from paper or cardstock. These will be the moving parts of your toy. Fold the rectangles in half and draw a small triangle shape at the bottom of each.
Step 7: Attach the moving parts Using glue, attach the moving parts to the pivot point on the body of the shark. Make sure the triangle shapes are facing down and can move freely.
Step 8: Test the movement Gently push the moving parts up and down to test the movement of your paper toy shark. Adjust the fins and tail as necessary to ensure smooth movement.
Step 9: Add details Add details to your shark toy, such as eyes, teeth, and gills, using a marker or pen. You can also use additional colored paper to create a mouth or other details.
Step 10: Play and enjoy! Your moving paper toy shark is now complete and ready to play with. Move the tail up and down to make your shark swim through the air, or create an underwater environment for your toy with a blue blanket or piece of fabric.
Creative ideas:
- Use different shades of blue, gray, and white to create a realistic-looking shark.
- Cut out small fish or other sea creatures to create a fun ocean scene for your toy.
- Create a paper ocean background using blue construction paper and white foam or felt to represent waves.
- Use glow-in-the-dark paint or markers to create a spooky shark toy for Halloween.
- Make multiple moving paper toy sharks in different sizes to create a shark family.
Making a moving paper toy shark is a fun and easy craft project that can be enjoyed by kids and adults alike. With a few materials and some basic folding and cutting techniques, you can create a unique and playful toy that will provide hours of entertainment. So get creative and dive into the world of moving paper toys today!
2. Moving Paper Toy Ideas | How To Make Paper Crow Step By Step
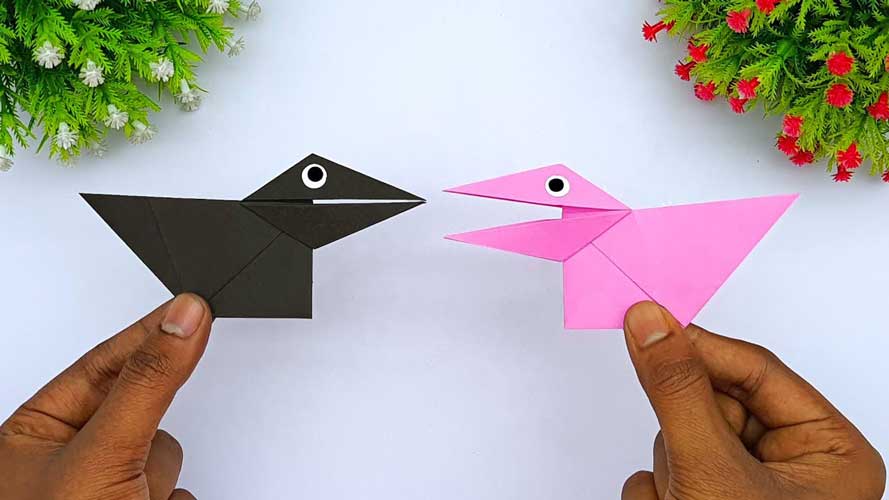
Paper crows are a fun and easy craft project that can be enjoyed by people of all ages. Whether you want to decorate your home, create a spooky Halloween scene, or simply have some fun with your kids, making paper crows is a great way to spend an afternoon. In this step-by-step guide, we will show you how to make a paper crow using only a few basic materials.
Materials Needed:
- Black construction paper or cardstock
- Scissors
- Glue stick
- Pencil
- White or yellow chalk
Step 1: Draw the Outline of the Crow
Take black construction paper or cardstock and fold it in half. Using a pencil, draw an outline of a crow on one half of the paper. You can make the outline as detailed or as simple as you like, depending on your skill level and preference.
Step 2: Cut Out the Crow
Once you have drawn the outline of the crow, use scissors to cut it out. Make sure to cut both sides of the folded paper so that you end up with a symmetrical crow shape.
Step 3: Create the Wings
To make the wings, cut two small triangles from the remaining black paper. Then, fold each triangle in half to create a crease down the center. Glue the wings to the back of the crow, positioning them so that they are symmetrical and resemble the wings of a real crow.
Step 4: Add the Eyes
Using white or yellow chalk, draw two small circles on the crow’s head to create the eyes. Make sure the circles are centered and symmetrical.
Step 5: Finish the Details
To add more detail, you can use the chalk to draw a small triangle for the beak and some feathers on the wings. You can also add some glitter or other embellishments if you like.
Step 6: Display Your Paper Crow
Once your paper crow is complete, you can display it in a variety of ways. You can attach a string to the back and hang it from a window or a doorway. You can also place it on a mantel or a bookshelf as decoration.
Making a paper crow is a simple and fun craft project that anyone can do. With just a few basic materials and some creativity, you can create a unique and interesting decoration that will add some fun and flair to your home. So gather your supplies, get creative, and have fun making your own paper crow today!
3. How To Make Paper Toy Lobster | Handmade Paper Fish Easy Instructions
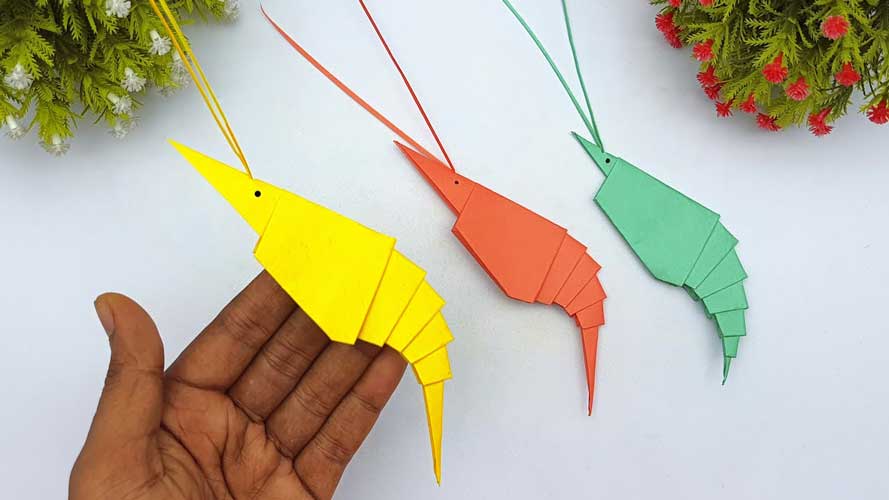
If you’re looking for a fun and unique craft project, making a paper toy lobster is a great option. Not only is it easy to create, but it’s also a great way to pass the time and show off your creativity. In this step-by-step guide, we’ll walk you through the process of making a paper toy lobster.
Materials needed:
- Red and white construction paper
- Scissors
- Glue stick or liquid glue
- Black marker
- Pencil
Step 1: Draw the Lobster Shape Start by drawing the shape of a lobster on white construction paper. Make sure that you draw the lobster’s head, claws, and body. You can use a pencil to make the outline.
Step 2: Cut Out the Lobster Shape Using your scissors, carefully cut out the lobster shape you drew in step 1. Be sure to cut along the lines you drew as precisely as possible.
Step 3: Create the Lobster’s Body Using the red construction paper, cut a rectangle that is about twice the length of the lobster’s body. Fold the rectangle in half lengthwise, then use your scissors to cut slits along the folded edge. The slits should be about 1 cm apart and should stop about 1 cm from the edge. Once you’ve cut the slits, unfold the paper and you should have a fringe-like effect.
Step 4: Glue the Body onto the Lobster Apply glue along the back of the fringe paper you created in step 3. Then, carefully glue it onto the lobster’s body, starting from the tail and working your way up. Trim any excess paper from the edges.
Step 5: Make the Lobster’s Claws Using the red construction paper, cut two identical claw shapes. They should be large enough to attach to the sides of the lobster’s head. Once you have cut the claws, fold them in half lengthwise and then fold them in half again. This will create a crease in the center of each claw.
Step 6: Attach the Claws to the Lobster Apply glue along the crease of each claw, then attach them to the sides of the lobster’s head. Make sure they are evenly spaced and aligned.
Step 7: Add the Lobster’s Eyes Using your black marker, draw two small circles on the lobster’s head to represent the eyes. Make sure they are evenly spaced and aligned.
Step 8: Create the Lobster’s Antennae Cut two thin strips of red construction paper, then fold each strip in half. Using your scissors, create small cuts along the folded edge to create a fringe effect. Then, glue each strip onto the top of the lobster’s head.
Step 9: Finish and Enjoy! Allow the glue to dry completely, then your paper toy lobster is ready to be enjoyed! You can even make several lobsters in different colors and sizes to create a fun collection.
Making a paper toy lobster is a fun and easy craft project that anyone can enjoy. With just a few simple materials and these step-by-step instructions, you’ll be able to create a cute and unique paper toy that’s sure to impress. So grab some construction paper and get started today!
4. How To Make Moving Paper Caterpillar | Handmade Caterpillar Crafts Easy
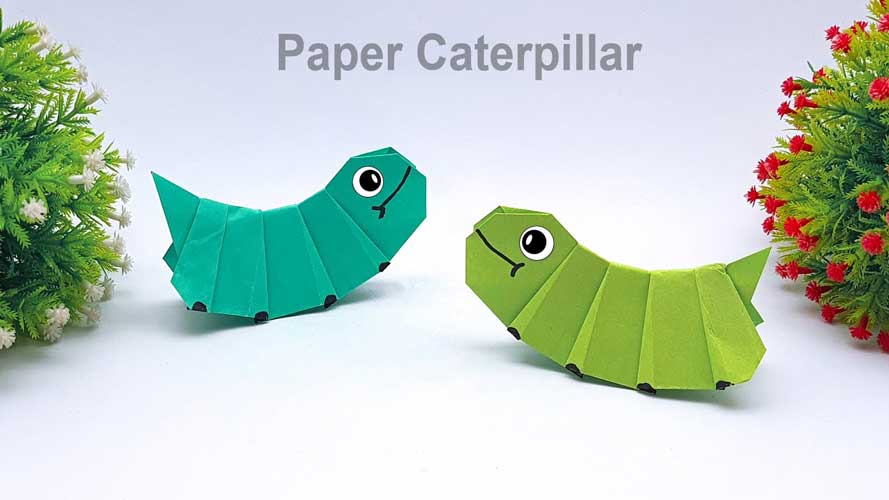
Are you looking for a fun and easy craft project to do with your kids? Look no further than making a moving paper caterpillar! This simple activity requires only a few materials and can provide hours of entertainment for children of all ages. Here’s a step-by-step guide on how to make a moving paper caterpillar.
Materials:
- Construction paper in various colors
- Scissors
- Glue
- Pencil or marker
- Pipe cleaners
- Googly eyes (optional)
Step 1: Cut the Paper Strips Start by cutting your construction paper into strips that are about 1 inch wide. You’ll need at least four strips, but you can make as many as you like depending on how long you want your caterpillar to be. For a standard size, we recommend using at least six strips.
Step 2: Fold the Strips Fold each strip back and forth in an accordion-like pattern. Make sure that the folds are sharp and even so that your caterpillar will move smoothly.
Step 3: Glue the Strips Together Once you have folded all of your strips, it’s time to glue them together. Apply a small amount of glue to the end of one strip and attach it to the beginning of the next strip. Keep gluing until you have attached all of the strips together.
Step 4: Add the Eyes and Antennae If you like, you can add googly eyes to your caterpillar to give it some personality. To attach them, simply use a small amount of glue. You can also add antennae by bending a pipe cleaner into a V shape and gluing it to the head of the caterpillar.
Step 5: Make the Caterpillar Move To make your caterpillar move, gently pull the ends of the accordion folds in opposite directions. This will cause the caterpillar to stretch and contract, creating a crawling motion.
Step 6: Decorate If you want to add some extra flair to your caterpillar, you can decorate it with markers, stickers, or other craft materials. You can also experiment with different colors and patterns to create a truly unique caterpillar.
And there you have it, a simple and fun craft project that will keep your kids entertained for hours. Making a moving paper caterpillar is a great way to encourage creativity and imagination, while also teaching valuable skills like following directions, cutting, and gluing. Plus, who doesn’t love a cute and crawly critter?


