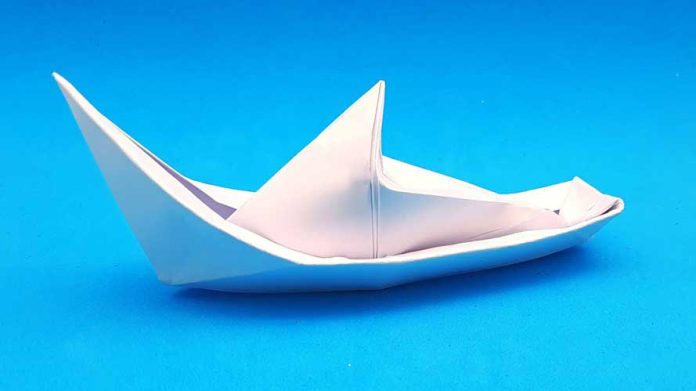
Origami, the Japanese art of paper folding, offers a meditative and creative way to express oneself through intricate designs. Among the vast array of origami creations, the fishing boat holds a special charm, symbolizing adventure and tranquility on the open seas. In this step-by-step guide, we’ll explore how to fold your own origami fishing boat, allowing you to embark on a journey of imagination with just a sheet of paper.
Materials Needed:
Before we dive into the folding process, let’s gather the materials you’ll need for this origami project:
- Square sheet of origami paper or any square paper (you can also cut a square from regular paper)
- Flat surface to work on
Step 1: Prepare Your Paper
Start by laying your square sheet of paper flat on a clean, flat surface. If you’re using regular paper, fold one corner diagonally to the opposite corner to create a triangle. Then, carefully cut off the excess paper along the folded edge to create a square.
Step 2: Fold the Paper Diagonally
Fold the paper in half diagonally, bringing one corner to meet the opposite corner. Crease the fold well and then unfold the paper.
Step 3: Fold the Paper in Half Horizontally
Next, fold the paper in half horizontally, bringing the top edge down to meet the bottom edge. Crease the fold well and then unfold the paper again.
Step 4: Fold the Bottom Corners
Take the bottom-left corner of the paper and fold it upwards, aligning it with the center crease created in Step 3. Crease the fold well. Repeat this step with the bottom-right corner, folding it upwards and aligning it with the center crease.
Step 5: Fold the Top Corners
Now, take the top-left corner of the paper and fold it downwards, aligning it with the bottom edge of the paper. Crease the fold well. Repeat this step with the top-right corner, folding it downwards and aligning it with the bottom edge.
Step 6: Fold the Top Flaps
Take the top layer of the left and right flaps and fold them diagonally towards the center crease, creating triangular flaps. Crease the folds well.
Step 7: Fold the Bottom Flap
Flip the paper over to the other side. Take the bottom flap and fold it upwards, tucking it underneath the triangular flaps created in Step 6. Crease the fold well.
Step 8: Shape the Boat
With the bottom flap folded up, gently open the boat by pulling apart the sides. Use your fingers to shape the boat, pressing the folds to create the desired form.
Step 9: Finishing Touches
Your origami fishing boat is now complete! You can leave it as is or add some details such as drawing windows, adding a paper sail, or decorating it with markers or stickers to personalize your boat.
Step 10: Enjoy Your Origami Fishing Boat
Your origami fishing boat is ready to set sail on the imaginary seas! Display it on a shelf, use it as a decoration, or incorporate it into storytelling or playtime. Let your imagination take you on an adventure with your handmade creation.
In conclusion, folding an origami fishing boat is a delightful and rewarding craft that anyone can enjoy. With just a few simple folds, you can create a symbol of exploration and discovery that’s sure to bring joy to both children and adults alike. So gather your paper and start folding – the high seas await!


