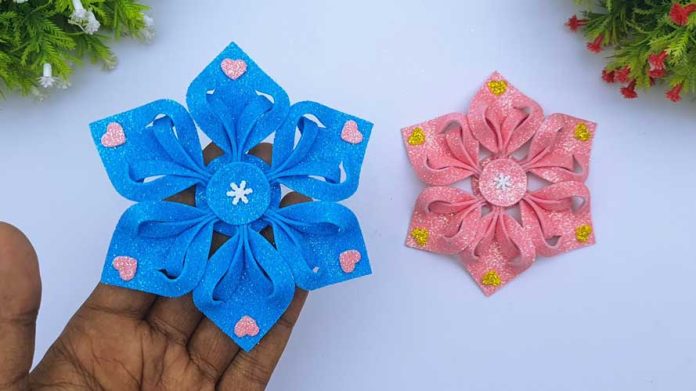
The holiday season is upon us, and there’s no better way to capture the enchantment of winter than by crafting your own Christmas snowflakes. These delicate, intricate decorations can turn your home into a winter wonderland, filling it with the magic of the season. In this comprehensive step-by-step guide, we’ll explore various techniques for making beautiful Christmas snowflakes. Whether you’re an experienced crafter or a beginner, these tutorials will help you create stunning snowflakes that will be the highlight of your holiday decor.
Materials You’ll Need:
Before we dive into the crafting process, let’s gather the essential materials you’ll need for making Christmas snowflakes. The specific materials can vary depending on the technique you choose, but here’s a general list to get you started:
- White paper: Ideal for classic paper snowflakes.
- Scissors: Sharp and precise scissors are crucial for intricate cuts.
- Pencil: For drawing snowflake designs (optional).
- Ruler: For measuring and creating symmetrical designs (optional).
- Craft knife (optional): Useful for detailed cuts.
- Cutting mat: To protect your work surface when using a craft knife.
- Hole punch (various sizes): Optional for adding detail.
- Glitter, sequins, or other embellishments: Optional for decorating your snowflakes.
- Clear thread or fishing line: For hanging your snowflakes.
- Ribbon or twine: To create loops for hanging.
- Tape or adhesive putty: To attach your snowflakes to surfaces.
Now, let’s explore various techniques for making Christmas snowflakes step by step!
Technique 1: Classic Paper Snowflakes
Step 1: Fold the Paper
- Start with a square sheet of white paper.
- Fold it diagonally to form a triangle.
- Fold the triangle in half again to create a smaller triangle.
Step 2: Design Your Snowflake
- Begin cutting out small shapes and patterns along the folded edges of the triangle. Be creative with your designs.
- Experiment with different cuts to create unique snowflakes.
Step 3: Unfold and Reveal
- Carefully unfold the paper to reveal your unique snowflake.
- Make as many as you like and hang them around your home.
Technique 2: Foam Sheet Snowflakes
Step 1: Draw Your Design
- Using a template or your own design, draw the snowflake shape on a foam sheet.
- You can use white foam sheets or choose different colors for a playful twist.
Step 2: Cut It Out
- Cut along the lines using scissors or a craft knife.
- Ensure smooth edges for a polished look.
Step 3: Decorate
- Add embellishments like glitter or sequins to make your foam snowflake sparkle.
- Allow the decorations to dry completely.
Step 4: Attach a Loop
- If you want to hang your foam snowflakes, attach a loop of ribbon or twine to the back using glue.
Technique 3: Felt Snowflake Ornaments
Step 1: Cut Felt Shapes
- Cut two identical snowflake shapes from felt.
- You can choose white felt or experiment with different colors.
Step 2: Decorate
- Embellish one of the felt snowflakes with beads, sequins, or embroidery.
- Be creative and add your personal touch.
Step 3: Layer and Sew
- Place the decorated felt snowflake on top of the plain one and sew them together along the edges, leaving a small opening.
- Use thread that complements your felt colors.
Step 4: Stuff and Close
- Stuff the snowflake with a small amount of filling, like polyester stuffing or cotton balls.
- Sew the opening shut.
Step 5: Attach a Loop
- Add a loop of ribbon or twine for hanging.
- Secure it by sewing it into the top of your felt snowflake.
Technique 4: Clear Plastic Snowflakes
Step 1: Trace Your Design
- Using a snowflake template, trace the design onto clear plastic sheets with markers or colored pencils.
- Be creative with the colors you use.
Step 2: Cut It Out
- Cut along the traced lines with scissors.
- Ensure smooth edges for a clean look.
Step 3: Emboss the Snowflake (Optional)
- Use embossing tools to add texture and detail to your plastic snowflake.
- This step is optional but can add an extra touch of elegance.
Step 4: Decorate
- Add glitter or sequins between the two plastic layers for a sparkling effect.
- Apply a thin layer of clear glue to one side of the plastic and sprinkle the embellishments on.
Step 5: Attach a Loop
- Punch a hole near one of the points and thread a clear thread or fishing line through for hanging.
Technique 5: Painted Wooden Snowflakes
Step 1: Acquire Wooden Shapes
- Purchase or cut wooden snowflake shapes.
- You can find these at craft stores or make your own from thin plywood.
Step 2: Paint
- Use acrylic paints and brushes to paint your wooden snowflakes in your chosen colors.
- Experiment with different color combinations for a unique look.
Step 3: Add Detail
- Once the base paint is dry, add intricate details and designs with smaller brushes.
- Consider using metallic paints for a touch of elegance.
Step 4: Seal
- Apply a clear sealer to protect your paintwork and give your snowflakes a glossy finish.
Step 5: Attach a Loop
- Add a loop of ribbon or twine to the back for hanging.
- Secure it with glue or by drilling a small hole for threading.
Conclusion:
Crafting Christmas snowflakes is a delightful and creative way to infuse your home with the beauty and charm of winter. Whether you choose to make classic paper snowflakes, elegant foam sheet snowflakes, or any of the other ideas mentioned, your handmade creations will undoubtedly fill your space with the magic of the season. So, gather your materials, invite your friends and family to join in the crafting fun, and start creating beautiful snowflakes that will make your holiday season truly special. Happy crafting and merry Christmas!


