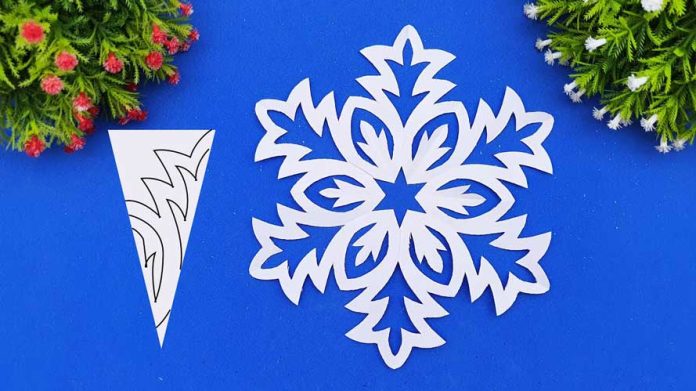
When it comes to Christmas crafts, making paper snowflakes is a timeless and joyful activity. With just a few simple materials and some creativity, you can create beautiful snowflake ornaments to decorate your home during the holiday season. In this step-by-step guide, we will show you how to make easy Christmas snowflakes out of paper. So, grab your paper and scissors, and let’s get started on this fun and festive craft project.
Materials Needed:
- Paper: Use white or colored paper, such as construction paper, printer paper, or origami paper. You can choose different sizes and types of paper for a variety of snowflakes.
- Scissors: A pair of sharp, small scissors will work best for cutting out intricate designs.
- Pencil (Optional): A pencil can be useful for tracing and marking guidelines, especially if you’re a beginner.
- Optional: Glitter, markers, or other decorative elements to add sparkle and personalization to your snowflakes.
Step 1: Prepare Your Workspace Find a clean, well-lit area where you can work comfortably. Clear off any clutter and gather all the necessary materials within reach. This will make the crafting process smoother and more enjoyable.
Step 2: Fold the Paper Take a square sheet of paper and fold it diagonally to create a triangle. Align the edges carefully to ensure a crisp and even fold. Smooth out any creases or wrinkles.
Step 3: Divide the Triangle Fold the triangle in half again by bringing one corner to the opposite corner, creating a smaller triangle. Press down firmly to create a sharp fold. You now have a smaller triangle with two folded edges and one open edge.
Step 4: Begin Cutting Start cutting out small shapes and patterns along the folded edges of the triangle. Be creative and experiment with different designs. You can try cutting triangles, squares, circles, or intricate curves. Remember to leave some sections uncut to maintain the integrity of the snowflake.
Step 5: Unfold and Reveal Once you have finished cutting, carefully unfold the paper to reveal your snowflake. Gently adjust any misshapen areas or stuck folds to create a symmetrical design. If desired, you can make additional cuts or adjustments to achieve the desired look.
Step 6: Personalize Your Snowflake Now is the time to add your personal touch to the snowflake. You can use markers to draw intricate details on the paper or add a touch of glitter for some sparkle. Let your creativity shine as you customize each snowflake.
Step 7: Create a Variety of Snowflakes Repeat steps 2 to 6 with different sizes and types of paper to create a collection of unique snowflakes. Experiment with different cutting techniques and patterns to make each snowflake special.
Step 8: Display Your Snowflakes Once you have created a collection of snowflakes, find creative ways to display them. You can hang them on windows, string them together to create a garland, or use tape to attach them to walls or doors. Let your imagination guide you in showcasing your beautiful handmade snowflakes.
Conclusion: Making easy Christmas snowflakes out of paper is a delightful and creative activity that adds a touch of winter magic to your holiday decorations. With this step-by-step guide, you now have the knowledge and inspiration to create beautiful snowflakes. Enjoy the process, involve your family and friends, and let your imagination soar as you make unique and festive paper snowflakes. Happy crafting and Merry Christmas!


