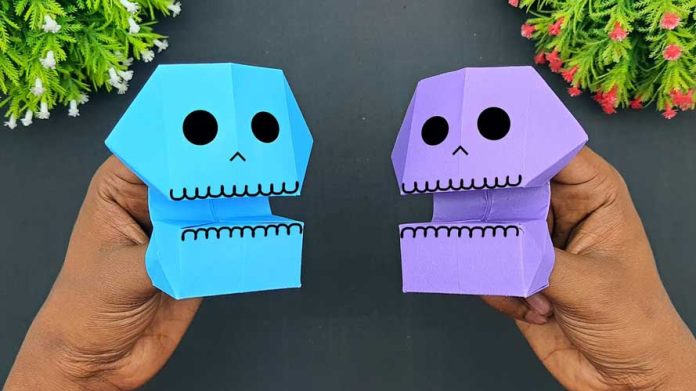
Dive into the fascinating world of origami with our step-by-step guide on “How to Make Origami Sugar Skull That Bites.” Unleash your creativity and create a unique and playful origami masterpiece that adds a bite of charm to your collection. Follow along as we guide you through each fold to bring this intriguing sugar skull to life.
Materials You’ll Need:
To embark on this origami adventure, gather the following materials:
- Square origami paper: Choose colorful paper to add vibrancy to your sugar skull.
- Markers or colored pencils: For adding details and personal touches.
- Optional: Adhesive: To secure folds and details in place.
Now, let’s dive into the step-by-step process of creating an Origami Sugar Skull That Bites:
Step 1: Select Your Origami Paper
Choose a square piece of origami paper with a color or pattern that suits your creative vision. The standard size is 6×6 inches, but you can adjust depending on your preference.
Step 2: Start with the Basic Fold
Begin by folding the origami paper in half diagonally, creating a triangle. Press the fold firmly to create a crisp edge.
Step 3: Create a Center Crease
Fold the triangle in half again, bringing one corner to meet the other. This creates a center crease, serving as a guideline for subsequent folds.
Step 4: Form the Base Shape
Unfold the paper back to the triangle shape. Take one of the bottom corners and fold it upwards, stopping just below the center crease. Repeat this fold with the other bottom corner.
Step 5: Fold the Top Corners Inward
Now, fold the top corners of the triangle inward, creating a narrower triangle. These folds will form the upper part of the sugar skull.
Step 6: Shape the Jawline
Create a jawline by folding the bottom edge of the triangle upwards. This fold determines the length of the jaw, so adjust it to achieve your desired skull shape.
Step 7: Form the Skull’s Eyes and Nose
Fold down a small section from the top of the triangle to create the forehead. Then, fold the sides of the triangle inwards to form eye sockets. Experiment with different shapes to add character.
Step 8: Create the Skull’s Teeth
Fold the bottom edge of the jaw upwards to create the skull’s teeth. You can make them sharp or round, depending on your preference. This is where the “bites” come to life!
Step 9: Add Personal Details
Use markers or colored pencils to add intricate details to your sugar skull. Draw patterns, designs, or even colorful accents to make your creation unique.
Step 10: Final Touches
Once you’re satisfied with the details, your origami sugar skull that bites is complete. If desired, secure folds and details in place with a touch of adhesive.
Conclusion:
Congratulations! You’ve successfully crafted an Origami Sugar Skull That Bites. Let your creativity run wild, experiment with colors and patterns, and enjoy the process of bringing this unique origami creation to life. Happy folding!


