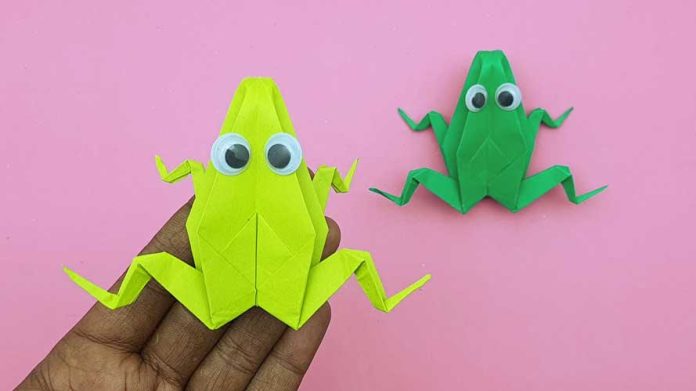
Are you ready to hop into the world of paper crafting with a fun and interactive project? In this step-by-step guide, we’ll show you how to create your very own moving paper toy frog. This delightful craft combines creativity with mechanics, resulting in a charming toy that will entertain both kids and adults alike. So, gather your materials and let’s get started on making your own hopping frog!
Step 1: Gather Your Materials Before we begin, make sure you have all the necessary materials on hand:
- Green construction paper or cardstock
- Scissors
- Glue stick or craft glue
- Googly eyes
- Pen or marker
- Paper fastener (brad)
- Pencil
- Ruler
Step 2: Cut Out the Frog Shapes Take your green construction paper and cut out two identical frog shapes. You can either freehand draw the frog shape or find a template online to trace onto the paper. Make sure your frog shapes are roughly the same size and proportion.
Step 3: Create Fold Lines Using your ruler and pencil, create fold lines on one of the frog shapes. Draw a straight line across the center of the frog’s body horizontally, and then draw another line vertically down the center. These lines will help guide your folds later on.
Step 4: Make the Leg Folds On the frog shape without fold lines, fold the bottom part of each leg upward, creating a crease where the legs meet the body. These folds will give your frog its hopping action, so make sure they are aligned evenly.
Step 5: Attach Googly Eyes Using your glue stick or craft glue, attach two googly eyes to the top of the frog’s head. Position them slightly inward to give your frog a cute and whimsical look.
Step 6: Attach the Legs Now, take the frog shape with the fold lines and apply glue along the outer edges, leaving the center area unglued. Place the frog shape with the legs on top, aligning the edges carefully. Press down firmly to secure the pieces together, ensuring that the legs can still move freely.
Step 7: Insert the Paper Fastener With your scissors, carefully poke a small hole through the center of the folded lines on the frog’s body. Then, insert the paper fastener (brad) through the hole and secure it in place by opening the prongs on the back.
Step 8: Test Your Frog Gently move the legs of your frog up and down to test its hopping action. Adjust the folds or fastener if needed to ensure smooth movement.
Step 9: Add Details Use your pen or marker to draw a mouth and nostrils on the frog’s face, as well as any other embellishments you desire, such as spots or patterns on its body.
Step 10: Have Fun! Your moving paper toy frog is now ready to hop into action! Press down on the paper fastener to make your frog’s legs move, and watch it jump and frolic to your heart’s content.
Conclusion: Creating a moving paper toy frog is not only a fun craft project but also a great way to explore mechanics and creativity. Whether you’re making it as a gift for a friend or simply as a playful addition to your desk, this hopping frog is sure to bring joy and laughter wherever it goes. So, grab your paper and scissors, and let your imagination leapfrog ahead!


