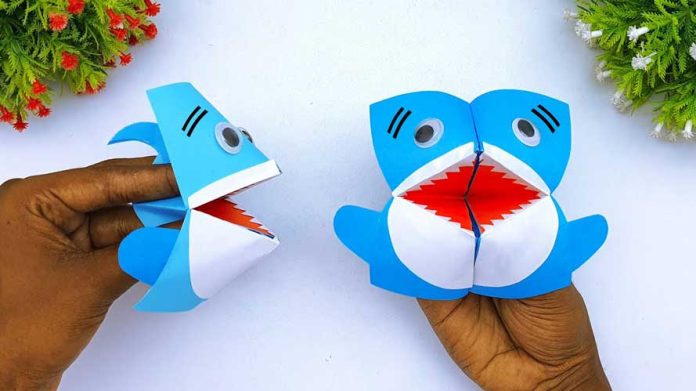
If you’re a fan of crafts and love marine creatures, then creating a moving paper toy shark is the perfect project for you. With just a few simple materials and some creative folding, you can bring this fascinating predator to life. In this comprehensive step-by-step guide, we’ll walk you through the process of making a moving paper toy shark. Let’s dive in!
Materials Needed:
- A sheet of blue construction paper (8.5×11 inches)
- A pair of scissors
- Glue stick or double-sided tape
- A pencil or pen
- A ruler
- Markers or colored pencils (optional, for decorating)
Step 1: Prepare the Paper Start by laying the blue construction paper flat on a clean work surface. This will be the body of your paper toy shark. Ensure that the paper is oriented in a landscape (horizontal) position.
Step 2: Fold the Paper Fold the paper in half lengthwise (hot dog style). This will create a crease down the middle. Unfold the paper after making the fold.
Step 3: Create the Mouth Starting from the top left corner of the paper, make a diagonal fold towards the center crease. Repeat this step with the top right corner. The folded edges should meet at the center crease, forming a triangle-shaped flap at the top.
Step 4: Form the Body Fold the bottom edge of the paper up towards the center crease, leaving a small gap between the bottom edge and the crease. This fold will become the shark’s body.
Step 5: Add Fins To create the shark’s dorsal fin, fold the top flap down, aligning it with the top edge of the body. Next, fold the bottom corners of the body towards the center crease, forming triangular-shaped fins.
Step 6: Make the Tail Fold the bottom edge of the paper upward, starting from the bottom of the fins. This fold will create the shark’s tail. You can experiment with different tail shapes by adjusting the size and angle of the fold.
Step 7: Decorate Let your creativity shine by using markers or colored pencils to decorate your paper toy shark. Add eyes, teeth, and other details to bring your creation to life.
Step 8: Bring It to Life Hold the paper toy shark by the tail and move it back and forth to make it “swim.” The triangular flap at the top will create a motion effect, making your shark appear to move.
Conclusion:
Congratulations! You have successfully crafted a moving paper toy shark. This fun and engaging project allows you to explore your creativity while learning about the art of paper folding. Experiment with different sizes and colors to create a whole school of paper sharks. Whether you display them or give them as gifts, these paper toys are sure to delight both children and adults alike. Enjoy the process and let your imagination swim free with this unique handmade creation.


