


Paper crafting is a fun and creative way to express your artistic side. How To Make Paper Crafts – Creating Paper Art, and Craft can be a great way to spend time, relax and let your creativity flow. In this article, we will discuss various ways that you can make paper crafts, from simple cut-outs to more intricate designs.
Paper crafts are an easy and enjoyable way to bring creative projects into your home. Whether you’re a beginner or a seasoned crafter, paper crafts are a great way to express your creativity. With the right materials, guidance, and imagination, anyone can make beautiful and unique paper crafts. In this article, we will explore the steps and materials needed to create some simple paper craft projects that everyone can enjoy. From creating origami figures to building paper models, we cover it all!
1. How To Make Paper Aircrafts | Paper Jet origami Plane | Boomerang Paper Super Aircraft | Paper Plane
Making Paper Aircrafts
Paper aircraft is an entertaining craft that can be made from simple materials found around the home. Whether you are a beginner or an expert, making paper aircraft is a fun activity that anyone can enjoy. In this guide, we’ll explain how to make paper aircraft such as the paper jet origami plane, boomerang paper super aircraft, and the traditional paper plane.
Creating your own miniature air force of these amazing flying machines is easy and rewarding. With some patience and practice, you will soon have a fleet of planes soaring through the sky! All you need is some ordinary printer or copy paper and knowledge of the instructions for each design. Once you’ve mastered them all, your friends will be impressed with your creations!
Step 1: Gather Materials
Making paper aircraft is an enjoyable and creative activity that can be done at home with a few basic materials. This article will teach you how to make paper jets, origami planes, boomerangs, and super aircraft in no time. Step one in this process is gathering the necessary materials for your project.
You’ll need several sheets of 8 1/2″ x 11″ printer paper or colored construction paper, scissors, and tape or glue–all of which can be found around your house or at any craft store. Additionally, depending on the type of aircraft you’re making, you may need markers to color it or decorations such as glitter and stickers to add a bit of sparkle and shine. Once these supplies are gathered together, you’ll be ready to begin crafting your very own unique aircraft!
Step 2: Create Boomerang Plane
Creating a boomerang paper plane is one of the most rewarding steps in making paper aircraft. While it requires some skill and patience to master, the end result of having a plane that circles around and returns to its starting point is worth all the effort.
The process starts with folding two pieces of rectangular A4 paper along the lengthwise crease. The outer corners each need to be folded twice towards the middle, creating four sharp points at the center. After this, flip the paper over and do exactly the same on another side as well. Fold both pieces of paper together like a book and make sure they are aligned properly with edges parallel to each other. Now fold them in half again so that all four points meet in one corner – this will create an ‘X’ shape at the center.
Step 3: Fold Paper Jet
Making a paper jet is an entertaining and creative activity for both children and adults. It doesn’t require any special tools, just regular paper. To make this paper jet, you will need to fold the paper in several steps—the third step is folding your paper into a jet shape. To begin the folding process, start by laying the sheet of paper down on a flat surface with one end slightly higher than the other. Then, take the top corner of one side and fold it down so that it meets with the other edge of the sheet. This should create a triangle shape with two equal sides. Next, fold each of those sides up again to create two more triangles that meet at their tips in the center of your paper sheet. Finally, pull back these tips to create wings on either side of your plane!
Step 4: Construct Super Aircraft
Paper aircraft are an easy and fun way to have a good time with friends and family. Step 4 of the process, constructing super aircraft, is where the real magic happens! With just a few tools, some paper, and a bit of creativity, you can make your own super aircraft that will fly further than any other paper plane.
This step involves folding your paper in specific ways to create wings and stabilizers for your plane. Additionally, you should add weights such as coins or paper clips to provide stability in flight. The type of fold used will affect how the plane flies; so experiment with different folds until you find one that works best for your needs! Be sure to test out multiple iterations before putting your super craft into action – the sky’s (literally!) the limit when it comes to creating something extraordinary!
Step 5: Launch Paper Plane
Making a paper aircraft is an exciting and fun way to explore aerodynamics, engineering, and physics. If you’ve followed the directions from steps 1 through 4, you’re now ready for Step 5: Launch your Paper Plane! Launching it correctly is key to having a successful flight and an enjoyable experience.
Before launch, make sure your plane is in an open space that has enough room for the paper plane to fly without being hindered by obstacles or other people. Stand at least five feet away from where you want the plane to lift off before launching it with a gentle toss of your hand. To get the most speed and distance out of your aircraft, try tossing it while making a slight spin with your fingers as you release it into the air. With practice, you can perfect this technique for maximum performance out of each launch!
2. How To Make An Origami Big Cat Fish | Creating Paper Fish, Paper Art, and Craft | Paper Crafts Fish
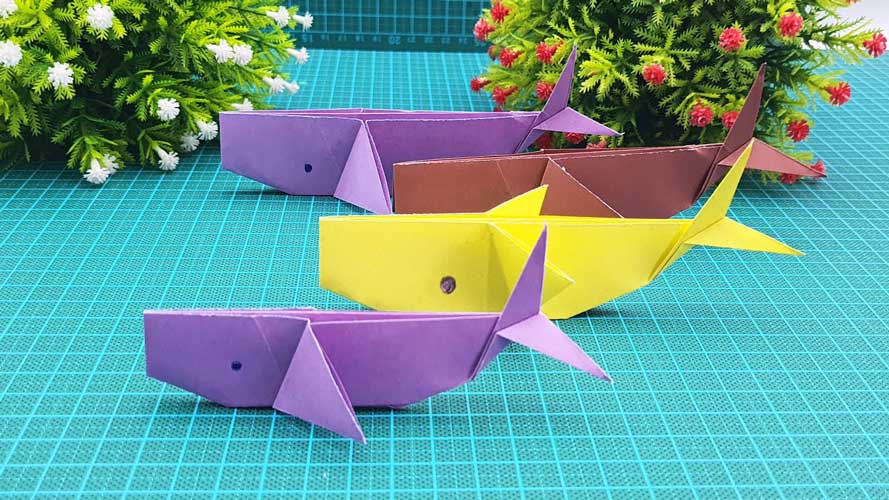
Paper Crafts Fish
Papercraft fish can be a fun and creative way to express yourself. Whether you’re a beginner or an experienced crafter, there are many ways to make paper fish that will bring out the artist in you. Origami is one of the most popular crafts when it comes to making paper fish, and with this article, we’ll show you how to make an origami big catfish. This project uses just a few simple materials and supplies and can be completed in as little as 30 minutes! All you need is some colorful origami paper, scissors, glue, and your imagination. Once finished, display your creation proudly for all to admire! With this guide on how to make an origami big catfish, you’ll be able to create beautiful works of art that can be used for decorations or gifts.
Materials: Paper, Glue, Scissors
Crafting is an enjoyable activity for many, and with the right materials, even a novice can make something beautiful. In this article, readers will learn how to create an origami big catfish using nothing more than paper, glue, and scissors. This simple project requires just basic cutting and folding techniques along with a little bit of creativity. Step-by-step instructions will help guide readers through the process of transforming ordinary office supplies into a fun paper craft they’ll be proud to show off. The end result is sure to delight family and friends! So grab your supplies and get crafting – we’ve got everything you need here to make an eye-catching origami big catfish!
Step 1: Prepare Paper
Making an origami big catfish is a fun and easy craft project that can be completed quickly. The first step in the process is preparing the paper for folding. To make an origami big catfish, you’ll need two sheets of origami paper, or two square pieces of paper cut in half diagonally to form two triangles. For a more intricate design, use heavier-weight paper such as card stock. Choose contrasting colors so that the finished product stands out and looks vibrant. For example, use one sheet of yellow with one sheet of orange. Be sure to avoid using glossy or laminated paper as these textures do not fold easily. When it comes to making an origami big catfish, having the right type and color of paper is essential for success!
Step 2: Fold & Cut Fish Body
Origami big catfish are a fun and creative way to make beautiful paper art. Step two of this craft involves folding and cutting the body of the fish. To begin, take your piece of colored paper and fold it in half vertically. Then, open it back up and fold both sides inwards towards the center line, creating a triangle shape at the top. Next, mark out the fins, tail, and head with a pencil on either side of the paper before you cut them out carefully with scissors. When all sections have been cut out, unfold your paper so that you can see your fish’s body taking shape! With just a few simple steps you will be well on your way to completing your origami big catfish craft.
Step 3: Add Color & Details
The third step in making an origami big catfish is to add color and details. To make this paper craft extra eye-catching, try using different colored papers for each part of the fish. For example, use blue for the body, orange for the fins, and yellow for the tail. This will create a fun and vibrant finished product! Additionally, adding details like eyes, scales, or polka dots can give your fish even more character. You can draw these on with markers or cut them out of thin paper. Even small touches will go a long way in creating an adorable creation that resembles a real fish! With colorful papers and detailed embellishments, your origami big catfish is sure to be something you can be proud of!
Step 4: Assemble the Fish
Creating an origami big catfish is a fun and creative way to make a beautiful paper craft. Step 4 in making this project involves assembling the individual pieces of paper into the fish.
To begin, take two of the triangular-shaped pieces that were made in step 3 and attach them at their short ends with glue or clear adhesive tape to form a square shape. Be careful not to crease the paper while attaching it together. Next, take one of the diamond-shaped pieces from step 3 and attach it under one side of your square shape so that it looks like an open mouth. Attach each corner to the triangle base on each side with glue or clear adhesive tape. Finally, attach all four legs created in step 3 onto each corner of your square body. Your origami big catfish is now complete and ready to be enjoyed!
Step 5: Create Finishing Touches
Creating an origami big catfish can be a fun and rewarding project for papercraft enthusiasts of all ages. Step 5 is the final step in the process and involves creating the finishing touches that will give your paper fish its signature look.
This step requires you to use scissors, glue, and colored markers or paints to customize your origami catfish. Start by carefully snipping off small pieces from the edges of your paper fish to form fins, whiskers, and eyes. Glue these onto the body of your origami catfish for added dimension, then use markers or paint to bring them to life with color and patterns. You can also add embellishments such as googly eyes or glitter to further customize your creation. With a few extra steps, you have now completed your very own origami big catfish!
3. Simple Paper Wall Decorations Ideas | Paper Wall Decorations Making With Leaf | Wallmate Home Decor
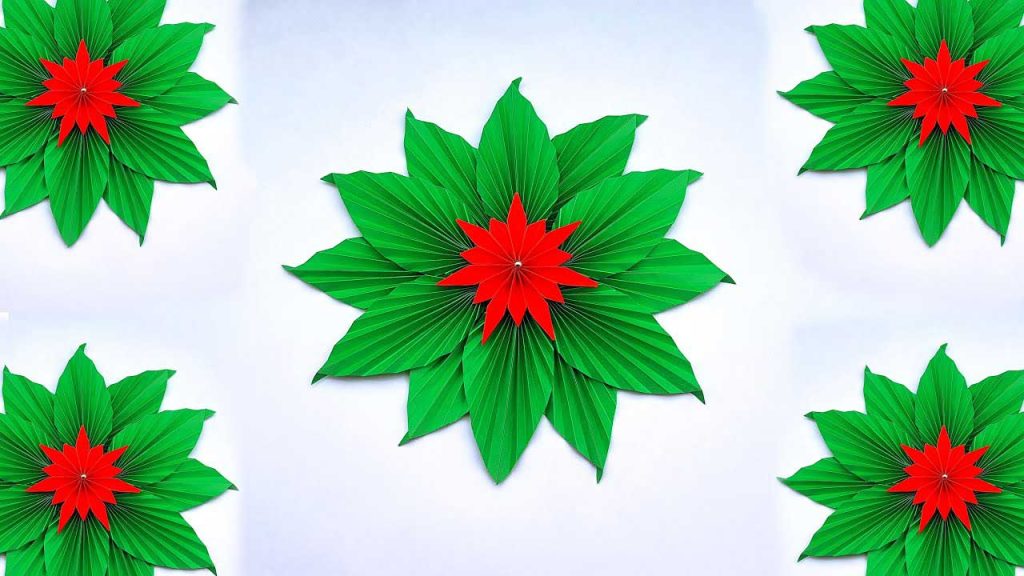
Paper Wall Decorations
Paper wall decorations are an easy way to spruce up any room in your home. Whether you’re looking for something simple and understated or bold and vibrant, there are plenty of creative ideas out there that require little effort but will have a big impact on your space. With just some paper, scissors, glue, and maybe a few other materials like paint or markers, you can create beautiful works of art to hang on your walls.
One simple idea is to take leaves from the garden or park and use them as stencils for unique wall decoration. Trace the outline of the leaves onto construction paper then cut them out with scissors. Arrange these leafy shapes into different patterns on your chosen wall then secure them with craft glue or double-sided tape.
Idea 1: Making With Leaf
Making with leaf is an easy and creative method for adding paper wall decorations to any room of your home. Leafing, or applying a thin layer of metal foil to materials, can be used to create intricate designs on paper for added texture and dimension. For example, you can use gold leaf to make a border around a piece of art or add glimmering accents around the edge of a photo frame. With the right supplies and some patience, leafing can be used to create unique pieces of wall art that will look beautiful in your home.
To get started making with leaf, you’ll need gold or silver foil sheets, adhesive size (or glue), and brushes for application. Begin by cutting out shapes from the foil sheet using scissors or a craft knife.
Idea 2: Wallmate Home Decor
Walmart Home Decor is a unique way to add a personal touch of style to any room. It offers an easy and affordable solution for decorating any wall in the home or office. This innovative product is made from high-quality paper that has been printed with bright and vibrant designs, giving it a unique look and feel. Whether you choose to create your own design or purchase one of the many pre-printed options, Wallmate Home Decor provides an array of options for customizing your walls. With its simple installation process, you can easily transform any space into something extraordinary.
The paper wall decorations created with Wallmate Home Decor are designed to be durable and long-lasting while still looking great with minimal maintenance required.
Materials Needed
Creating paper wall decorations is a simple yet rewarding project that can be used to spruce up any home. Whether it’s a welcoming sign for the front door, or decorative shapes to hang from the ceiling, paper wall decorations are easy and fun to make with materials like leaves, tissue paper, and Wallmate Home Decor adhesive. To get started on this crafty project, you’ll need some basic items such as scissors, glue sticks, paintbrushes, and of course some colorful paper.
For those looking for an extra special touch of nature in their creations try adding leaves into the mix! Gather your favorite colored leaves from outside and start cutting out shapes that fit into your design. Leaves can be used to create intricate patterns or simply as accents throughout your decoration.
Step-by-Step Guide
The process of making simple and beautiful paper wall decorations can be intimidating – but it doesn’t have to be! Follow this step-by-step guide to create elegant paper wall decorations with Leaf Wallmate Home Decor. This guide will help you create art pieces that are sure to impress guests in your home.
First, select the type of paper you’d like for your artwork. Choose from plain white paper, colored card stock, or patterned scrapbooking papers. Once you’ve decided on a material, decide how much coverage you’d like and measure the area where your decoration will go. Cut the paper into whatever shape you would like – a square, rectangle, or any other shape is fine! Now it’s time to embellish your piece with Leaf Wallmate Home Decor products such as stickers and washi tape for more color and texture if desired.
Creative Ideas:
Simple paper wall decorations can be a great way to add pizzazz and personality to any room. With just a few basic supplies, you can create beautiful paper wall decorations that will transform your walls into one-of-a-kind works of art. Making paper wall decorations with leaves is a fun and easy craft project that anyone can do. Walmart home decor offers some great ideas of simple paper wall decorations that are perfect for adding life and color to any room in your home.
Making paper wall decorations with leaves is a fun way to get creative and experiment with different designs. Whether you’re creating abstract shapes or intricate patterns, the possibilities are endless when it comes to crafting these unique pieces of art.
4. Cool Origami Shark | How To Make Paper Shark Puppet Toy | Origami Baby Shark Puppet | Nursery Craft

Paper Shark Craft
Paper shark crafts are perfect for children and adults alike who want to explore the world of origami. Origami is a great way to express creativity and make fun, interesting objects out of everyday materials. With just some paper and glue, you can make an adorable baby shark puppet toy that’s perfect for your nursery or playroom! This cool origami project only requires basic folding skills to make the body of the paper shark. Then use simple paint or markers to give it a unique look. You can also use soft felt material or fabric scraps for eyes, fins, and other details on the puppet. Once it’s complete you’ll have an amazing paper shark craft that will be sure to delight everyone in your family!
Materials: Paper, Glue, Scissors
Are you looking for a fun and creative way to keep your kids entertained? Origami baby shark puppets are easy to make and perfect for any nursery craft. All you need is paper, glue, scissors, and a bit of imagination!
This origami project is simple enough that even young children can join in the fun. Start by taking the paper or cardstock of your choice and folding it into three sections. Cut out the shape of a baby shark with the scissors, making sure to leave some extra space around the edges for gluing. Finally, attach two small pieces of paper on either side as fins before securing all parts together with glue. Your origami baby shark puppet toy is now ready to be personalized with colorful markers or paint!
Steps: Fold, Cut, Glue
Making a cool origami shark paper puppet toy is an easy and fun craft activity for kids. This adorable baby shark puppet is the perfect nursery decoration to add some character to any room. Follow these simple steps to make your own origami shark puppet: fold, cut, and glue!
To start folding, you’ll need two pieces of square-shaped paper. To create a symmetrical shape, it’s best to use one colored side and one white side. Start by folding the corners so that they meet in the center of the sheet. Next, fold each corner into its opposite corner creating a triangle shape with four flaps at the bottom. Finally, draw eyes on the top flap using markers or crayons before cutting along each line from top to bottom.
Tips & Tricks: Smooth Folds
Origami, the beloved art of paper folding, has been around for centuries. Although it may seem complex with all of its intricate folds and shapes, origami can be simple for beginners and experts alike. This article provides some tips & tricks on how to make smooth origami folds that will help you create any origami shape from a baby shark puppet to a cool origami shark. With these helpful pointers, your paper-folding masterpieces will come together in no time.
Whether you’re making an origami animal or something else entirely, one key factor in the success of your project is having neat and even folds. To make sure this happens every time, use a ruler or straight edge when creating your creases – this ensures that each line is nice and crisp.
Variations: Body Parts, Colors
This article provides a fun and creative way to teach children about the various body parts, colors, and challenges that come with making an origami shark puppet toy. Whether it be a baby shark or a full-sized version, this craft is sure to give kids hours of entertainment while also teaching them important lessons in origami. Parents can use this project as an opportunity to help their children learn more about shapes, sizes, and colors while creating something they can proudly show off.
The origami shark puppet toy starts with simple steps such as folding paper into basic shapes like triangles or squares. Then the pieces are combined together using glue or tape to create the body of the shark. Kids will have fun exploring different color combinations and unique designs for their creations; some may opt for a classic grey color scheme while others might get creative with blues and purples!
Video Tutorial: Step by Step
Origami is a fun paper craft that can be used to create amazing sculptures and designs. With the right instructions, anyone can create beautiful creations in no time. This video tutorial will show you how to make an origami baby shark puppet, perfect for a nursery craft or as a plaything for young children.
This step-by-step guide will allow viewers to easily follow along with the tutorial, guaranteeing success every time. All that’s required are some colored sheets of paper, scissors, and glue – making this project budget friendly and achievable by anyone! Our simple video instructions will explain what type of paper should be used and how it needs to be folded so that you end up with an impressive-looking origami shark puppet at the end!
Final Thoughts
In conclusion, paper crafts are a great way to express your creativity while also making unique and beautiful artwork. All it takes is some paper, glue, scissors, and your imagination to make something amazing! Paper crafting can be done by anyone of any age or skill level, so don’t be afraid to give it a try. With the right tools and techniques, you will soon create something that you can be proud of. So grab some supplies and get creative today!


