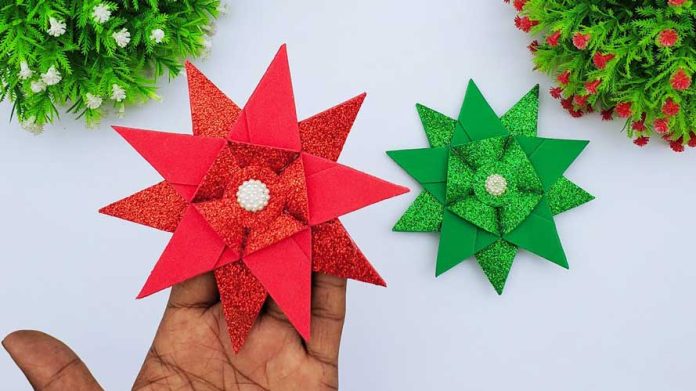
The holiday season brings joy, warmth, and a festive spirit, and what better way to spread that cheer than by crafting your own Christmas decorations? In this step-by-step guide, we will show you how to create a stunning Christmas star using Eva glitter foam sheets. This craft project is not only fun and easy to make, but it will also add a touch of sparkle to your holiday decor. So, let’s get started and create a magical Christmas star that will shine brightly during the holiday season!
Materials Needed:
Before we begin, gather all the necessary materials to make the Christmas star:
- Eva glitter foam sheets in the color of your choice (gold, silver, or any other festive hue).
- Scissors
- Ruler
- Pencil
- Glue gun or craft glue
- Twine or ribbon for hanging
- Optional: Craft embellishments (sequins, rhinestones, etc.)
Step 1: Plan your Star Design
The first step in creating your Christmas star is to plan the design. Decide on the size of the star you want to make and sketch it out on a piece of paper. For simplicity, you can go with a traditional five-pointed star shape. Once you are satisfied with your design, move on to the next step.
Step 2: Trace the Star Template
Using the sketch you made as a guide, trace the star template onto the Eva glitter foam sheet with a pencil. Make sure to trace two identical star shapes.
Step 3: Cut Out the Star Shapes
Carefully cut out the star shapes using scissors. Take your time to ensure clean edges and precise cuts, as this will contribute to the overall look of the finished Christmas star.
Step 4: Add Embellishments (Optional)
If you want to add some extra sparkle and flair to your Christmas star, now is the perfect time to do so. You can glue on sequins, rhinestones, or other craft embellishments to decorate the front side of one of the star cutouts. Get creative and let your imagination run wild!
Step 5: Glue the Two Star Cutouts Together
Take the star cutout without any embellishments and apply glue evenly on its surface. Place the embellished star cutout on top of the glued surface, aligning the edges carefully. Press them together firmly to create a sturdy bond.
Step 6: Create a Hanging Loop
To hang your Christmas star, cut a piece of twine or ribbon of the desired length. Form a loop and glue the ends to the backside of the top point of the star.
Step 7: Allow the Glue to Dry
Give your Christmas star some time to dry completely. This will ensure that all the components are securely attached and the star is ready to be displayed.
Step 8: Hang and Admire!
Once the glue is dry, your Eva glitter foam sheet Christmas star is ready to be showcased. Find a prominent place in your home or on your Christmas tree to hang this dazzling decoration. The sparkle from the glitter foam will catch the light and add a magical touch to your holiday decor.
Conclusion:
Congratulations! You’ve successfully crafted a beautiful Christmas star using Eva glitter foam sheets. This DIY project allows you to infuse your own personal style and creativity into your holiday decorations. Whether you hang it on your Christmas tree or display it on a mantelpiece, this sparkly star is sure to captivate your guests and spread the holiday spirit.
Get your friends and family involved in this craft and create a whole constellation of glittery stars to brighten up your holiday season. Embrace the joy of crafting and the magic of Christmas as you embark on this creative journey. Happy holidays and may your home be filled with love, warmth, and the twinkle of your handmade Christmas stars!


