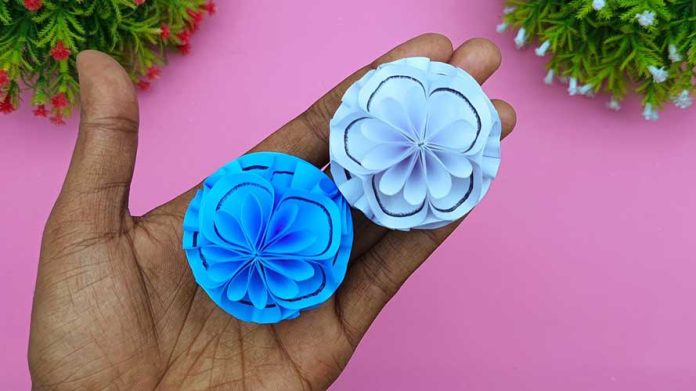
Elevate your home decor or special event with a touch of elegance and charm by creating your own paper flower ball. This beautiful and versatile craft is perfect for weddings, parties, or simply adding a burst of color to any room. In this step-by-step guide, we’ll show you how to craft a stunning paper flower ball that will impress your guests and delight your senses.
Materials Needed:
- Colored or patterned paper
- Scissors
- Craft glue or hot glue gun
- Floral wire or pipe cleaners
- Styrofoam ball (size of your choice)
- Optional: Ribbon or string for hanging
Step 1: Gather Your Materials Collect all the materials needed for this project. Choose a variety of colored or patterned paper to create an eye-catching display of flowers. Ensure you have a comfortable workspace with plenty of room to spread out your materials.
Step 2: Cut Out Flower Shapes Using scissors, cut out flower shapes from the colored or patterned paper. You can use flower templates or freehand cut various petal shapes such as circles, ovals, or hearts. Experiment with different sizes and colors to create a visually appealing assortment of flowers.
Step 3: Fold and Shape Petals Once you’ve cut out the flower shapes, fold and shape the petals to give them dimension. Gently curl the edges of each petal using your fingers or a pencil to create a more realistic and lifelike appearance.
Step 4: Attach Flowers to Floral Wire Take a piece of floral wire or pipe cleaner and apply a small amount of craft glue to one end. Place the glued end in the center of a paper flower and press firmly to secure it. Repeat this step for each flower, ensuring they are evenly spaced along the wire.
Step 5: Prepare the Styrofoam Ball Take the Styrofoam ball and decide where you want to attach the paper flowers. You can cover the entire surface of the ball or leave some areas bare for a more eclectic look. If you plan to hang the flower ball, attach a ribbon or string to the top of the Styrofoam ball for easy hanging.
Step 6: Insert Flowers into the Ball Carefully insert the floral wire stems of the paper flowers into the Styrofoam ball, ensuring they are securely in place. Arrange the flowers in a balanced and aesthetically pleasing pattern, filling in any gaps as needed.
Step 7: Fill in Gaps and Add Details Once all the flowers are attached, take a moment to fill in any gaps with additional paper flowers or foliage. You can also add extra embellishments such as glitter, beads, or sequins to enhance the overall look of the flower ball.
Step 8: Display Your Creation Once you’re satisfied with the arrangement, find the perfect spot to display your paper flower ball. Whether it’s hanging from the ceiling, adorning a centerpiece, or brightening up a mantel, your handmade creation is sure to be a showstopper.
Conclusion: You’ve successfully crafted a stunning paper flower ball that adds a touch of beauty and elegance to any space. Whether you’re hosting a special event or simply sprucing up your home decor, this DIY project is a delightful way to express your creativity and showcase your love for handmade crafts. Enjoy the process of creating and displaying your one-of-a-kind masterpiece!


