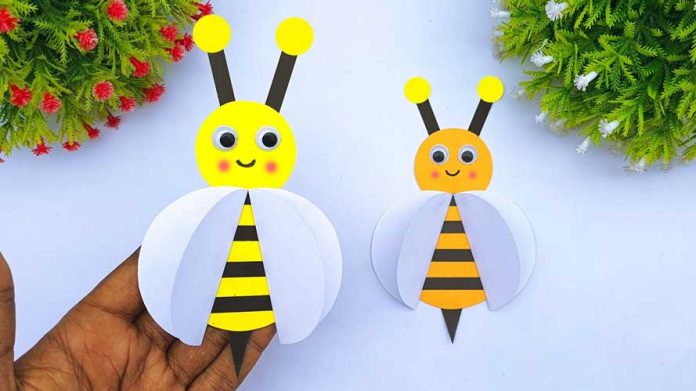
Are you looking for a fun and creative craft activity that both kids and adults can enjoy? Making a paper toy bee is the perfect choice! This delightful DIY project allows you to create a cute and buzzing bee using simple materials that you probably already have at home. In this step-by-step guide, we’ll walk you through the process of crafting your very own paper toy bee. So, let’s dive in and bring this adorable bee to life!
Materials Needed:
Before we begin, gather these materials to ensure a smooth crafting process:
- Yellow construction paper or cardstock
- Black and white construction paper or cardstock
- Googly eyes (optional but adds a fun touch)
- Scissors
- Glue stick or craft glue
- Pencil
- Black marker
- Ruler
Step 1: Prepare the Bee’s Body
Start by cutting a rectangle from the yellow construction paper. The size of the rectangle will determine the bee’s body length, so choose a size that fits your preference. For example, a rectangle measuring 6 inches by 4 inches works well.
Step 2: Fold the Body
With the yellow rectangle in front of you, fold it in half lengthwise. This fold will create a crease in the center of the bee’s body.
Step 3: Create the Wings
Using black construction paper, cut two identical wing shapes. These can be oval or tear-drop-shaped, depending on your preference. Make sure they are proportionate to the size of the bee’s body.
Step 4: Attach the Wings
Glue each wing on either side of the folded yellow rectangle, aligning them with the crease in the middle. The wings should be visible when the bee is standing upright.
Step 5: Craft the Bee’s Face
From the black construction paper, cut a small circle for the bee’s head. Glue this circle onto the top of the folded yellow rectangle, just above the wings. Now, stick the googly eyes on the head to add a charming touch.
Step 6: Make the Antennae
Cut two thin strips from the black construction paper. These will serve as the bee’s antennae. Glue them on the top of the bee’s head.
Step 7: Add Details
Using the black marker, draw a smile and two small stripes on the bee’s body to give it a friendly and bee-like appearance.
Step 8: Create the Stinger
From the black construction paper, cut a small triangle for the bee’s stinger. Glue it to the bottom of the folded yellow rectangle, just below the wings.
Step 9: Final Touches
Take the white construction paper and cut out two small oval shapes. Glue these ovals onto the bee’s wings to give them a distinctive pattern.
Step 10: Let it Dry and Play!
Allow the glue to dry completely before playing with your paper toy bee. Once dry, gently open and close the folded body to make the bee “fly” its wings. Watch your cute paper toy bee come to life!
Conclusion:
Congratulations on making your very own paper toy bee! This step-by-step guide has shown you just how simple and enjoyable crafting can be. This delightful DIY project is perfect for children’s activities, classroom crafts, or even as a party favor. Get creative with colors and patterns to make each bee unique. So, gather your materials and let your imagination soar as you create a swarm of buzzing paper toy bees! Happy crafting!


