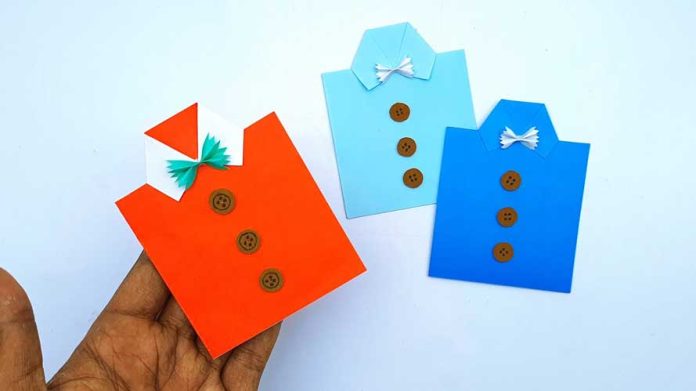
DIY Special Message Card: A Step-by-Step Guide
Creating a special message card by hand adds a personal touch that store-bought cards can’t match. Whether it’s for a birthday, anniversary, or just because, a DIY Special Message Card is a heartfelt way to convey your feelings. In this step-by-step guide, we’ll show you how to make a beautiful and unique message card that will be cherished by the recipient.
Materials Needed:
- Cardstock in various colors
- Patterned paper
- Scissors
- Ruler
- Pencil
- Glue or double-sided tape
- Markers or pens
- Stickers, stamps, or other embellishments
- Ribbon or twine (optional)
- Photos or small keepsakes (optional)
Step 1: Gather Your Materials
Before you start, gather all the necessary materials. Choose cardstock and patterned paper in colors and designs that fit the occasion and your personal style.
Step 2: Create the Card Base
- Cut the Cardstock:
- Cut a piece of cardstock to measure 8.5 inches by 5.5 inches.
- Fold the Cardstock:
- Fold it in half to create a 4.25×5.5 inch card base.
Step 3: Design the Front of the Card
- Add Patterned Paper:
- Cut a piece of patterned paper slightly smaller than the front of the card base (about 4 inches by 5.25 inches) and glue it to the front of the card.
- Add a Central Element:
- Cut a shape (circle, square, heart, etc.) from a contrasting piece of cardstock and glue it to the center of the front of the card. This will be the focal point of your design.
Step 4: Write Your Special Message
- Message on the Front:
- Use markers or pens to write a short message on the front, such as “Happy Birthday,” “Congratulations,” or “Thank You.”
- Personalize:
- Decorate around the message with stickers, stamps, or hand-drawn elements that suit the theme.
Step 5: Add Embellishments
- Borders and Corners:
- Add decorative borders or corner stickers to frame the front design.
- 3D Elements:
- Use foam tape to attach 3D embellishments like flowers, stars, or butterflies for added dimension.
- Ribbon or Twine:
- Wrap a piece of ribbon or twine around the front of the card and tie it in a bow or knot for an elegant touch.
Step 6: Design the Inside of the Card
- Write a Heartfelt Message:
- Open the card and write a personal, heartfelt message inside. Share specific memories, reasons you appreciate the recipient, and kind words.
- Add More Decor:
- Decorate the inside with more stickers, stamps, or small drawings. You can also add a small photo or keepsake item.
Step 7: Create an Envelope (Optional)
If you don’t have an envelope, you can make one from a piece of cardstock or patterned paper:
- Measure and Cut:
- Cut a piece of cardstock or patterned paper to 10 inches by 10 inches.
- Fold the Envelope:
- Place the paper with the patterned side down.
- Fold the paper diagonally to create a triangle, then unfold it to reveal a crease.
- Fold the two opposite corners to the center crease, overlapping slightly to form the sides of the envelope.
- Fold up the bottom corner to overlap the sides and create the bottom flap.
- Fold down the top corner to create the top flap.
- Glue the Sides:
- Apply glue or double-sided tape along the edges of the bottom flap.
- Press the bottom flap to the sides to secure it, forming a pocket.
- Insert the Card:
- Once the glue is dry, insert your DIY Special Message Card into the envelope.
- Fold down the top flap and secure it with a sticker, washi tape, or a small piece of double-sided tape.
Step 8: Add Final Touches
- Check the Card:
- Ensure all elements are securely attached and the card looks complete.
- Presentation:
- Consider adding a small gift tag or label to the envelope with the recipient’s name.
Conclusion
Making a DIY Special Message Card is a wonderful way to show someone you care. This personalized card, filled with thoughtful details and heartfelt messages, will be treasured by the recipient. By following this step-by-step guide, you can create a unique and memorable card for any occasion.


