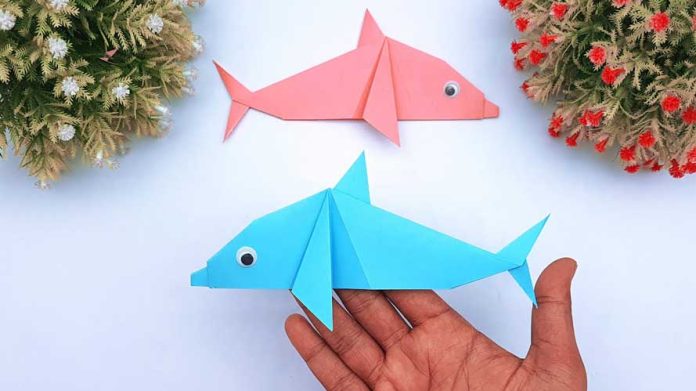
Origami, the art of paper folding, has captivated people for centuries with its elegance and creativity. Among the many fascinating origami designs, the origami dolphin stands out as a beloved symbol of grace and playfulness. In this step-by-step guide, we will walk you through the process of folding your very own origami dolphin. Whether you’re a beginner or an experienced folder, this guide will help you create a beautiful piece of art.
Materials Needed:
Before we dive into the instructions, let’s gather the materials you’ll need to fold your origami dolphin:
- Square sheet of origami paper (color of your choice)
- Clear and well-lit workspace
- Patience and enthusiasm!
Step 1: Preparing the Paper Start by selecting a square sheet of origami paper. If you don’t have origami paper, you can cut a square from any lightweight paper. Ensure that the paper is clean, crisp, and free from any creases or tears. Place it in front of you, ready for the first fold.
Step 2: Folding the Initial Crease Fold the paper diagonally in half, bringing one corner to meet the opposite corner. Carefully align the edges and corners, ensuring a precise fold. Smooth out any wrinkles or air pockets, as a clean starting point will make subsequent steps easier.
Step 3: Creating a Triangle With the paper still folded in half, rotate it so that the open ends are facing away from you. Fold the paper in half again, bringing the left corner to meet the right corner. This will form a smaller triangle.
Step 4: Unfolding the Triangle Unfold the triangle you created in the previous step, carefully returning it to its original square shape. Take a moment to appreciate the creases formed during the previous folds as they will guide your next steps.
Step 5: Forming the Dolphin’s Head Position the paper with one of the corners facing upwards. Fold the top layer of the paper downwards, bringing the upper point to meet the bottom point. This fold will create a smaller triangle, representing the dolphin’s head.
Step 6: Shaping the Body Fold the left and right corners of the paper towards the center, aligning them with the bottom point of the triangle you created in the previous step. This will form the dolphin’s body. Take a moment to refine the shape and ensure that the folds are crisp and symmetrical.
Step 7: Crafting the Fin Fold the bottom point of the triangle upwards, aligning it with the top edge of the dolphin’s body. This fold will create a fin, adding dimension and character to your origami dolphin.
Step 8: Bringing the Dolphin to Life Gently pulls apart the layers of the dolphin’s body to create volume and give it a three-dimensional appearance. Adjust the angles of the fins and tail to your liking, adding a personal touch to your creation. Take a step back and admire your origami dolphin!
Conclusion: Congratulations! You have successfully folded an origami dolphin from a simple square sheet of paper. This step-by-step guide has taken you through each fold, allowing you to create a beautiful and artistic representation of this majestic sea creature. Remember, practice makes perfect, so don’t hesitate to try folding multiple dolphins and experimenting with different paper colors and sizes. Let your creativity flow and enjoy the meditative process of origami. Happy folding!


