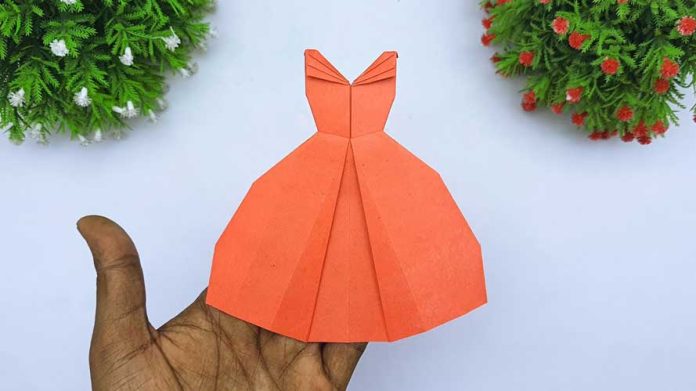
Are you ready to explore your creative side and make a unique and eye-catching paper dress? In this step-by-step guide, we will walk you through the process of creating a beautiful paper female dress that can be used for various artistic purposes, such as fashion design sketches, photo shoots, or even as a centerpiece for a special event. With a few simple materials and a dash of creativity, you’ll be amazed at what you can create. Let’s get started!
Materials Needed:
- Colored or patterned paper: Choose a variety of colors and patterns to add depth and visual interest to your dress.
- Scissors: A pair of sharp scissors will be essential for cutting the paper with precision.
- Glue stick or double-sided tape: Opt for a glue stick or double-sided tape to secure the different parts of the dress together.
- Pencil and eraser: These basic drawing tools will help you sketch and outline your dress design before cutting the paper.
- Decorative elements (optional): You can enhance your paper dress with additional decorative elements like glitter, beads, or ribbons to add a touch of glamour.
Step 1: Design Your Dress
- Start by sketching your dress design on a plain piece of paper. Consider the style, length, neckline, and any additional details you want to incorporate.
- Once you’re satisfied with your design, use a pencil to lightly trace the outline of each dress component onto the colored or patterned paper.
Step 2: Cut Out the Dress Components
- Carefully cut along the traced lines of each dress component using the scissors. Take your time to ensure clean and precise cuts.
- Separate the components (e.g., bodice, skirt, sleeves) and set them aside.
Step 3: Assemble the Dress
- Lay out the dress components in front of you, ensuring you have all the necessary pieces.
- Begin by attaching the bodice to the skirt. Apply a thin layer of glue or double-sided tape along the edges of the bodice and carefully align it with the top part of the skirt.
- Secure the bodice and skirt together by pressing firmly along the glued edges. Allow the adhesive to dry completely.
Step 4: Add the Sleeves (if applicable)
- If your design includes sleeves, determine their placement and attach them to the dress using glue or double-sided tape.
- Take your time to ensure the sleeves are securely attached and aligned symmetrically.
Step 5: Finishing Touches
- Now that the basic structure of the dress is complete, you can add any desired decorative elements. Apply glue or double-sided tape to the desired areas and carefully attach the embellishments.
- Let your creativity shine by experimenting with different textures, colors, and patterns to make your paper dress truly unique.
Step 6: Display and Enjoy
- Once your paper female dress is fully assembled and decorated, gently fold the back of the skirt to create a stand for your dress to rest on.
- Find a suitable spot to display your creation—a bookshelf, table centerpiece, or even a photoshoot backdrop.
- Admire your artistic achievement and share it with others to showcase your creativity and talent.
Conclusion:
Creating a stunning paper female dress allows you to unleash your artistic flair and explore the world of fashion design. With a few basic materials and a step-by-step approach, you can craft a remarkable paper dress that showcases your style and creativity. Remember to experiment with colors, patterns, and decorative elements to make your dress truly one-of-a-kind.
Throughout this step-by-step guide, we’ve walked you through the process of designing, cutting, assembling, and adding finishing touches to your paper dress. The possibilities are endless, and you can adapt the techniques and ideas presented here to suit your unique vision.


