


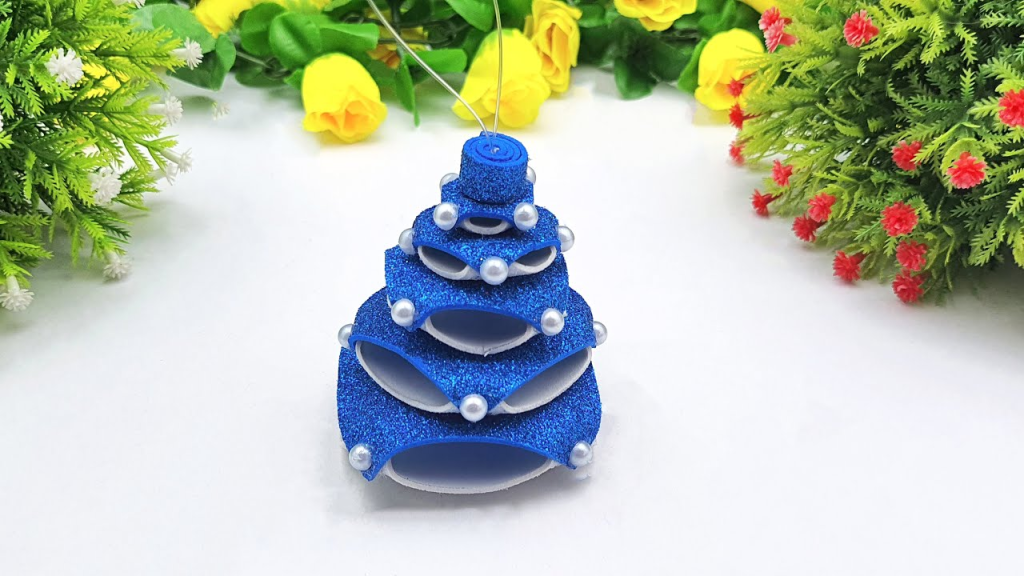
Christmas is approaching and what better way to get into the holiday spirit than by making your own 3D Christmas tree craft? This easy and fun project is perfect for kids and adults alike. All you need is some construction paper, scissors, glue, and a little bit of imagination.
To make your own 3D Christmas tree craft, start by cutting out six circles from green construction paper. Next, cut each circle in half. Now you should have 12 semi-circles. Take two semi-circles and glue them together at the curved edges to form a cone shape. Repeat this step until all of the semi-circles are used up and you have six cones. Now it’s time to start building your tree! Begin by gluing three cones together in a triangle shape.
To make your own 3D Christmas tree craft, start by cutting out six circles from green construction paper. Next, cut each circle in half. Once you have your 12 semicircles, take six of them and fold them in half. These will be the tree’s branches. To give your branches some dimension, curl the halves up slightly. Now take your remaining semicircles and glue them together at the flat end to form a cone. This will be the tree’s trunk. Once the glue has dried, attach the branches to the trunk. Finally, decorate your tree with sequins, glitter, or anything else you like!
3d Christmas Tree Craft Ideas:
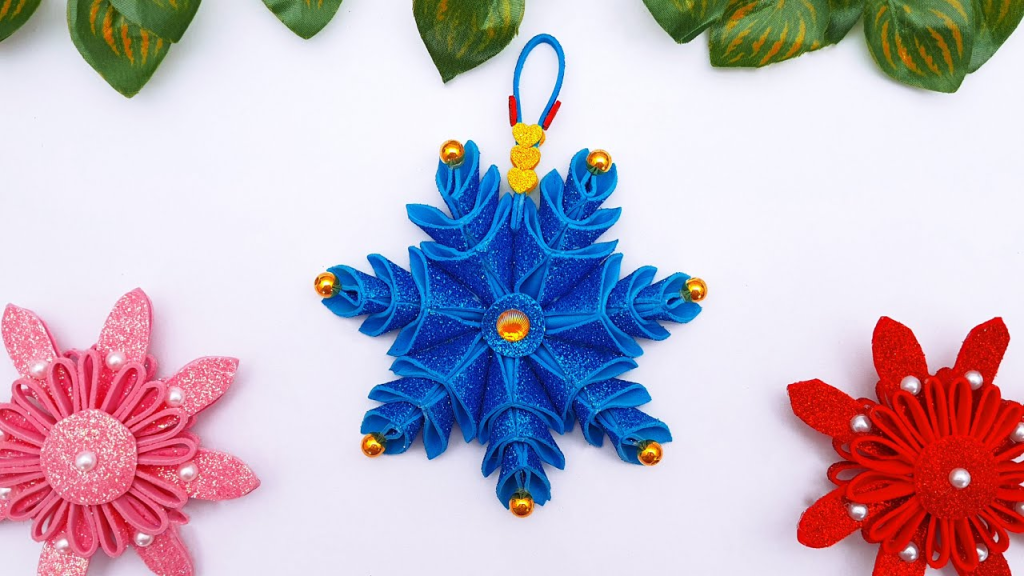
1. Glitter Paper Snowflakes Making Ideas For Christmas Decoration | Eva Foam Sheet Crafts
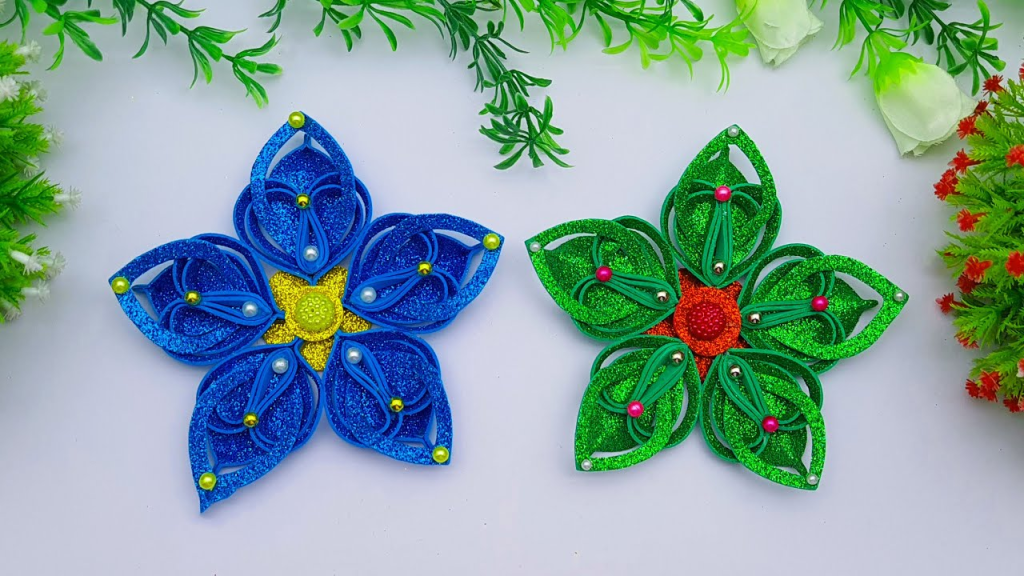
3d christmas tree craft is one of the popular items for decoration during the Christmas season. Many people love to make their own 3d paper snowflakes to add to the beauty of their Christmas trees. Here are some tips on how you can make your own 3d paper snowflakes. To start, you will need some basic materials like glitter paper, scissors, and an Eva foam sheet. You can find these materials at any local craft store.
Once you have gathered your supplies, it’s time to start crafting! Begin by cutting out six equal-sized squares from your glitter paper. Next, fold each square in half diagonally to create a triangle. Now it’s time to start folding your triangles into thirds. To do this, take the bottom corner of each triangle and bring it up to meet the top point.
It’s beginning to look a lot like Christmas! And what better way to get into the holiday spirit than by making your own decorations? This 3D paper christmas tree craft is the perfect project for crafters of all ages. Start by cutting out six equal-sized squares from your glitter paper. Fold each square in half, then in half again. Unfold and crease along the folds to create a template for your tree.
Next, use a pencil or pen to trace around the template onto your construction paper. Cut out the shapes, then glue them together at the fold lines to create a 3D tree. Finally, decorate your tree with sequins, beads, or anything else you like!
2. How to Make Christmas Angel For Decorations | Angel Making Form Glitter Foam Paper
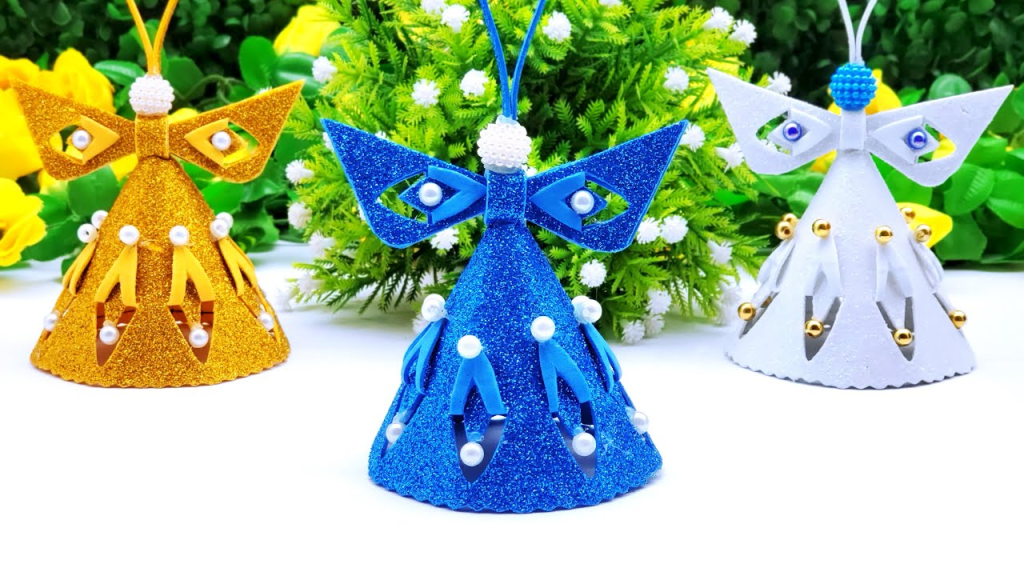
Angels are one of the most popular Christmas decorations. They can be made from many different materials, but glitter foam paper is a good option because it is easy to work with and you can create a 3D effect. Here’s how to make your own Christmas angel:
- Start by cutting out two identical Angel shapes from glitter foam paper.
- Make a small slit in the center of each shape.
- Insert one shape into the other so that the slits line up.
- Use a pencil to draw a face on your angel, then cut out small wings from another piece of glitter foam paper and glue them onto the back.
- To finish, glue a length of ribbon onto the top of your angel’s head so that she can hang on your tree!
Why not try making your own angels out of glitter foam paper? This 3D craft is easy to make and is sure to add some sparkle and personality to your holiday decor. Here’s how you can do it:
- Start by cutting out two angel shapes from the glitter foam paper. Make sure they are identical in size and shape.
- Next, take one of the angel shapes and cut a small slit in the center of the body. This will be where you insert the other angel shape to create the 3D effect.
- To finish, simply glue or tape the two angel shapes together at the slit. You can also add some extra embellishments like sequins, beads, or ribbons to really make your angels stand out.
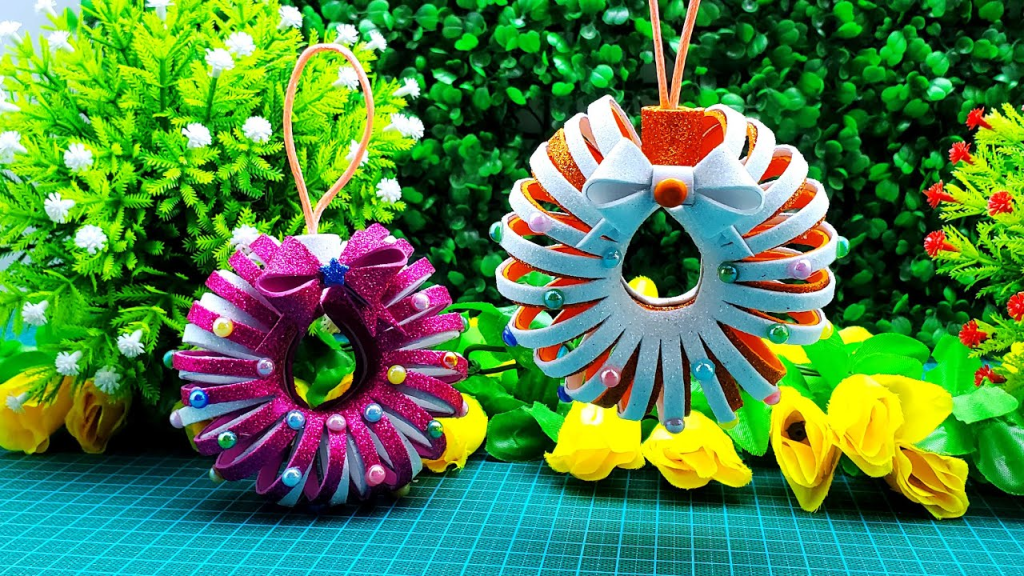
3. Christmas Wreath Using Glitter Foam Sheet – Diy Wall Hanging Glitter Paper Craft
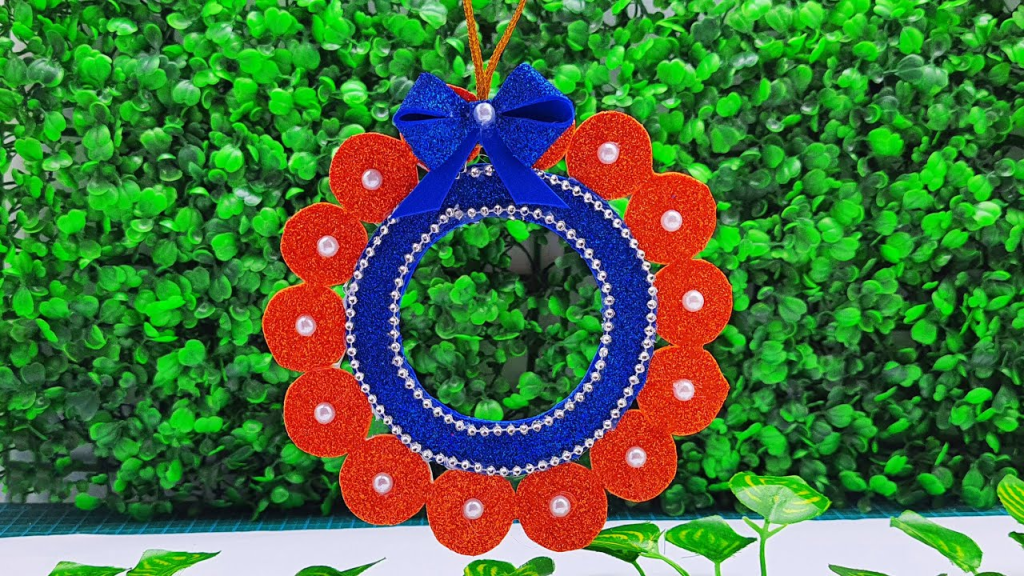
Make your own beautiful and unique Christmas wreath this year with our easy-to-follow tutorial! Using just a few materials like glitter foam sheets, sequins, and ribbons, you can create a one-of-a-kind wreath that will add some holiday cheer to your home. This project is perfect for kids and adults alike, so get creative and have fun!
This year, add a personal touch to your Christmas decor with a homemade wreath! Our step-by-step tutorial makes it easy to create a beautiful and unique wreath that will be the talk of your holiday party. All you need are some glitter foam sheets, scissors, and hot glue. With just a few simple steps, you can make a one-of-a-kind wreath that will impress your guests and add some extra holiday cheer to your home.
This step-by-step tutorial makes it easy to create your own stunning wreath. All you need are some basic craft supplies and a little bit of time. In no time at all, you’ll have a beautiful decoration that will add some holiday cheer to your home.
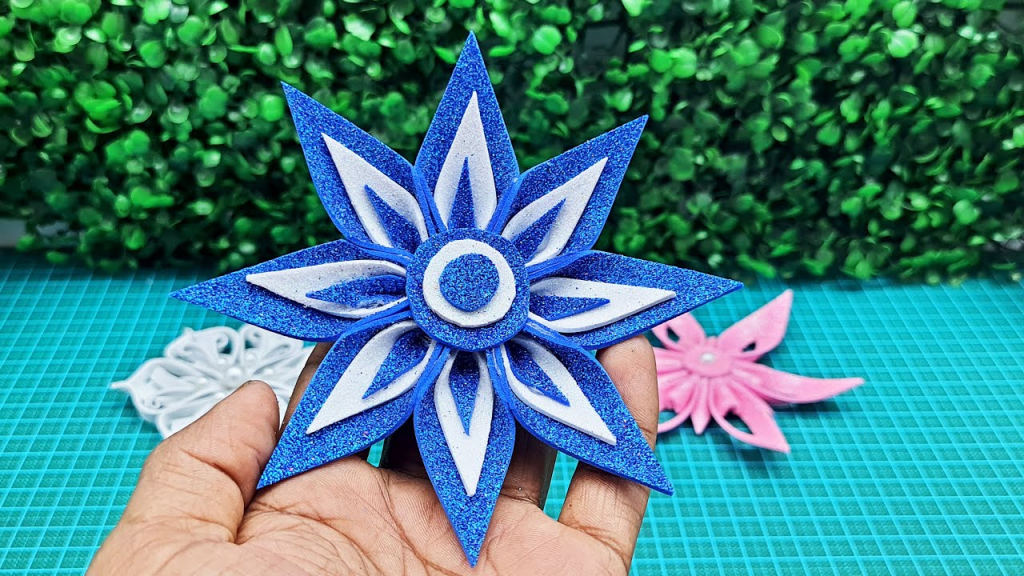
4. Beautiful Glitter Paper Snowflake For Christmas Room Decoration – Diy Ornaments Making Ideas
If you are looking for a unique and beautiful way to decorate your home for the holidays, then look no further than this 3D Christmas tree craft! It is easy to make, and you can use any type of paper or fabric that you like. The best part about this decoration is that it can be used year after year.
To make your own 3D Christmas tree craft, start by cutting out a tree shape from paper or cardstock. Then, cut out smaller triangles from different colors of paper or fabric. Glue the triangles onto the tree shape, starting at the bottom and working your way up. Once the entire tree is covered, add some glitter or sequins for extra sparkle. Hang your finished tree on a wall or in a window for all to see!
To make your own 3D christmas tree, start by cutting out a tree shape from green paper or fabric. Then, cut out smaller triangles from different colors of paper or fabric. Glue the triangles onto the tree shape, starting at the bottom and working up. You can add as many or as few triangles as you like to create a unique design. Display your 3D christmas tree on a mantel, shelf, or table in your home. It also makes a great gift for friends and family!
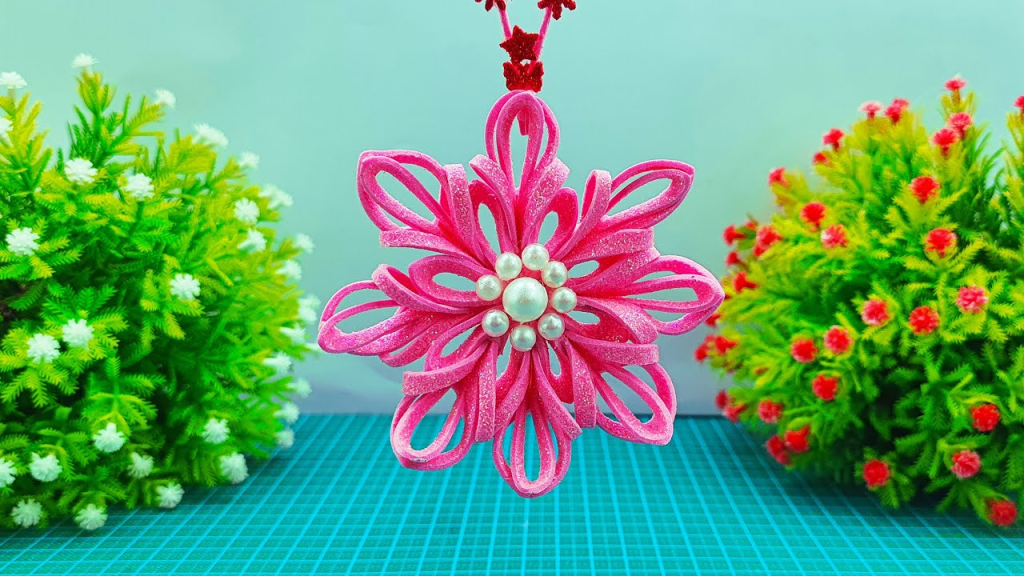
5. Glitter Paper Hanging Ornament For Christmas | Beautiful Snowflake Ornament Making Ideas
Making your own Christmas decorations is a great way to get into the holiday spirit, and this glitter paper hanging ornament is the perfect project for getting started. This beautiful snowflake ornament is easy to make and only requires a few materials. Plus, it’s a great way to add a personal touch to your holiday decor.
Christmas is a time for family, friends, and decorating. What better way to get into the holiday spirit than by making your own decorations? This glitter paper hanging ornament is the perfect project.
Not only is this ornament easy to make, it’s also fun and festive. All you need is some glitter paper, scissors, and ribbon. Simply cut out a tree shape from the glitter paper, then cut out small circles for the ornaments. To hang, just punch a hole in the top of the tree and thread through some ribbon. This charming ornament is sure to add some sparkle to your holiday decor. So get crafty and spread some holiday cheer! This 3d christmas tree craft is the perfect way to add a personal touch to your holiday decor. It’s easy to make, and you can customize it however you like. Plus, it’s a great way to spread some holiday cheer!
6. Mini Wreath Making With Glitter Foam Paper For Christmas | Christmas tree Decorations ideas | Wreath
Looking for something fun and festive to do with the kids this Christmas? Why not try your hand at making mini wreaths out of glitter foam paper? This 3D Christmas tree craft is easy enough for even the youngest crafters to try, and you can make them as simple or as elaborate as you like.
To get started, you’ll need some green glitter foam paper, a pair of scissors, and some glue. You can also add in other decorations like sequins, beads, or buttons if you like. Simply cut the foam paper into strips, twist them into rings, and then glue them together to form mini wreaths. Once your wreaths are assembled, hang them on your Christmas tree or use them to decorate other holiday items like presents or cards.
To get started on this 3D Christmas tree craft, you’ll need some green glitter foam paper, a pair of scissors, and some glue. You can also add in other decorations like sequins if you’d like. First, cut out a triangle from the foam paper. Then, cut that triangle in half to create two smaller triangles. Next, take one of the small triangles and cut it in half again.
Continue doing this until you have a total of eight triangles. Now it’s time to start gluing! Take the largest triangle and glue it to the center of another piece of paper. Then begin adding on the smaller triangles around the outside, slightly overlapping each one as you go. Once all the triangles are glued down, your 3D Christmas tree is complete!
7. DIY Christmas Hanging Room Decorations Making With Glitter Foam Paper | Christmas Hanging Ornaments
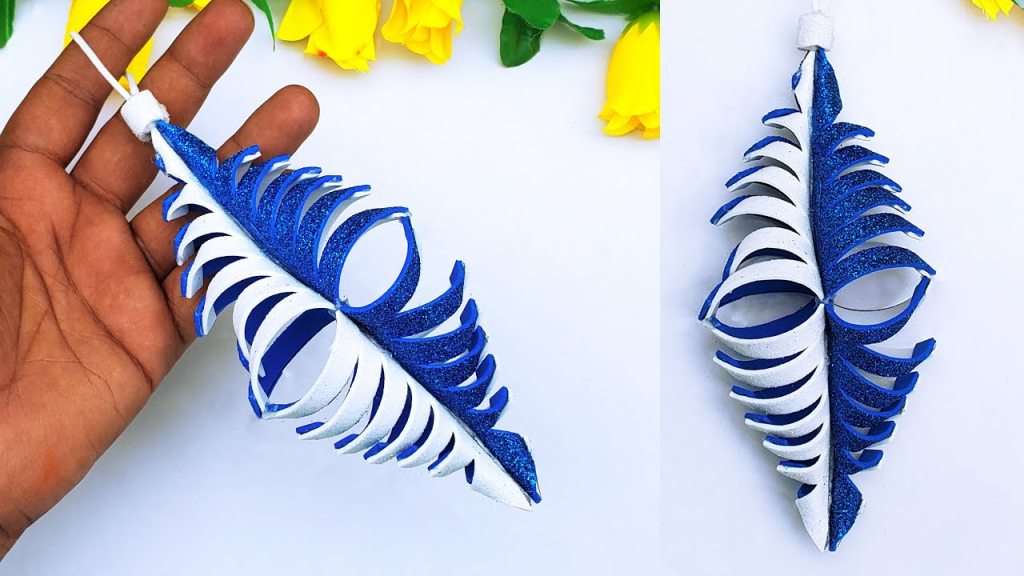
This holiday season, give your home a personal touch with these easy DIY Christmas hanging room decorations. Made with just a few materials like glitter foam paper and some string, these beautiful ornaments are sure to add some extra cheer to your home. Best of all, they’re simple and fun to make, so you can enjoy the process as much as the end result. So get creative and let your holiday spirit shine through with these DIY decorations.
Materials needed: list materials
To make this 3D paper Christmas tree craft, you will need the following materials:
-One sheet of green construction paper
-One sheet of brown construction paper
-Scissors
-Glue
-Tape
-Pencil
-Ruler or a straight edge
Step two: describe second step
Making your own hanging Christmas decorations is a fun and easy way to add some personal flair to your holiday decor. Here’s what you’ll need to do for the second step:
Cut out a variety of shapes from the glitter foam paper. You can use any kind of Christmas-themed cookie cutter, or even just freehand some shapes. Once you have a good selection of shapes, it’s time to start assembling them into your decorations.
To make each decoration, start by glueing two foam shapes together. Then, add a length of string or ribbon to the top of the shape so that it can be hung up. Continue adding more shapes and strings until your decoration is as full and festive as you want it to be!
Step three: describe third step
In this step, you will need to take your glitter foam paper and cut it into strips. You will then need to take those strips and glue them together to create a chain. Once you have created your chain, you will need to measure it and cut it to the desired length. Finally, you will need to glue the ends of the chain together to create a loop.
In this step, you will need to take your foam shapes and glue them together to create a second loop. Once you have created your second loop, you will need to measure it and cut it to the desired length. Finally, you will need to glue the ends of the second loop together to create a double chain. Step five: describe fifth step In this step, you will need to take your foam shapes and glue them together to create a third loop.
8. Diy Home Decorations Christmas For Snowflakes Ideas | Beautiful Paper Christmas Making
Check out these snowflake ideas for some fun and festive DIY Christmas decorations! From hanging snowflakes on your tree to making a 3D paper snowflake wreath, there are plenty of ways to add some winter wonderland flair to your home. So get creative and start crafting!
With Christmas just around the corner, it’s time to start thinking about decorations. If you’re looking for something a little bit different this year, why not try making your own snowflakes?
There are plenty of tutorials online that show you how to make 3D paper snowflakes. All you need is some white paper and a pair of scissors. Once you’ve made your snowflakes, you can hang them from the ceiling or attach them to the Christmas tree. If you’re feeling really creative, you could even try making some Snowflake-shaped cookies. These would make great gifts for friends and family members. Whatever you decide to do, have fun and get creative!
Supplies needed
To make this 3D Christmas tree craft, you will need the following supplies:
-1 sheet of green construction paper
-1 sheet of brown construction paper
-Scissors
-Glue or tape
-Markers or crayons (optional)
First, cut a triangle out of the green construction paper. This will be the tree. Then, cut strips of brown construction paper to create the tree trunk. Glue or tape the strips onto the back of the tree. Finally, decorate your tree with markers or crayons, if desired.
Step 1: Cut out snowflakes.
If you want to make your own DIY snowflakes, the first step is to cut them out! You can use any type of paper you like, but we recommend using thin white paper for the best results.
There are a few different ways you can cut out your snowflakes. The simplest way is to fold your paper in half and then in half again, and then just start cutting out shapes. If you want something a little more complicated, you can try folding your paper into a cone shape and then cutting out triangular flakes.
Whatever method you choose, just have fun with it and see what kind of unique snowflakes you can create! Once all of your snowflakes are cut, you’ll want to glue them onto a background of your choice. You can use any color paper you like, but we recommend using white paper for the best results. We also recommend using adhesive spray glue so that your snowflakes will stick better. Begin by spraying the back of your background paper and then layering it on top of a table or desk with a clear surface.
Spray the back of your snowflake and lay it on top of your background paper. Use a brush or foam applicator to smooth out any bubbles and then allow it to dry completely. Spray the back of another snowflake and lay it on top of your first layer. Smooth out any bubbles with a brush or foam applicator and allow it to dry completely. Repeat the process until you have the desired number of layers.
Step 2: Assemble the 3D Christmas tree
Follow these simple steps to create your own 3D christmas tree that is perfect for any room in your house!
1. Cut out a tree template from construction paper or cardstock. If you want a bigger tree, use a larger piece of paper.
2. Fold the paper in half lengthwise and then in half again. Unfold the paper and you should now have four equal sections.
3. Fold each section in half again and then cut along the fold lines to create eight equal sections.
4. Take one section and make a small cut at the top and bottom of the long side. This will be used to connect the sections together later on.
5. Repeat step 4 with all of the remaining sections until you have eight pieces that look like this.
Step 3: Hang snowflakes on the tree
Decorate your home for Christmas with these easy DIY snowflake ideas. Hang snowflakes on your tree for a festive look that will fill your home with holiday cheer. To make your own snowflakes, you’ll need some white paper, a pair of scissors, and a little bit of glue. Start by cutting out different shapes from the paper. Then, fold the paper in half and cut out smaller shapes along the fold. Finally, glue the two pieces of paper together to create a three-dimensional snowflake. Hang your snowflakes on the tree using clear thread or fishing line. Space them out evenly around the tree for a beautiful display. Enjoy your handiwork and the festive atmosphere it creates in your home!
9. Christmas For Snowflakes Craft Decorations Ideas | Eva Glitter Foam Ornaments Step By Step Tutorial.
Christmas is a time for family, friends, and snowflakes!
Christmas is a time for family, friends, and snowflakes! It’s a time to be merry and enjoy the company of those you love most. One of the best parts about Christmas is the decorations. putting up the tree, stringing lights, and hanging ornaments is a fun activity that gets everyone in the holiday spirit. Another great thing about Christmas is the food. From roasted turkey to homemade pies, there are so many delicious things to eat during the holidays.
And of course, no Christmas would be complete without a little bit of snow. Whether you’re sledding down a hill or building a snowman, playing in the snow is one of the best parts of winter. So bundle up and enjoy all that Christmas has to offer!
3D Christmas Tree Craft: Materials needed and step-by-step instructions
Materials needed:
- -1 sheet of green construction paper
- -1 sheet of white construction paper
- -Scissors
- -Glue
- -Pencil or pen
Instructions:
1. Begin by folding the green construction paper in half lengthwise. Then, cut along the fold. You should now have two long strips of green paper.
2. Take one strip and accordion fold it, making 1″ folds.
3. Once you’ve reached the end of the strip, glue the ends together to form a circle. This will be the base of your 3D Christmas tree.
4. To make the tree’s trunk, take the other green strip and accordion fold it until it is about 6″ long. Cut off any excess paper and glue the ends together to form a cylinder.
Snowflake Craft Ideas: A roundup of different snowflake crafts you can make
Looking for something fun and festive to do with the kids this winter? Why not try your hand at making some snowflake crafts? We’ve rounded up a few of our favorite ideas to get you started. One easy option is to make a 3D paper snowflake. All you need is some white construction paper and a pair of scissors. Just cut out a bunch of different-sized snowflakes, stack them up, and voila! You’ve got yourself a cute little 3D snowflake.
If you’re feeling a bit more ambitious, you can try your hand at making a beaded snowflake. This one requires a bit more patience, but the end result is definitely worth it. Just string together some clear beads in the shape of a snowflake and voila! You’ve got yourself a beautiful decoration for your tree or windowsill.
With Christmas just around the corner, it’s time to start thinking about all the festive decorations you can make. One of the most iconic symbols of Christmas is the snowflake, so why not incorporate it into your decorating this year? There are plenty of different snowflake crafts you can make, whether you’re looking for something simple or more complex. Check out these different ideas to get started:
For a 3D effect, try making a paper snowflake wreath. Start by cutting out a bunch of snowflakes in different sizes and colors. Then, hot glue them onto a foam wreath form. Add a ribbon for hanging, and you’re done! If you want something a little more unique, try creating some snowflake ornaments. You can use any type of material you want-felt, paper, sequins, etc.
Christmas Decorating Ideas: How to incorporate your snowflake crafts into your holiday decor
When it comes to decorating for Christmas, there are endless possibilities. One of the most popular and unique ways to add a personal touch to your holiday decor is by incorporating snowflake crafts into your display. There are many different ways to make snowflakes, and they can be used in a variety of ways to bring some extra holiday cheer to your home. Here are a few ideas on how you can use your snowflake crafts to decorate for Christmas:
-Hang them from the ceiling: This is a great way to fill up empty space and add some height to your decorations. You can use string, fishing line, or clear tape to attach the snowflakes to the ceiling.
-Dangle them from windows: Another fun way to use snowflakes is by hanging them in front of windows.
10. DIY Christmas Foamiran Ball Ornaments | Glitter Foam Paper Tree ornaments | Christmas Ball Ornaments
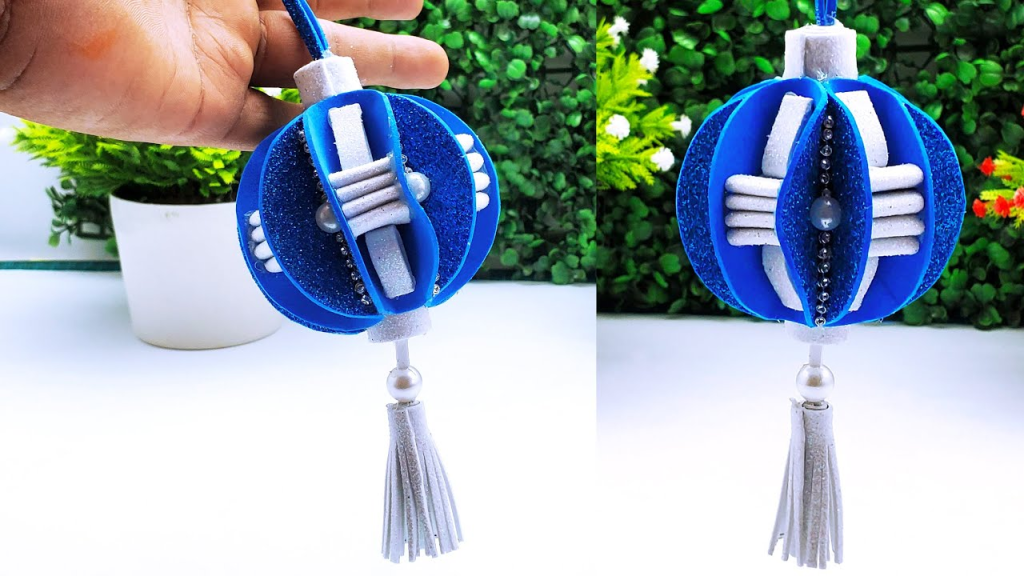
DIY Christmas Foamiran Ball Ornaments Glitter Foam Paper Tree ornaments are a fun and easy way to add some sparkle to your holidays. With just a few supplies, you can create these beautiful ornaments. Follow the tutorial below to learn how. Looking for a fun and unique Christmas craft? Try making your own Foamiran ball ornaments! These ornaments are made from glitter foam paper and are easy to make. Simply cut out the desired shape, glue it onto the Foamiran ball, and add some glitter. You can also add a ribbon loop to hang the ornament on your tree. These ornaments are sure to add some sparkle to your holiday decor!
What you need: list materials
- -Foamiran sheets
- -Glitter foam paper
- -Scissors
- -Ruler or measuring tape
- -Pencil
- -Balloon
- -String
- -Hole punch (optional)
Step 1: Cut out foam Balls
To make these DIY Christmas ornaments, start by cutting out some foam balls. You can use a knife or a hot wire cutter to do this. If you’re using a knife, be sure to use a sharp one so that you don’t have any trouble cutting through the foam. Once you have your foam balls cut out, it’s time to start gluing them together. If you want to make your own Christmas ornaments this year, here’s a great DIY project. You can make these cute foam ball ornaments using just a few supplies. They’re easy to make and they’re so sparkly and pretty!
Step 2: Add Glue and Glitter
It’s time to add some sparkle to your ornaments! In this step, you will need to add a layer of glue and then cover the ornament with glitter. Be sure to work in a well-ventilated area, as the fumes from the glue can be strong. Adding glitter to your ornaments is a great way to personalize them and make them truly unique.
Have fun with this step and experiment with different colors and textures of glitter. You can also use sequins, beads, or other small decorations in addition to or instead of glitter. Once you have added all the embellishments you want, set the ornament aside to dry completely. This may take several hours or even overnight. Once the ornament is dry, it will be ready to hang on your tree!
Step 3: let dry
Once you have added all of the glitters to your foam balls, it is time to let them dry. This may take a few hours, depending on how much glitter you used and how thickly you applied it. Once they are dry, your ornaments will be ready to hang on the tree! Did you enjoy this craft? There are many other fun Christmas crafts in our collection. If you like this project, be sure to share it with your friends and family!
Once you have added all of the glitters to your foam balls, it is time to let them dry. This may take a few hours, depending on how much glitter you use. Once the foam balls are dry, you can add them to your Christmas tree or gift them to friends and family. These DIY ornaments are sure to bring some holiday cheer!
Conclusion,
This 3d Christmas tree craft is a fun and easy way to get into the holiday spirit. It’s perfect for kids of all ages and is a great way to show off your holiday cheer. This 3d christmas tree craft is a fun and easy way to get into the holiday spirit. It’s a great activity for kids and adults alike, and it’s a perfect way to show off your holiday cheer. So grab some supplies and get crafting!


