


If you are planning on putting up some Christmas decorations this year, ornaments are a must. There are so many different kinds and styles of ornaments available that it can be hard to decide which ones to buy. Here are a few tips to help you choose the perfect Christmas decorations and ornaments for your home.
One thing to consider is the overall theme or look that you are going for with your Christmas decorating. This will help narrow down the choices of ornaments available to you. Do you want something traditional, whimsical, elegant, or fun? Once you have decided on a general direction, start shopping around for ornaments that fit that description.
Another thing to think about is what kind of materials you would like your ornaments to be made out of. When it comes to Christmas decorations, one thing to consider is the overall theme or look that you are going for. This will help narrow down the choices of ornaments. For example, if you are going for a more traditional look, then you might want to choose ornaments that are red and green. But if you are looking for something more unique, then you might want to consider ornaments that are gold or silver. Whatever look you are going for, make sure to choose ornaments that fit with your overall theme.
Christmas Decorations Ornaments Ideas:
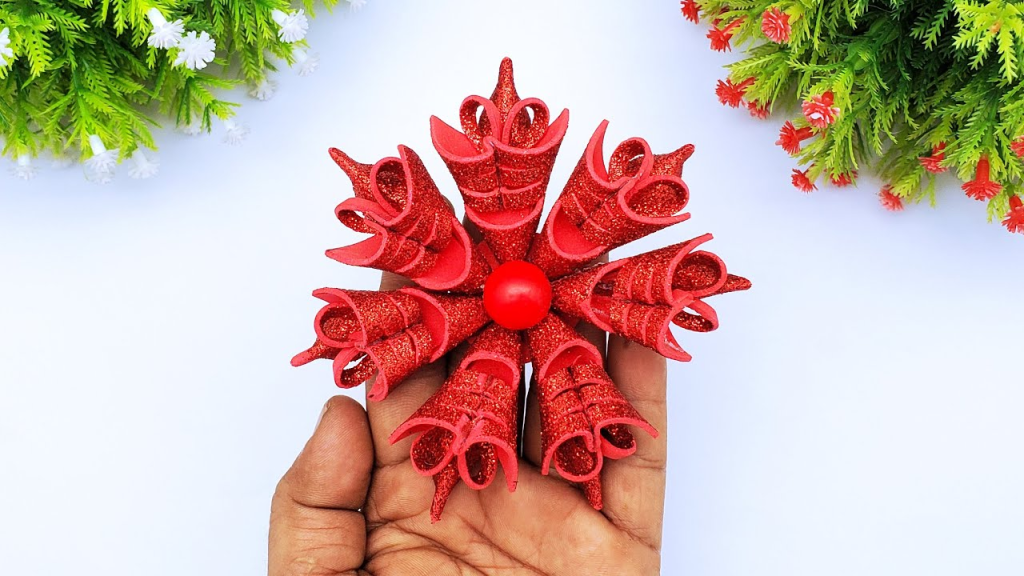
1. Christmas Decorations Ornaments – Glitter Foam Paper Crafts Ideas | Christmas Tree Ornaments
what is glitter foam paper and why it’s great for crafts If you love glitter and foam, then you will love these glitter foam paper crafts ideas! They are so much fun to make and they look so pretty when they are finished. You can use them to decorate your home or office or give them as gifts.
Glitter foam paper is a type of craft paper that has a glittery surface on one side and a foam core. It is ideal for making cards, invitations, scrapbooking, and other paper crafts. The glittery surface of the paper adds a touch of sparkle and pizzazz to any project. And the foam core makes the paper sturdy and easy to work with. Plus, it’s just plain fun to use! So if you’re looking for a new crafting material to try, be sure to check out glitter foam paper.
What is glitter foam paper?
Glitter foam paper is a type of craft paper that is covered in glitter. It is often used to make cards, scrapbooks, ornaments, and other decorative items. Glitter foam paper is relatively easy to work with and can be found at most craft stores. To use glitter foam paper, start by cutting out the shape that you want. Then, use a glue stick or double-sided tape to attach the piece to another piece of paper or cardstock. Once the piece is attached, you can embellish it with additional decorations, such as beads or ribbon.
Glitter foam paper crafts ideas
Looking for a fun and unique craft idea? Why not try glitter foam paper crafts? Glitter foam paper is a great material to work with and can be used to create all sorts of different projects. Here are just a few ideas to get you started:
1. Make your own greeting cards – Glitter foam paper makes for beautiful and eye-catching greeting cards. Simply cut out the shape of your choice, add some embellishments, and write your message on the inside.
2. Decorate your planner – Add some sparkle to your everyday planner by using glitter foam paper to decorate the pages. Cut out shapes, words, or initials and glue them down.
3. Create framed artwork – Cut out a design from glitter foam paper and frame it to create one-of-a-kind artwork for your home.
Glitter foam paper is a great material to work with and can be used to create all sorts of different projects. Whether you’re looking to make cards, scrapbook pages, or even home decor items, glitter foam paper crafts are a great way to add some sparkle and personality to your creations.
How to make a glitter foam paper bunny
Bunnies are one of the most popular symbols of spring, so why not make your own out of glitter foam paper? This is a simple and fun craft that kids will love, and it’s easy to do with just a few supplies. To make a glitter foam paper bunny, start by cutting two bunny shapes out of black glitter foam paper. Then, use white glue to attach the two shapes together at the ears. Next, cut out two smaller circles from pink glitter foam paper and glue them onto the bunny’s face for its cheeks. Finally, add some details like eyes and a nose with a fine-tip black marker. Your sparkling new bunny is now ready to hop into spring!
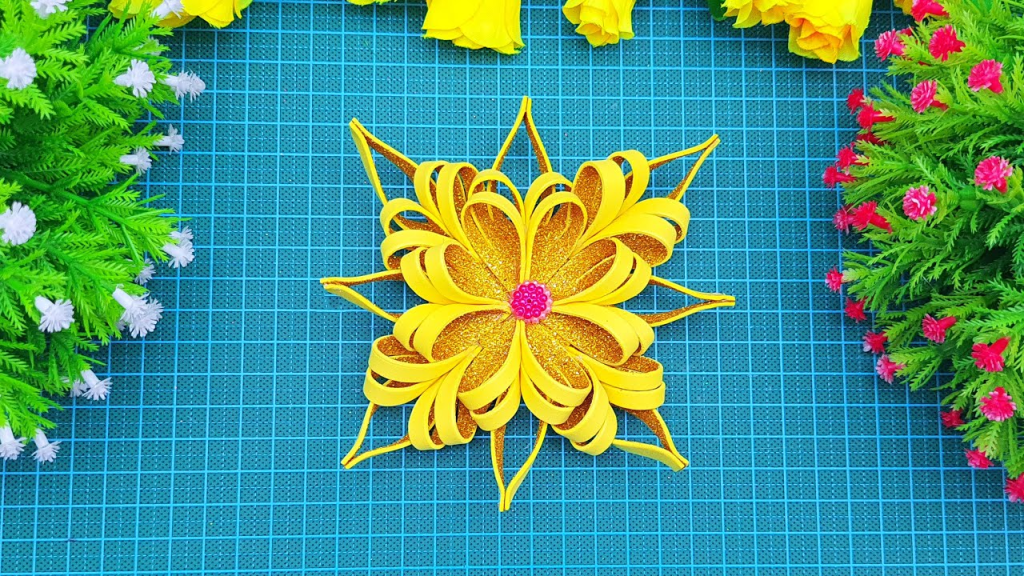
How to make a glitter foam paper flower
Looking for a fun and easy craft project? Try making a glitter foam paper flower! This guide will show you everything you need to know to make your own beautiful glitter foam paper flower.
What you’ll need:
- – Glitter foam paper
- – Scissors
- – Pen or pencil
- – Pipe cleaner or wire (optional)
- – Hot glue gun and glue sticks (optional)
1. Start by cutting a circle out of glitter foam paper. The size of the circle will determine the size of your finished flower, so cut it to the size you want. If you’re not sure, start with a small circle and adjust as needed.
2. Next, cut the edge of the circle into evenly spaced triangles. Make sure not to cut all the way to the center of the circle!
3. Starting near the center of the circle, begin shaping the petals by folding them in half.
4. Work your way around, making sure to fold each petal in half before moving on to the next one.
5. When you reach the end, pinch the two ends together to form a bud.
6. Add a small piece of tape to keep the flower together while you work on making another one.
7. Repeat steps 3 and 4 until you have made 10 flowers.
How to make a glitter foam paper heart
1. Do you want to make a glitter foam paper heart? It’s easy and only requires a few materials.
2. First, you’ll need some glitter foam paper. You can find this at most craft stores.
3. Next, cut out a heart shape from the glitter foam paper. If you don’t have a template, you can trace around a heart-shaped object.
4. Now it’s time to add some glue to the back of the heart. You can use any type of glue, but we recommend using a hot glue gun for this project.
5. Once the glue is applied, sprinkle on some glitter. Be sure to cover the entire back of the heart so that it’s nice and sparkly!
6. Now let the glue dry and your glitter foam paper heart is complete!
7. To make your card, start by cutting a heart out of tissue paper. Be sure to use different colors! 8. Next, you’ll need some more glitter foam paper and also a piece of red cardstock.
9. Cut out a heart and glue it down on the cardstock.
10. Using a black marker, write your name on one of the hearts in the middle of your card.
11. Cut out little red hearts to glue down around your name!
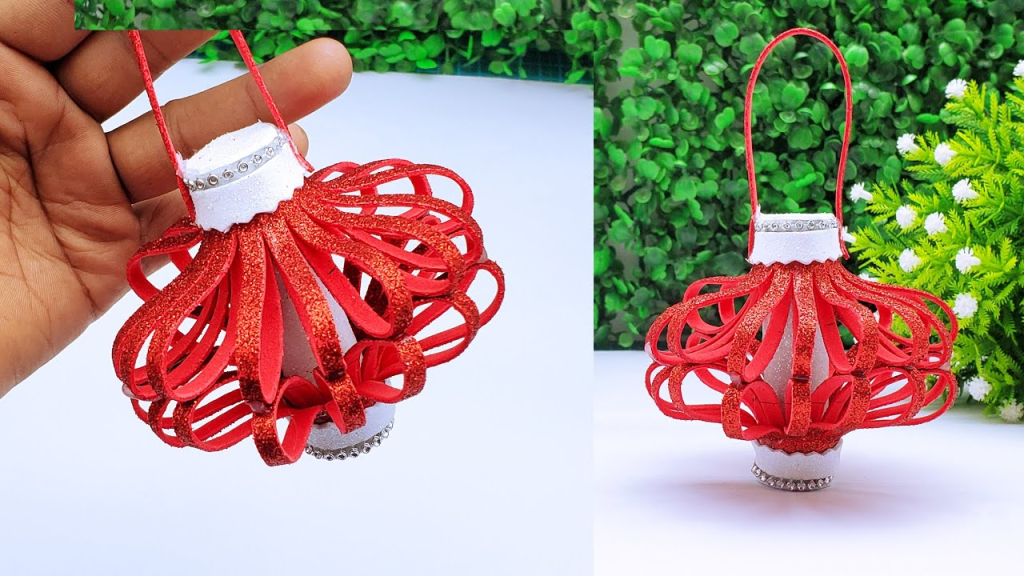
2. Diy Christmas Ornaments Decorations Simple Ideas | Christmas Tree Decorations | Christmas Craft.
Get into the Christmas spirit with these easy DIY ornaments. Looking for a fun and festive way to get into the Christmas spirit? Look no further than these easy DIY ornaments! From simple to complex, there’s an ornament here for everyone – so get crafting! Not only are these ornaments fun to make, but they’re also beautiful additions to your holiday decor. Whether you’re looking for a unique gift idea or simply want to add a personal touch to your home, these DIY ornaments are sure to please. So what are you waiting for? Get started today!
Step One: Describe how to make the first ornament
To make this first ornament, you will need:
-a piece of cardstock
-scissors
-ruler or a straight edge
-a pencil
-hole punch
-yarn or ribbon
-tape
First, use the ruler and pencil to draw a line 1/2 inch from the top of the cardstock. Then, cut along this line. Next, measure and mark 1/2-inch intervals along the long edge of the paper strip. Use the hole punch to create a hole at each mark.
Now it’s time to decorate! You can use crayons, markers, or paint to make your design. Once you’re finished, thread the yarn or ribbon through the holes and tie it off at the end. Finally, tape the end of the string to the back of the ornament so it’s ready to hang.
Step Two: Describe how to make the second ornament
For this step, you will need:
-1 pipe cleaner
-1 pom pom
-1 inch of ribbon
To make the second ornament, start by taking the pipe cleaner and wrapping it around the pom pom. Then, take the inch of ribbon and tie it around the top of the pom pom. Make sure to leave enough ribbon so that you can hang the ornament on the tree.
This step is simple and only requires a few materials. You will need -1 pipe cleaner -1 pom -1 inch of ribbon To make the second ornament, start by taking the pipe cleaner and wrapping it around the pom pom. Make sure to leave enough room at the top so you can add the ribbon. Once you have wrapped the pipe cleaner around the pom pom, take the inch of ribbon and tie it around the top. This will create a hanger for your new ornament!
Step Three: Describe how to make the third ornament
To make this pretty paper star, you’ll need some heavy cardstock, a pencil, scissors, and double-sided tape. First, cut a strip of cardstock about 1″ wide and 12″ long. Fold the strip in half lengthwise and crease with a bone folder or your fingernail. Unfold the strip and then fold each long side to meet in the middle at the crease line. Again crease well with a bone folder or your fingernail. Now cut off one end of the strip at an angle so you have a point. You will now have a long triangle shape.
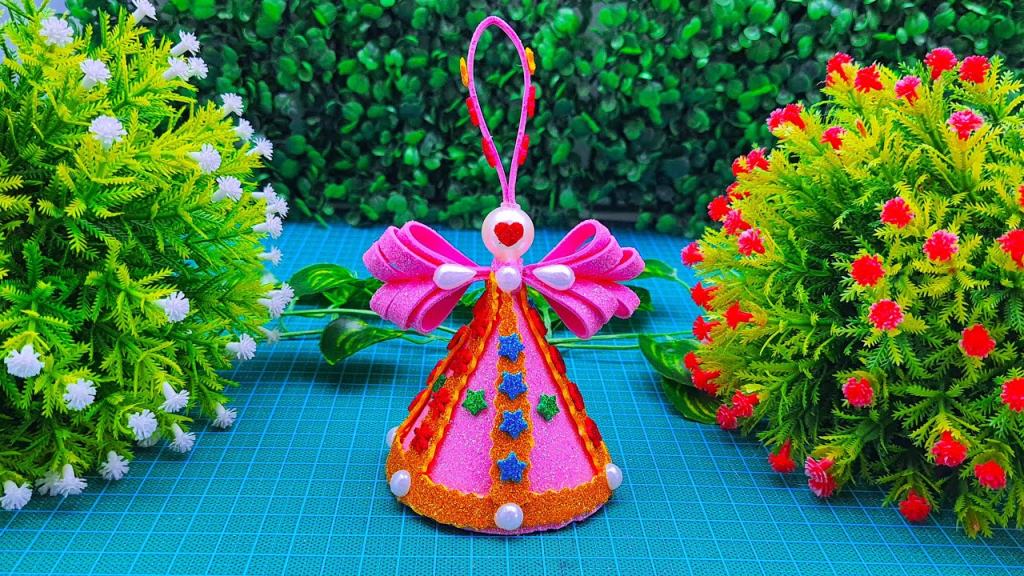
3. Diy Glitter Paper Angel For Christmas | How To Make A Angel For Christmas
4. 3D Snowflakes Making With Eva Glitter Foam Sheets paper | DIY Snowflakes For Christmas Decorations
What You Will Need:
1. Tape
2. Paper
3. Scissors
4. Glue
5. Pencil
6. Ruler or a straight edge
7. Gold or silver glitter
8. A black marker (optional)
Why This Is A Fun Activity:
1. It’s a fun activity to do with your family or friends.
2. You can make as many or as few as you want.
3. They’re perfect for decorating your home for Christmas.
4. They’re delicious.
5. You can eat them as soon as they come out of the oven or save them for later.
6. They’re sweet, fruity, and delicious!
This is a fun activity because it allows you to be creative and make something unique. It is also a great way to get into the holiday spirit!
Step One: cut out the angel shape.
If you want to make your own glitter paper angel for Christmas, the first step is to cut out the angel shape. You can use any kind of paper you like, but glitter paper will give your angel a little extra sparkle. Once you have your angel shape cut out, it’s time to start decorating! You can add anything you like to your angel, from sequins and beads to ribbons and lace. Just let your imagination run wild! When you’re finished decorating, all that’s left to do is hang up your beautiful creation. Your glitter paper angel is sure to add some holiday cheer to any room!
Step Two: glue on the glitter
After you have cut out your angel shape, it is time to add some sparkle! Gather your glue and glitter and get ready to add some pizzazz to your angel.
Adding glitter to your angel is a simple process. First, apply a layer of glue to the area where you would like the glitter to be. Then, sprinkle on the glitter. Be generous with the glitter- you can always brush off any excess later. Let the glue dry completely before moving on to the next step. Step Three: attach the hanger After you have added your glitter, it is time to make your angel stand up! The easiest way to do this is by adding a hanger.
The hanger I used was a simple jump ring that I purchased at the hardware store. All you need to do is place the jump ring through the hole in your angel and then attach the end of the jump ring to itself with a simple knot. I love this look because it’s simple and can be used in so many different ways. You could use the same hanger to hang a wreath on the front door or decorate your mantel with a few of your favorite Christmas angels.
Step Three: Decorate the angel
Now that you have your angel’s body and wings all cutout, it’s time to start decorating! You can use a variety of materials to give your angel some personality. Gold and silver glitter are always popular choices for Christmas decorations, so feel free to go wild with those. You can also use sequins, beads, buttons, and even feathers to really make your angel stand out. Just be sure to glue everything on securely so it doesn’t fall off during the holiday season.
Step Four: hang up your angel
Now that you have followed the previous three steps, your angel is complete! All that is left to do is find the perfect spot to display her. Whether you want to keep her simple with just a few accents or go all out with a full-blown display, there are plenty of options to choose from. And don’t forget, you can always change things up next year if you want!
Here are a few ideas to get you started:
1. Hang your angel on the Christmas tree for all to see. This is a classic option that always looks beautiful.
2. Place her on a shelf or mantelpiece as part of your holiday decor.
3. Get creative and make your own unique display! For example, you could put her in a pretty glass jar or vase filled with lights and baubles.
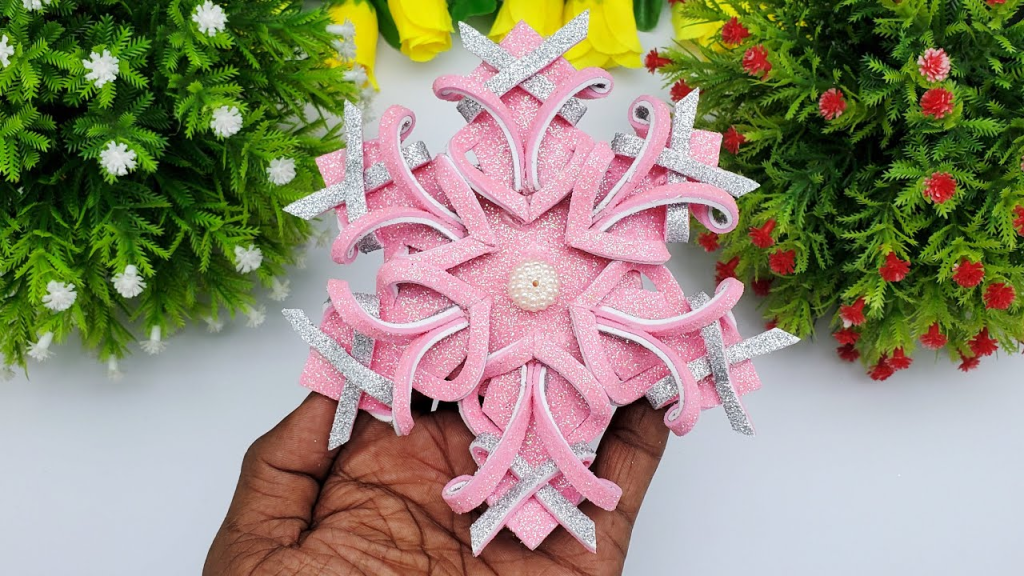
5. Christmas Snowflake making Ideas | Simple & Easy Glitter Foam Sheet Snowflake
Add some sparkle to your Christmas decorations this year with glitter foam sheet snowflakes. They’re easy to make and add a touch of elegance to any tree.
To make glitter foam sheet snowflakes, you will need:
- Glitter foam sheets
- Scissors
- Hot glue gun
- String or ribbon
Cut the foam sheets into desired snowflake shapes. You can make them as simple or complex as you like. Once you have your desired shape, add a line of hot glue around the edge and sprinkle with glitter. Let the glue dry completely before hanging your snowflakes on the tree.
One of the best things about making your own Christmas decorations is that you can make them as simple or complex as you like. Foam sheets are an inexpensive and easy material to work with, so they’re perfect for crafting your own unique snowflakes. To get started, cut the foam sheets into your desired snowflake shapes. You can make them as simple or complex as you like.
Once you have your desired shape, keyhole saw, or utility knife cut out the center of the snowflake. This will create a negative space in the center of your snowflake that will add dimension and interest when it’s hung on the tree.
Conclusion
Christmas decorations ornaments are a great way to show your holiday spirit. They are also a great way to show your personality and style. If you are looking for a unique and personal gift, consider giving a Christmas decoration ornament.


