


The winter holiday season is a time for warmth, family, and decorations. One of the best ways to bring festive cheer into your home is to hang a beautiful Christmas Snowflake Wall Hanging. This simple craft project is not only easy to make but can be customized with colors and textures to fit any style. Whether you use it as part of your seasonal décor or give it as a gift, this wall hanging will bring joy and light to any home or office.
Christmas Snowflake Wall Hanging is a time of joy and festivity, and decorating your home with beautiful handmade decorations can make the holiday season even more special. A great way to bring the spirit of Christmas into your home is by creating a festive snowflake wall hanging. This article will provide step-by-step instructions on how to create a stunningly elegant Christmas Snowflake Wall Hanging that will look beautiful in any room.
1. 3D Snowflakes : Easy Paper Snowflake Wall Hanging | Make Snowflake Out Of Paper | New Christmas 2022
3D Paper Snowflakes
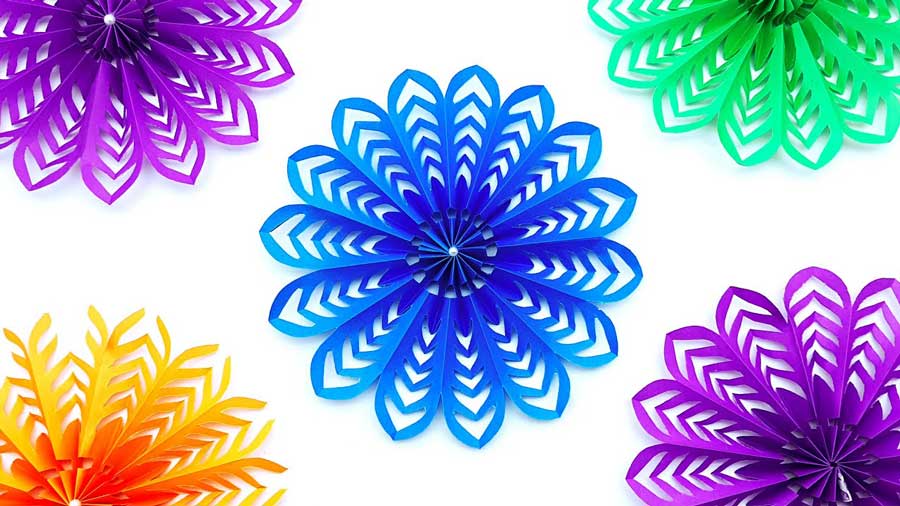
This Christmas Snowflake Wall Hanging, decorate your home with 3D paper snowflakes! Making a 3D snowflake out of paper is an easy and fun craft project that you can do with the whole family. With just a few simple materials, you can create beautiful and unique decorations for your home that will last for many holidays to come.
Start by cutting several large circles and triangles out of colored paper or white card stock. You will need scissors, glue sticks and some ribbon for hanging. Fold the circles in half twice to make four identical wedges before making several small cuts around the edges of each wedge to shape it into a Christmas Snowflake Wall Hanging pattern. Then glue the wedges together at their edges to form a 3D star shape. Finally, add some sparkle by adding glitter or beads on top if desired – whatever you want to make it look like freshly fallen snow!
Materials Needed
Are you looking to add a festive touch to your home with this Christmas Snowflake Wall Hanging? Make a beautiful wall hanging out of paper snowflakes! This easy-to-follow tutorial will show you how. In order to make this 3D Snowflake Wall Hanging, there are some materials that you will need:
You will require paper in two different colors and sizes – one A4-sized sheet in white and another A3-sized sheet in the color of your choice. You’ll also need scissors, glue, glitter, sequins, or any other decorations for added appeal. Additionally, you can use a ruler and pencil if needed for measuring and tracing the patterns. Once all these materials are ready with you, it’s time to start working on your 3D Snowflake Wall Hanging!
Making the Snowflakes
Creating beautiful snowflakes for Christmas Snowflake Wall Hanging has never been easier! With the help of a 3-D paper snowflake wall hanging, you can make perfect snowflakes in no time. Whether you are looking for a craft to do with your family, or a unique gift to give your friends and loved ones, 3-D paper snowflake wall hangings offer a fun way to celebrate the holiday season.
Start by gathering needed materials like cardstock paper or thin artboard, scissors, and glue. Cut out six identical shapes from the paper. For an easy project, you can use pre-cut templates that come with various shapes such as stars, hearts, and circles. Once all pieces are cut out, fold each one in half twice and then snip off the edges to create a fringed look resembling snowflakes.
Assembling the Snowflake Wall Hanging
Creating a gorgeous 3D Snowflake Wall Hanging is an easy and inexpensive way to decorate your home for the upcoming Christmas 2022. This paper wall hanging can be hung up in any room, giving it a festive touch without overdoing it. Assembling this project is simple: all you need are supplies from your local craft store, scissors, and a hot glue gun.
To begin assembling the wall hanging, cut out copies of the snowflake pattern on different colors of cardstock paper or other thick materials. You will then fold each Christmas Snowflake Wall Hanging according to the instructions given in the pattern and secure them with hot glue along a full length of twine or ribbon. Once they’re all glued together, hang up your finished product on any wall you choose!
Variations for New Christmas 2022
As the holiday season approaches, many people are looking for new ways to add a festive touch to their homes. One of the most popular winter decorations is snowflakes, and this year there’s an exciting new twist on these classic decorations. With 3D snowflakes, you can create a beautiful wall hanging or another ornament that is sure to add some extra cheer during New Christmas Snowflake Wall Hanging 2022!
3D snowflakes are easy to make and can be created out of paper in just a few minutes. All you need is some plain white paper, scissors, and glue. Simply cut out shapes from the paper that represent different parts of a snowflake such as stars or circles for arms or points for petals. Then glue them together into various arrangements to create your own unique 3D design.
2. Beautiful Ornament-Making Ideas For Christmas – Homemade Snowflake Ornament-Making Tutorial
Christmas & Ornaments
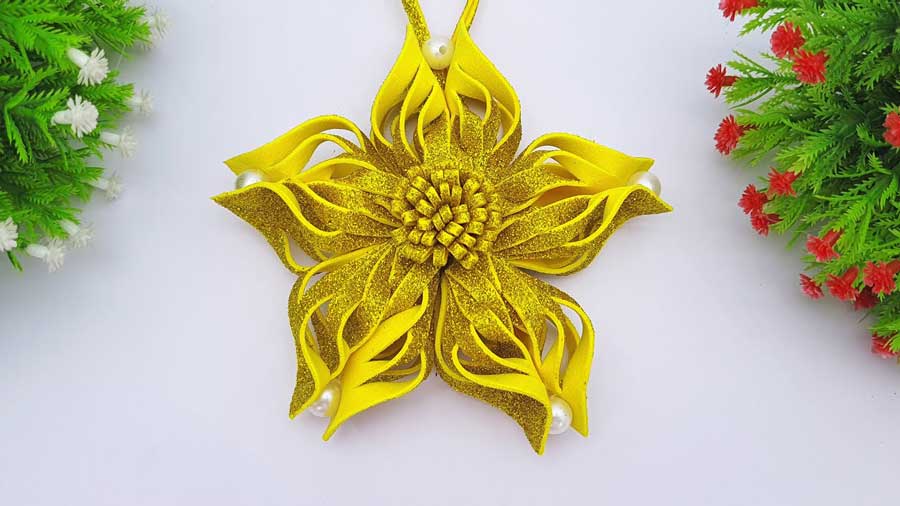
Christmas Snowflake Wall Hanging is the perfect time to get creative and make some homemade ornaments. From snowflakes to stars, there are so many different ways to decorate your tree with the help of a few simple supplies. This tutorial will show you how to make an adorable snowflake ornament that will be sure to bring holiday cheer into your home.
The best thing about this project is that it’s easy for everyone from beginners who want to try their hand at crafting, to experienced crafters looking for a more unique take on Christmas decorations. All you need is some cardstock paper, glue, scissors, and markers—all of which are easily available from local craft stores. With just these materials you’ll be able to create an eye-catching decoration in no time!
Supplies Needed
Making homemade ornaments is a great way to get into the Christmas Snowflake Wall Hanging spirit and create something special that you can hang on your tree year after year. This article will provide a tutorial for creating beautiful snowflake ornaments out of some common materials. Before starting, it is important to gather the necessary supplies so that you have everything you need right at hand.
To make these snowflake ornaments, gathering paper, scissors, glue, glitter, and ribbon are all essential items. It is also helpful to have a pencil and ruler available as well. Depending on what design of snowflakes you choose to make, it may also be useful to have markers or colored pencils handy in order to add more detail and color. Lastly, make sure there is plenty of space cleared off on your table so that you have enough room for crafting!
Snowflake Design Ideas
Christmas is the perfect time for decorating your home and getting crafty! Create beautiful handmade decorations with these snowflake design ideas that will transform your Christmas tree into a winter wonderland.
Making homemade snowflake ornaments is a fun, easy, and affordable way to add some extra charm to holiday decorations. With just a few materials, you can make unique and intricate designs that will be sure to impress family and friends alike. Whether you are an experienced crafter or looking for new ways to get creative this season, our collection of snowflake design ideas has something for everyone. From classic white paper cuts to colorful fabric creations, we have all the inspiration you need to create beautiful homemade snowflake ornaments. Check out our tutorial below for step-by-step instructions on how you can make your own festive decorations this holiday season!
Step-by-Step Tutorial
Do you want to add a special touch to your Christmas Snowflake Wall Hanging this year? Why not make your own homemade ornaments for the family tree? Here we’ll provide you with a step-by-step snowflake ornament-making tutorial. This easy, fun craft idea is perfect for the holiday season and will have your tree looking festive in no time. Whether it’s for yourself, as a gift, or as decoration at an upcoming event, follow these simple steps to create beautiful snowflake ornaments that are sure to be admired. Get creative and enjoy the process of bringing something unique and special into your home!
Tips & Tricks
Are you looking for the perfect holiday ornament to hang on your Christmas tree this season? Look no further than making a homemade snowflake ornament! This tutorial will show you how to make an ornament that’s beautiful and unique. With just a few tips and tricks, you’ll be able to create an eye-catching decoration that adds a special touch to your holiday décor.
Using just paper, scissors, and glue, it’s easy to make a variety of different snowflake ornaments in all shapes and sizes. You can customize the colors of the paper according to traditional Christmas Snowflake Wall Hanging colors such as red and green, or go for something more modern with blues or pinks. The possibilities are endless! Get creative by using different papers like tissue paper or vellum for an extra sparkly effect.
Showcase Your Decorations
This Christmas Snowflake Wall Hanging, make your home special by showcasing your homemade decorations. Making ornaments for the season is an exciting and rewarding experience that will keep you feeling festive throughout the holidays. Here’s a tutorial on making beautiful snowflake ornaments to give your tree some extra sparkle this winter.
These ornaments are deceptively easy to make by following a few basic steps. All you need is some cardstock, scissors, and glue! Choose holiday-inspired colors such as red and green, silver and gold, or pick out other shades of paper to create unique snowflake designs. The possibilities are endless! When finished, hang these lovely decorations proudly around your home to add a personal touch during the festive season.
3. How To Make Snowflakes Out Of Paper | 3D Snowflake Patterns For Christmas Decorations
Crafting Snowflakes
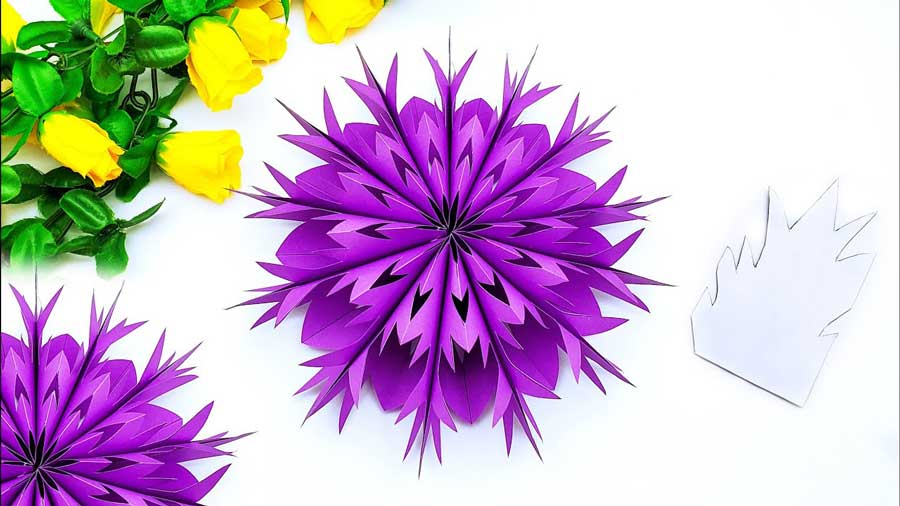
One of the most popular holiday decorations is snowflakes! With some paper, scissors, and a little creativity, you can easily craft beautiful 3D snowflakes for your Christmas décor. Whether it’s for a tree, windowsill, or mantelpiece, crafting paper snowflakes is a fun way to celebrate the season. From basic shapes to intricate designs, learn how to make 3D snowflake patterns with just a few simple steps.
You don’t need any special craft supplies either – all you need are some sheets of white paper and scissors. Get creative by folding and cutting different shapes into the paper. You can even add details like glitter or ribbons to create unique-looking snowflakes that will surely stand out in any room!
Supplies Needed
Making snowflakes out of paper is a great way to add festive decorations to your home this Christmas Snowflake Wall Hanging. To get started, there are some basic supplies you will need: white or colored construction paper, scissors, and a ruler.
The type of construction paper you choose will determine the size of your finished snowflakes. For example, larger sizes can be cut from poster board while smaller sizes work best with regular-sized sheets. Choose whichever size works for your desired project! Scissors should be sharp enough to make clean cuts in the paper – rounded points are recommended for intricate shapes. Lastly, use a ruler to draw lines and shapes that you can then cut out with scissors; this will help ensure professional-looking results every time!
Step 1: Cutting the Paper
Making snowflakes out of paper is an easy, fun way to decorate for the holidays! To start, the first step is cutting the paper. You’ll need a sheet of white or light-colored copy paper and scissors to get started. Start by folding your sheet in half one way, then folding it again in the opposite direction. This will create four even sections.
Cut small shapes along each fold as desired; try not to cut too close to the edges or your snowflake won’t look right when it’s finished! Use various shapes like triangles and squares for added dimension, or snip tiny slits along each fold. When you’re done cutting, unfold your paper to reveal your unique snowflake pattern! Next up: assembling and hanging your 3D snowflakes for a festive holiday feel.
Step 2: Folding and Snipping
Folding and snipping paper to make beautiful snowflakes is a fun winter activity for all ages. To create 3D snowflakes, cut a piece of thin cardstock or construction paper into a perfect square. Then, fold the square in half diagonally both ways to form a triangle shape. Fold the triangle in half again, then fold it into thirds for a smaller triangle shape with two flaps on the sides.
For added dimension, unfold your paper and start cutting shapes from one side of the triangle to the other with scissors. Make sure not to cut through any of your folds! As you continue cutting shapes, add more layers of intricate details so that when unfolded, you can create unique 3D snowflake designs each time. Have fun experimenting with different kinds of cuts and sizes until you come up with your own personal design!
Step 3: Glue and Fluffing
Making 3D snowflakes out of paper for Christmas decorations is a fun and easy way to add flair to your holiday decor. Step three in the process of making a beautiful snowflake is gluing and fluffing the pieces together. This step requires quick work so that all sections can be joined together before the glue dries.
To begin, make sure you have all the necessary supplies such as scissors, glue sticks, and paper handy. You will also need a flat surface such as a cutting board or sturdy table on which to assemble your snowflake. First use the glue stick to attach each piece one at a time, taking care to spread it evenly around each section of the paper. Then gently press down with your fingers until each piece is secure.
Step 4: Making 3D Patterns
Making 3D patterns out of paper is a great way to create a unique, festive Christmas Snowflake Wall Hanging. With the right materials and some creativity, you can make beautiful snowflakes that will spruce up any holiday party or winter scene. All it takes is an understanding of the basics of folding and cutting paper into 3D shapes.
The fourth step in making your very own 3D snowflake pattern is to use scissors or an X-acto knife to cut along the lines of your design to give it a three-dimensional form. Make sure that all sides are even and symmetrical for a perfect finish! You can also add dots, circles, or other embellishments with a marker or colored pencils to make your snowflake extra special.
4. Beautiful Glitter Paper Snowflake For Christmas Room Decoration – Diy Ornaments Making Ideas
Making decorations for Christmas Snowflake Wall Hanging is a wonderful way to get in the holiday spirit and add some sparkle to your home. This article has given readers all the information they need to make paper snowflakes with glittery paper, adding beautiful decorations to any room in the house.
The first step of the project requires gathering supplies and understanding which materials will work best for this project. The second step involves folding, cutting, and gluing each snowflake together. Finally, assembling all of the pieces into one final ornament completes this DIY craft.
Using glittery paper adds an extra touch of glamour that is sure to be appreciated by family and friends alike when they visit during the holiday season. This article showed how easy it can be to make ornaments out of simple materials like glittery paper while still making a big statement in any home this Christmas season! DIY Christmas Ornaments
Materials Needed: Glitter Paper, Scissors
Are you looking for a festive and fun way to decorate your Christmas room this year? Then try making some beautiful glitter paper snowflakes! This craft is perfect for those who are just starting out in the DIY-ornament-making world or for experienced crafters. All that is required is a few basic materials such as glitter paper, scissors, and glue. Plus, it’s a great activity to do with children of all ages.
For this project, you will need several sheets of glitter paper in various colors – reds, greens, and whites work well together. You will also need sharp scissors that can easily cut through the thicker paper. If you are making snowflakes with intricate designs then consider using small pointed scissors so as to get accurate cuts every time.
Step 1: Cut Snowflakes
Getting creative with snowflakes during the holidays is always a fun activity to do! Making paper snowflakes for Christmas room decorations is an especially enjoyable and simple endeavor. Step one in this craft project requires getting some colorful glitter paper, scissors, and a ruler or measuring tape.
Once these materials are gathered, it’s time to cut out your snowflake design! Lay the paper flat on a hard surface and use the ruler or measuring tape to draw a square on your paper. Make sure all four sides are equal in length so that you can get symmetrical shapes when cutting. After you’ve drawn the square, fold it like an accordion so that each side of the square is folded against the other. Cut along the edges of your folded paper to create sharp designs – stars, triangles, circles – anything that looks like a snowflake will work!
Step 2: Attach Glitter Paper
Making a beautiful snowflake ornament for your Christmas room decorations is easy and fun! Step 2 is all about adding the sparkle to your DIY project – attaching glitter paper. Start by taking several pieces of cardstock and cutting them into smaller sections. Once you’ve completed this step, it’s time to attach the glitter paper.
Take one section of cardstock at a time and cut it into the shape of a snowflake using scissors or an x-acto knife. Place each piece onto a sheet of glitter paper, ensuring that it sticks securely with glue or tape. Make sure that each piece has enough space in between so there are no overlapping edges when finished. Use different colors for an eye-catching effect! Once you have all your snowflakes cut out, use small pieces of string or ribbon to connect them together in order to create the perfect hanging ornament.
Step 3: Hang Snowflakes
Hang Snowflakes will take your decorations to the next level! Whether you’re hanging a single snowflake or an entire wall of them, this step is sure to have everyone in awe. With just a few materials and some creativity, you can easily turn your space into a winter wonderland. Here are some tips for making sure your snowflakes look great when hung up.
First, choose the right thread for hanging your snowflakes from the ceiling or walls. A thin fishing line is ideal because it won’t be too visible but still provides enough length and strength to hold up heavier snowflakes. Once you have decided on the thread, use small pins or tacks to attach it securely to the ceiling or wall where you want each snowflake to hang.
Creative Ideas for Variations
Are you looking for creative ways to give your Christmas decorations a unique touch? Look no further! This article has all the ideas and inspiration you need to create beautiful glitter paper snowflakes for your Christmas room decorations. Whether you’re an expert crafter or just starting out, these DIY ornament-making ideas will help you get the festive look you want.
With a few simple supplies and some creativity, you can create stunning glitter paper snowflakes that will add sparkle and joy to any holiday setting. Get ready to get creative with this fun project – it’s easy and sure to impress! You’ll learn how to make snowflakes with different colors of glitter paper in various sizes and shapes, creating endless variations on this classic holiday design. For extra pizzazz, consider adding metallic accents or colorful ribbons. The possibilities are only limited by your own imagination!
Final Thoughts
In conclusion, this Christmas Snowflake Wall Hanging is a great holiday decoration to add to your home. Not only is it easy and relatively inexpensive to make, but it also offers a unique handmade touch that can be cherished for years to come. The combination of red and white materials makes it perfect for the winter season, while the intricate snowflake design adds a festive flair.


