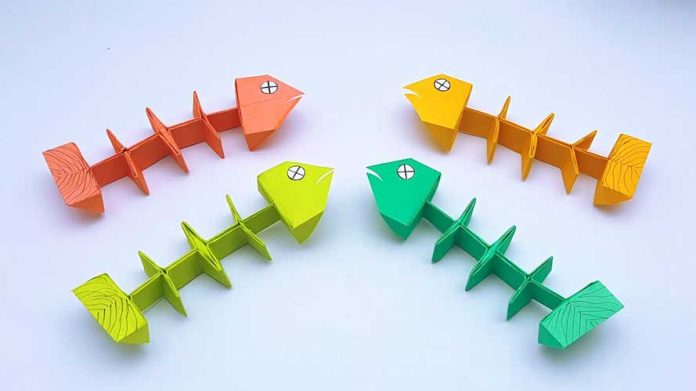
Paper crafting is a delightful way to express your creativity and bring unique decorations to life. If you’re looking for a charming and quirky addition to your home decor, consider making paper fishbones. In this step-by-step guide, we’ll take you through the process of crafting these whimsical paper fishbones that can add a touch of coastal charm to any space.
Materials Needed:
- Colored craft paper (white, gray, or any preferred fishbone color)
- Pencil
- Scissors
- Craft glue or adhesive tape
- Toothpick or scoring tool (optional, for folding)
Step 1: Choose Your Paper: Select the colored craft paper you’d like to use for your fish bones. Traditional gray or shades of white work well for a realistic look, but feel free to get creative and choose colors that suit your decor style.
Step 2: Draw the Fish Bone Shape: Using a pencil, draw the outline of a fish bone shape on your chosen craft paper. It should resemble a simple elongated bone structure with a slightly curved body and two prongs at one end.
Step 3: Cut Out the Shape: Carefully cut along the outline you’ve drawn. Make sure to follow the lines closely for a clean and polished result.
Step 4: Create Fold Lines (Optional): For added dimension and realism, you can create fold lines on your paper fishbone. Use a toothpick or a scoring tool to gently score lines down the center of each prong. This will make folding the prongs slightly easier in the next step.
Step 5: Fold the Prongs: Fold the prongs of the fishbone along the scored lines if you’ve created them. This will give your fishbone a more dynamic and three-dimensional appearance.
Step 6: Assemble the Fish Bone: Apply a small amount of craft glue or use adhesive tape to attach the folded prongs to the curved body of the fishbone. Hold the pieces together for a few moments to ensure they adhere properly.
Step 7: Repeat for More Fish Bones: Create as many paper fish bones as you desire for your project. You can experiment with different sizes and colors to add variety to your decor.
Step 8: Arrange and Display: Once you’ve crafted your paper fish bones, it’s time to arrange them in your chosen display area. They can be arranged in a bowl, hung as a mobile, or even attached to a wall for a playful wall art arrangement.
Step 9: Personalize and Embellish (Optional): Feel free to get creative and personalize your paper fish bones. You can add small details like dots, lines, or even tiny fish scales using markers, glitter glue, or other embellishments.
Step 10: Enjoy Your Charming Creation: Step back and admire your handiwork. Your paper fishbones are now ready to bring a touch of whimsy and coastal charm to your space. Whether as standalone decor or part of a larger theme, these delightful paper fishbones are sure to catch the eye and spark conversations.
Conclusion: Creating paper fishbones is a simple and enjoyable DIY project that allows you to add a unique touch to your home decor. With just a few materials and a bit of creativity, you can craft charming paper fish bones that bring a playful and artistic element to any room. So, gather your supplies, let your imagination run wild, and have fun crafting these quirky decorations that are bound to make a splash in your home.


