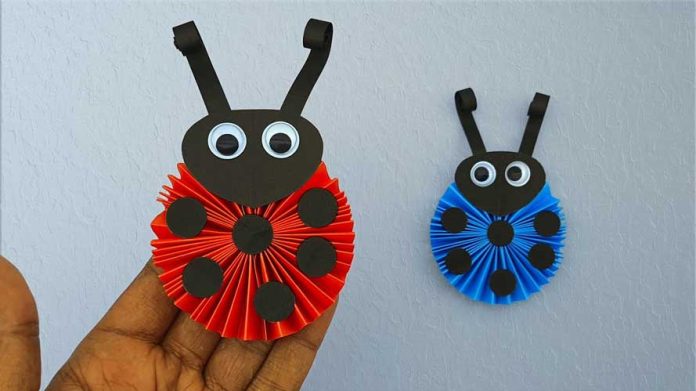
Nature-inspired crafts have a magical way of bringing the outdoors into your living space. If you’re looking for a creative and charming project, consider making a 3D paper ladybug. In this step-by-step guide, we’ll walk you through the process of crafting an adorable 3D paper ladybug that’s sure to add a touch of whimsy to your home decor.
Materials Needed:
- Red and black construction paper (or colors of your choice)
- White paper
- Scissors
- Pencil
- Craft glue or adhesive tape
- Googly eyes (optional)
- Black marker or pen
Step 1: Gather Your Materials: Collect all the necessary materials, including red and black construction paper, white paper, scissors, a pencil, craft glue or adhesive tape, googly eyes (if desired), and a black marker or pen.
Step 2: Create the Ladybug’s Body: Begin by drawing the ladybug’s body on the red construction paper. It should resemble a slightly elongated oval shape. Cut out the shape carefully using scissors.
Step 3: Add Black Spots: Cut small circles out of the black construction paper to create the ladybug’s spots. You can create as many spots as you like, but traditionally, ladybugs have seven spots on their backs. Glue or tape these spots onto the red body.
Step 4: Craft the Wings: Cut two identical wing shapes out of the red construction paper. These will serve as the ladybug’s wings. For a more 3D effect, slightly fold the wings along the center.
Step 5: Attach the Wings: Apply glue or adhesive tape to the folded side of the wings and attach them to the back of the ladybug’s body. Ensure that they are symmetrical and positioned in a way that gives the ladybug a realistic appearance.
Step 6: Add Eyes: If you’re using googly eyes, attach them to the ladybug’s head using glue. Alternatively, you can draw eyes using a black marker or pen.
Step 7: Create the Antennae: Cut two thin strips of black construction paper for the ladybug’s antennae. Glue or tape them to the top of the ladybug’s head.
Step 8: Form the Legs: Cut thin strips of black construction paper to create the ladybug’s legs. Attach six legs to each side of the ladybug’s body using glue or tape.
Step 9: Add a Smile (Optional): Using the black marker or pen, draw a small smiling mouth on the ladybug’s head to give it a friendly expression.
Step 10: Display Your 3D Paper Ladybug: Your 3D paper ladybug is now complete! Find a suitable spot to display it. You can place it on a shelf, attach a string to hang it as a decoration, or even use it as a cute addition to greeting cards or gift wrap.
Conclusion: Crafting a 3D paper ladybug is a delightful and rewarding project that allows you to create a charming piece of nature-inspired decor. With a few simple materials and a bit of creativity, you can bring the beauty of the outdoors into your home in a whimsical way. So, gather your supplies, follow the steps, and enjoy the process of crafting a lovable 3D paper ladybug that’s sure to brighten up your space.


