


If you’re looking for a fun and easy Christmas wreath craft, this DIY glitter foam paper wreath is the perfect project! It’s a great activity for kids and adults, and you can customize it to match your holiday décor. Plus, it’s a great way to use up those scraps of glitter foam paper that you have left over from other projects. In this article, we will show you how to make a DIY Glitter Foam Paper Christmas Wreath. This wreath is easy to make and only requires a few materials. You can use any color paper you want, but we recommend using glitter paper for a festive touch. This wreath makes a great addition to your holiday décor and is sure to impress your guests.
What you need: list of materials
This holiday season, make your own sparkling wreath with this easy DIY project using glitter foam paper! This project is perfect for anyone who wants to add a personal touch to their holiday decor. All you need is a few sheets of glitter foam paper, scissors, and hot glue. With just a little bit of time and effort, you can create a beautiful and unique wreath that will add some extra sparkle to your home this holiday season!
Best DIY Glitter Foam Paper Christmas Decoration
1. DIY Christmas Crafts | Homemade Christmas Wreath | Amazing Christmas Decoration Ideas |Paper Wreath
Everyone loves homemade Christmas crafts. They are unique and one-of-a-kind, plus they make great gifts! Here are a few easy DIY crafts that anyone can make. To make a snowman ornament, start by painting a wooden disc white. Once the paint is dry, glue on three small pom poms for the body, two mini black buttons for the eyes, and a orange triangle for the nose. Then, glue on a ribbon loop to the back of the disc. That’s it!
For a festive wreath, simply wrap a metal or straw wreath form with strips of fabric. Start by hot gluing one end of the fabric strip to the wreath form, then wrap around and glue the other end down. Repeat with as many fabric strips as you like in whatever pattern or colors you choose.
Step 1: Cut Foam Paper Into Strips
To make this glittery holiday wreath, you’ll need just a few supplies: foam paper, scissors, glue, and glitter. First, cut the foam paper into strips. You can make the strips as wide or as thin as you like. Once you have all your strips cut, it’s time to start gluing them together. To make the wreath base, start by gluing two strips together at one end. Then continue adding strips, slightly overlapping each one as you go. Once you’ve added all the strips, give the wreath a good twist so that all the ends are pointing inwards. Now it’s time to add some glitter! Get a generous amount of glue and start covering the wreath with it. Then sprinkle on some glitter and shake off any excess. Let the wreath dry completely before hanging it up.
Step 2: Glue Strips Onto Wreath Form
This easy DIY Glitter Foam Paper Christmas Wreath is a fun and festive way to add some sparkle to your holiday décor! All you need is a wreath form, some glue strips, and some glitter foam paper. To start, simply glue the strips of glitter foam paper around the wreath form. You can overlap the strips or leave some space in between them – it’s up to you! Once all of the strips are glued on, use a piece of ribbon or string to hang your sparkling new wreath on your door or wall.
Step 3. Glue Strips Together To Make a Circle
To make a DIY glitter foam paper Christmas wreath, you will need:
- 1. A foam wreath form
- 2. A hot glue gun and glue sticks
- 3. A roll of glitter foam paper
- 4. A pair of scissors
- 5. Optional: ribbon, sequins, and other decorations
First, cut strips from the roll of glitter foam paper. You will need around 40 strips, each about 1” wide and 12” long. Next, use the hot glue gun to attach the strips to the wreath form, overlapping the strips as you go around the circumference of the form. Once all the strips are glued on, trim off any excess paper and decorate your wreath with ribbon, sequins, or other embellishments as desired.
Step 4: Add Glitter
This year, add some sparkle to your Christmas decorations with a DIY glitter foam paper wreath! This project is simple and fun, and it’s a great way to add some personalization to your holiday decor. Here’s what you’ll need:
- – Foam paper
- – Glitter
- – Scissors
- – Hot glue gun
Start by cutting out a circular piece of foam paper. Then, use the hot glue gun to attach pieces of glitter around the edge of the circle. Once you’ve covered the entire circumference with glitter, cut a loop out of the center of the circle. This will be used to hang the wreath on your door or wall.
Now that you’ve made your own glittery wreath, it’s time to enjoy the holiday season!
Step 5: Decorate with glitter and sequins
Deck the halls with boughs of holly—and a whole lot of glitter and sequins! This year, add some extra sparkle to your holiday décor with a DIY Glitter Foam Paper Christmas Wreath. This festive wreath is easy to make and only requires a few materials: foam paper, glitter, sequins, and hot glue. Simply cut out circles of foam paper and glue them together to form a wreath shape. Then, get creative with the embellishments! Add some holiday cheer to your home with this shimmering DIY Glitter Foam Paper Christmas Wreath.
Step 6: Hang on the door or wall
This Christmas, add some extra sparkle to your home with this DIY Glitter Foam Paper Christmas Wreath. This wreath is easy to make and can be hung on the door or wall.
To make this wreath, you will need glitter foam paper, scissors, and hot glue. First, cut the foam paper into strips. Then, fold the strips in half and glue them together. Once all the strips are glued together, shape them into a circle and glue the ends together. Finally, add any embellishments you like.
This wreath is a great way to add some extra sparkle to your home this holiday season. Hang it on your front door or on a wall in your entryway. Your guests will be sure to notice this beautiful decoration!
2. Cute Tree Ornaments Making For Christmas Decorations Crafts | Diy Christmas Ornaments| Christmas
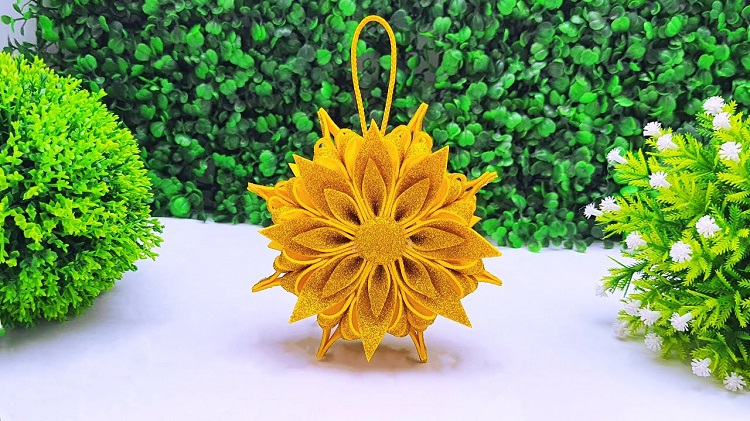
Christmas is a time for decorating, and what better way to do it than by making your own decorations? This year, try your hand at making some cute tree ornaments. With just a few supplies and some creativity, you can create unique ornaments that will add some personality to your Christmas tree. So get crafting and enjoy the process of creating something special for your home this holiday season.
What is Christmas without a tree? And what is a tree without ornaments? If you want to get into the holiday spirit, making your own unique tree ornaments is a great way to do it! There are tons of different ways to make your own ornaments. You can go the traditional route and use popsicle sticks, glue, and glitter. Or you can get a little more creative and use recycled materials like old buttons or pieces of fabric. If you’re feeling really ambitious, you can even try your hand at making handmade glass ornaments. Whatever route you choose, making your own ornaments is a fun way to get into the Christmas spirit!
What you’ll need to make the ornaments
When it comes to ornaments, there are a few supplies you’ll need in order to make them. First, you’ll need some sort of base for your ornament. This can be anything from a piece of cardboard to a Styrofoam ball. Next, you’ll need something to decorate your ornament with. This can be anything from glitter to paint to ribbon. Finally, you’ll need a way to hang your ornament. This can be a piece of string or ribbon looped through the top of the ornament. With these simple supplies, you can make a variety of different ornaments for your Christmas tree!
Easy steps to follow for making the ornaments
Making your own ornaments is a great way to add a personal touch to your Christmas tree. And it’s easier than you might think! Follow these simple steps and you’ll be crafting beautiful ornaments in no time.
- 1. Gather your supplies. You’ll need some basic craft supplies like glue, scissors, and paint. You can find all of these at your local craft store.
- 2. Choose your design. There are endless possibilities when it comes to ornament designs. You can keep it simple with a few basic shapes, or get creative with intricate patterns.
- 3. Cut out your pieces. Once you’ve decided on a design, carefully cut out the pieces you’ll need from construction paper or felt.
- 4. Assemble your ornament. Use glue or stitching to attach the pieces of your ornament together.
Helpful tips for making the perfect ornaments
Making the perfect ornaments for your Christmas tree can be a daunting task, but with these helpful tips, you’ll be sure to create beautiful decorations that will wow your friends and family. To get started, choose a material that you’re comfortable working with – whether it’s glass, metal, or wood. Once you’ve selected your material, gather your tools and supplies.
For glass ornaments, you’ll need a drill and small drill bit, as well as glass paint and brushes. For metal ornaments, you’ll need a hammer and nails, plus wire cutters and pliers. And for wood ornaments, you’ll need a saw and sandpaper. Now it’s time to start creating! If you’re making glass ornaments, begin by drilling a small hole in the top of each ornament.


