


Paper toy making is an excellent place to start if you’re searching for a simple and enjoyable DIY project. There are many straightforward concepts available that simply need a few supplies and some fundamental abilities. Making paper toys is not only a fantastic creative outlet, but it can also be a lot of fun to do with children. You can begin with straightforward designs like paper boats or aircraft before progressing to more intricate ones like origami animals or paper dolls. When it comes to paper toys, the options are countless, and after you get the hang of it, you can even make your own designs.
1. Origami Butterfly Making Without Glue, Tape & scissor | Paper Crafts Butterfly For School Crafts
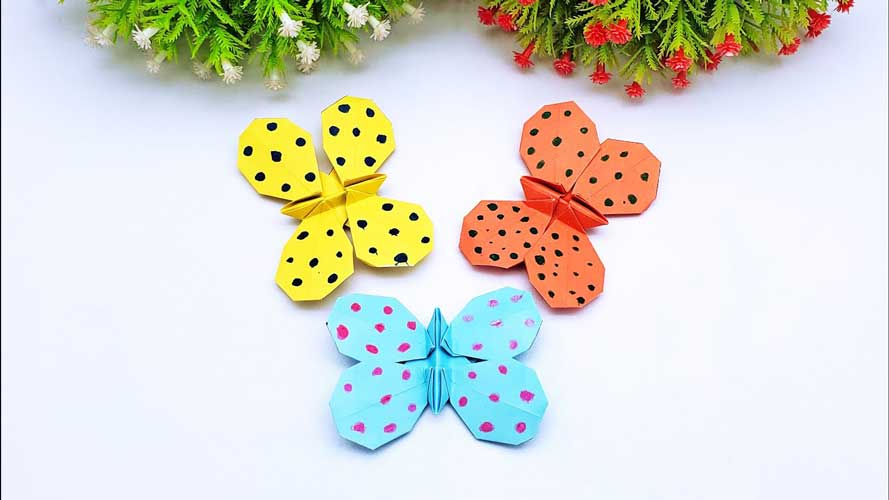
Origami is the ancient art of paper folding that originated in Japan. It is a beautiful and intricate art form that has been passed down through generations. One of the most popular origami designs is the butterfly. With just a few folds, you can create a delicate and stunning butterfly without using any glue.
Here is a step-by-step guide to creating an origami butterfly without glue:
Step 1: Choose a square sheet of paper. If you’re a beginner, it’s best to start with a larger piece of paper (around 15cm x 15cm).
Step 2: Fold the paper in half diagonally to create a triangle.
Step 3: Fold the triangle in half again to create a smaller triangle.
Step 4: Fold the top corners of the triangle down towards the center point to create a diamond shape.
Step 5: Fold the bottom edge of the diamond up to meet the top edge.
Step 6: Flip the paper over and fold the bottom corners up towards the center point.
Step 7: Fold the paper in half vertically to create the wings.
Step 8: Fold the top of the wings down to create the butterfly’s body.
Step 9: Fold the wings down to create a crease along the body.
Step 10: Pull the wings upwards to create the butterfly’s wings.
Your origami butterfly without glue is now complete. You can experiment with different paper sizes and colors to create a range of unique butterflies. You can even add details like antennae or spots with a pen.
Origami is a relaxing and rewarding hobby that requires patience and practice. With a bit of effort, you can create beautiful and intricate designs like this origami butterfly without using any glue.
2. Learn How To Make Paper Flapping Bird | Handmade Origami Bird Easy Instructions
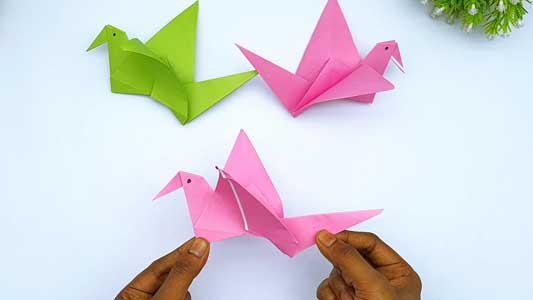
Origami, the Japanese art of paper folding, has been enjoyed for centuries. The beauty and complexity of the designs have captivated people all around the world. One of the most popular and exciting origami designs is the flapping bird. In this tutorial, you will learn how to create your own handmade paper-flapping bird with easy step-by-step instructions.
Step 1: Start with a square piece of paper, with the colored side facing down.
Step 2: Fold the paper in half diagonally to form a triangle. Crease well and unfold.
Step 3: Fold the top point of the triangle down to the bottom point. Crease well and unfold.
Step 4: Fold the top right point of the triangle to the center crease. Crease well and repeat with the top left point.
Step 5: Fold the paper in half along the center crease, bringing the two side points together. Crease well.
Step 6: Fold the top point down towards the bottom edge, leaving a small gap at the bottom. Crease well.
Step 7: Fold the top left and right points inwards along the crease lines, making them meet at the center line.
Step 8: Fold the bottom edge of the paper up to meet the bottom of the flaps created in step 7.
Step 9: Fold the top flap down over the folded bottom edge, tucking it under the flaps created in step 7.
Step 10: Fold the wings of the bird downwards, making sure they are symmetrical.
Step 11: Fold the wings upwards and then release them quickly. The bird should flap its wings and fly.
Congratulations, you have made a paper-flapping bird!
With a little practice, you can experiment with different sizes of paper and create a flock of paper birds. It is a perfect activity for kids, and adults can enjoy it too. The flapping bird is just one of many origami designs that you can learn to create. With time and patience, you can make complex origami creations that are both beautiful and fascinating.
3. How To Make Paper Heart Snowflakes For Valentine’s Day | Snowflake Cutting Ideas For Valentines Decor
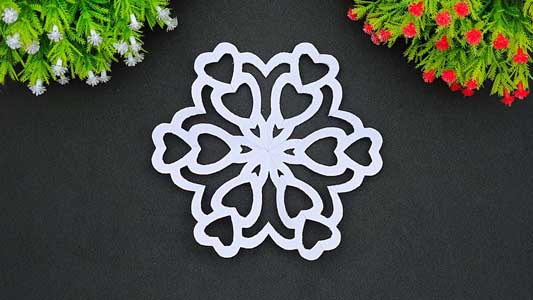
Valentine’s Day is just around the corner, and what better way to celebrate the occasion than with some DIY paper crafts? One of the easiest and most popular Valentine’s Day crafts is paper heart snowflakes. With a few simple materials and some easy-to-follow steps, you can create beautiful and festive decorations that are perfect for the season.
Materials:
- Red or pink paper
- Scissors
- Pencil
- Ruler
Step 1: Start with a square piece of paper. Fold the paper in half to create a rectangle, then fold it in half again to create a square.
Step 2: Fold the square in half diagonally to create a triangle.
Step 3: Fold the triangle in half again to create a smaller triangle.
Step 4: Take the right corner of the triangle and fold it towards the center of the paper. Repeat with the left corner.
Step 5: Fold the top of the triangle down to meet the bottom edge.
Step 6: Use a pencil to draw a half-heart shape on the folded paper. Make sure that the center of the heart is at the fold. Cut along the line to create a heart shape.
Step 7: Carefully unfold the paper to reveal the heart snowflake. You can create a variety of designs by cutting different shapes into the heart.
Step 8: Repeat steps 1-7 with additional pieces of paper to create a set of heart snowflakes.
Step 9: Hang your heart snowflakes on a wall, string them together to create a garland, or use them to decorate your Valentine’s Day table.
Paper heart snowflakes are a simple and fun Valentine’s Day craft that can be enjoyed by kids and adults alike. You can experiment with different colors of paper and create unique designs by cutting different shapes into the hearts. With a little creativity, you can turn this easy DIY craft into a beautiful and festive decoration for the holiday.
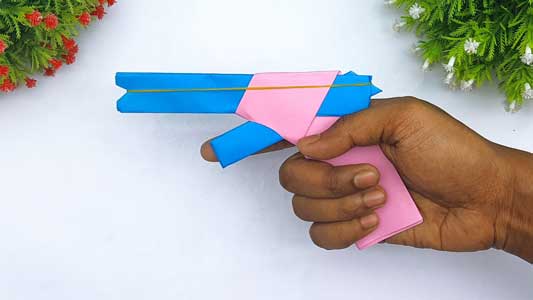
4. How to Make Paper Toy Gun That Go Very Fast | Easy Paper Toy Ideas
Materials:
- A sheet of paper
Step 1: Start with a rectangular piece of paper. Fold it in half lengthwise and then unfold it.
Step 2: Fold the top corners of the paper down towards the center crease, so that they meet at the middle of the paper.
Step 3: Fold the top edge of the paper down towards the bottom edge, creating a triangle shape at the top.
Step 4: Fold the paper in half along the center crease. The top of the paper should now be a point.
Step 5: Fold the wings down at a 45-degree angle, starting from the bottom corner of the paper and ending at the point.
Step 6: Flip the paper over and repeat step 5 on the other side.
Step 7: Unfold the wings slightly and adjust them until they are even and symmetrical.
Step 8: Hold the paper at the bottom and give it a gentle toss to see it fly through the air.
This simple paper airplane design is easy to make and can be customized with different colors or patterns of paper. You can also experiment with different folding techniques to create other unique paper toys. Remember to always prioritize safety and enjoy the process of creating something fun and creative with paper.


