


- Here are some of the best easy paper wall decorations to get you started!
- 1. Beautiful Paper Butterfly Wall Hanging Crafts | Easy Paper Wall Decorations Butterfly | Butterfly
- 2. Easter Paper Lantern decoration ideas | Handmade Foam Paper Christmas Decorations | Glitter Foam
- 3. 3D Christmas Snowflakes Making With Glitter Foam Paper Sheets | Easy Way To Make Christmas Snowflake
- Easy way to make 3D Christmas snowflakes out of glitter foam paper sheets
- What You Need: list the materials needed
- Step One: fold the paper into thirds and cut the snowflake shape out of the center
- Step Two: Unfold the paper and cut each triangle in half.
- Step Three: Fold the paper in half again and cut out another snowflake shape.
- Step Four: Unfold the paper and you will have eight triangles.
- Step Five: Take two triangles and make a small cut at the bottom point.
- Step Six: Repeat Step Five with all eight triangles.
- Final Thoughts
Looking for an easy, breezy way to add some life to your walls? freshen up any room in your home with one of these fifty-three best easy paper wall decorations. From 3D paper flowers to washi tape designs, there’s a project here for everyone – no matter your skill level or time commitment. So grab some scissors and get to work!
If you’re looking for simple, yet effective wall decor, look no further than paper decorations! Paper wall decorations are easy to make and can be customized to fit your taste and style. Plus, they’re budget-friendly and can be found in any craft store.
Looking for some simple and best easy paper wall decorations? Look no further! These are the best easy paper wall decorations that you can make in a snap. With just a few supplies, you can transform your blank walls into a work of art. All you need is some paper, scissors, and tape or glue.
First, decide on the design you want to create. You can go for a geometric look, or something more organic. Once you have your design in mind, cut out the shapes from your paper. If you want, you can add some color to your shapes by painting them or coloring them in with markers.
Once your shapes are all cut out, it’s time to start assembling them on your wall. Start at the bottom and work your way up, taping or gluing each piece in place. And that’s it!
Here are some of the best easy paper wall decorations to get you started!
Looking for some simple yet effective best easy paper wall decorations? Here are some of the best easy paper wall decorations to get you started! Paper wall decor is a great way to add some personality and style to your home without spending a lot of money. And, best of all, it’s easy to do!
1. Beautiful Paper Butterfly Wall Hanging Crafts | Easy Paper Wall Decorations Butterfly | Butterfly
Easy paper butterfly wall hanging crafts
Looking for a fun and easy craft to do with the kids? Try making these paper butterfly wall hangings! They’re simple to make and only require a few materials that you probably already have around the house. Plus, they’ll add a touch of springtime cheer to any room in your home.
Materials needed: paper, scissors, glue, string
Looking for a fun and best easy paper wall decorations craft? Look no further than this paper butterfly wall hanging! This craft is perfect for all ages and can be made with just a few simple materials. All you need is paper, scissors, glue, and string.
To make your paper butterfly wall hanging, start by cutting out your butterflies. You can use any color or pattern of paper you like. Once you have your butterflies cut out, it’s time to start attaching them to the string. Start at the center of the string and work your way out. To add a little extra flair, you can also curl the wings of your butterflies.
This pretty paper butterfly wall hanging is sure to brighten up any room in your house!
Step 1: Cut out butterfly shapes from paper
1. Can you believe that these beautiful paper butterflies are easy to make at home? With just a few simple supplies, you can create your own butterfly wall hanging in no time!
2. To get started, you’ll need to cut out butterfly shapes from paper. You can use any color or type of paper you like – construction paper, tissue paper, or even old magazines! Just be sure to use scissors that have pointed tips so you can get nice, clean cuts.
3. Once you have your butterflies cut out, it’s time to start assembling your wall hanging. To do this, simply glue the butterflies onto a piece of string or ribbon, spacing them out evenly as you go. Once all of the butterflies are in place, hang your wall hanging up and enjoy your handiwork!
Step 2: Decorate butterflies with glitter, paint, etc.
Step 3: Glue butterflies to string or wire
Start by cutting out a few different sizes of butterflies from colored construction paper. Once you have your butterflies, it’s time to start attaching them to string or wire. You can glue them directly to the string, or use small clothespins to attach them. This step is entirely up to you and your design! Once you have all of your butterflies attached, hang your new wall decoration up and enjoy!
Step 4: Hang on a wall
Looking for a beautiful and easy craft to add some life to your walls? This paper butterfly wall hanging is perfect! In just four simple steps, you can create a stunning piece of wall decor that is sure to impress.
First, gather your supplies. You will need some colored paper, scissors, glue, and a pencil. Once you have everything you need, it’s time to get started! Trace two wing shapes onto your paper and cut them out. These will be the wings of your butterfly. Next, use the pencil to draw a small body shape in the center of each wing. Cut these out as well.
Now it’s time to assemble your butterfly! Glue the body shape in between the two wings, making sure that the pointy ends of the wings are facing up.
2. Easter Paper Lantern decoration ideas | Handmade Foam Paper Christmas Decorations | Glitter Foam
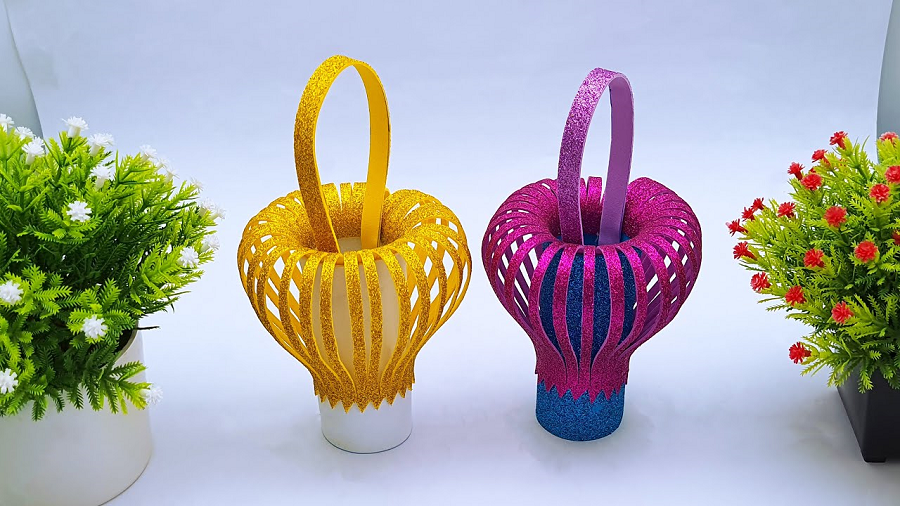
Easter decorations using paper lanterns and handmade foam paper
Looking for some unique and fun Easter decorations? Look no further than your own backyard – or the nearest party store! Paper lanterns and handmade foam paper best easy paper wall decorations and are a great way to add some festive flair to your home this Easter.
For quick and easy decoration, try hanging paper lanterns in different colors from the eaves of your porch or deck. If you want to get a little more creative, use different sizes and shapes of lanterns to create a more dramatic effect. You can also fill them with small LED lights for a bit of extra sparkle.
If you’re feeling crafty, try your hand at making some handmade foam paper decorations. These are easy to make and can be customized to match any Easter decorating theme you have in mind.
Section 1: Paper lantern Easter eggs
Paper lanterns are a great way to decorate for Easter. They are easy to make and can be used to decorate your home or office. Here are some tips on how to make paper lantern Easter eggs.
To make a paper lantern egg, you will need:
- -A sheet of white paper
- -A sheet of colored paper
- -A pencil
- -Scissors
- -Tape
- -A stapler
- -Ribbon or string
1. Begin by tracing an egg shape onto the white paper. Cut out the egg shape.
2. Cut out a smaller egg shape from the colored paper. This will be the top of your lantern egg.
3. Tape the two pieces of paper together, sandwiching the ribbon or string in between.
Section 2: Glitter foam Easter eggs
With Easter right around the corner, now is the time to start thinking about the best easy paper wall decorations. One simple and easy decoration is a glitter foam egg. All you need is some glitter foam, scissors, and glue.
Cut out egg shapes from the glitter foam. You can make them any size you want. Once you have your egg shapes cut out, glue them together at the edges. Make sure to leave a small opening at the top of each egg.
Now it’s time to add the glitter! Pour some glitter into the opening of each egg. Be generous with the glitter so that it really sparkles and shines. Once you’ve added the glitter, close up the opening with more glue. Your Glitter Foam Easter Eggs are now complete!
Section 3: Easter bunny paper lantern
Looking for a fun and festive way to spruce up your home for Easter? Check out these Easter bunny paper lanterns! They’re easy to make and are sure to add a touch of whimsy to your holiday decor.
To make these bunny lanterns, you’ll need some basic craft supplies like foam sheets, scissors, glue, and glitter. First, cut out bunny shapes from the foam sheets. Then, decorate the bunnies with glitter and glue. Once they’re dry, simply insert a tea light candle into each one and enjoy the sparkling display!
Section 4: Handmade paper flowers
Looking for a fun and unique way to decorate your home this Easter? Look no further than handmade paper flowers! These charming decorations are easy to make and can be customized to match any decorating scheme.
To make your own paper flowers, you will need:
- -Several sheets of colored construction paper
- -Scissors
- -Glue or Tape
- -Ruler or Measuring Tape
- -Pencil
First, decide on the size and shape of your flower. Using a pencil and ruler, draw a template on a piece of scrap paper. Cut out the template and use it to trace shapes onto your construction paper. Once you have all of your petals cut out, it’s time to assemble your flower.
Start by gluing or taping the center of one petal to the center of another.
3. 3D Christmas Snowflakes Making With Glitter Foam Paper Sheets | Easy Way To Make Christmas Snowflake
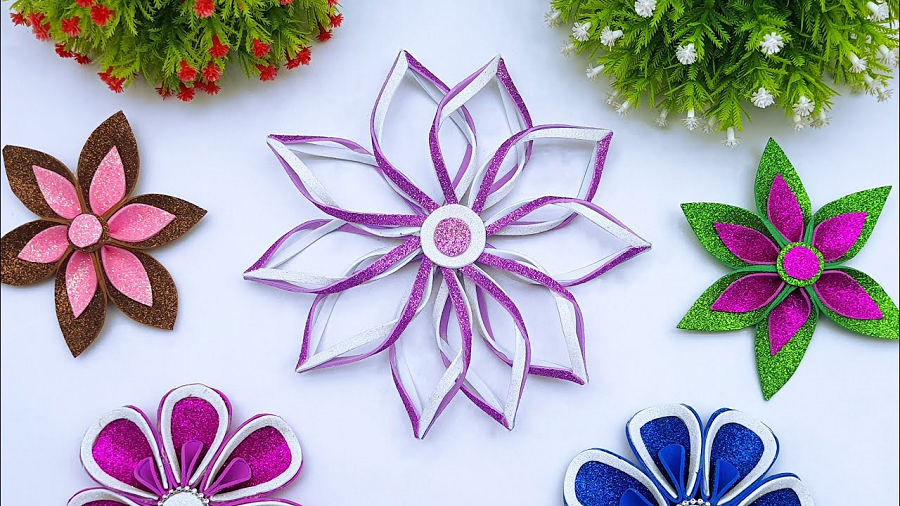
Easy way to make 3D Christmas snowflakes out of glitter foam paper sheets
It’s that time of year again! The holidays are upon us and that means it’s time to start thinking about Christmas decorations. One of the most popular and timeless best easy paper wall decorations is snowflakes. They can be simple or complex, small or large, but they always look beautiful.
If you want to try your hand at making some 3D snowflakes, we’ve got the perfect tutorial for you. All you need is some glitter foam paper sheets and a little bit of patience. In no time at all, you’ll have beautiful snowflakes to decorate your home with.
Follow the steps below and you’ll be a pro in no time:
1. Cut out a square from the glitter foam sheet. This will be the base of your snowflake.
2. Cut out 6 equal-sized triangles from the square.
What You Need: list the materials needed
In just a few easy steps, you can make your own 3D Christmas snowflakes out of glitter foam paper sheets. All you need is a pair of scissors, a pencil, and some clear tape.
First, trace a snowflake onto the glitter foam sheet with a pencil. Then, cut out the snowflake shape with scissors. Make sure to cut along the pencil line as closely as possible.
Next, take two identical snowflakes and tape them together at the center. Once you have two flakes taped together, take another flake and tape it to one of the other flakes, creating a six-sided star shape. Continue adding flakes until you have a full snowflake.
Finally, hang your 3D Christmas snowflake in a window or on a wall, and enjoy!
Step One: fold the paper into thirds and cut the snowflake shape out of the center
Making a three-dimensional snowflake is easy with just a few supplies. All you need is some glitter foam paper, scissors, and a little bit of time. Follow these simple steps to make your own 3D snowflake.
Step Two: Unfold the paper and cut each triangle in half.
To make 3D snowflakes out of glitter foam paper sheets, start by folding a sheet of paper in half and then in half again. Then, cut each triangle in half so that you have 8 triangles. Next, take two triangles and glue them together at the points where they meet. Repeat this step with the remaining triangles. Finally, let the glue dry and your 3D snowflakes are ready to hang!
Step Three: Fold the paper in half again and cut out another snowflake shape.
This step is identical to step two above. The only difference is that you’ll be cutting out a smaller snowflake this time. Again, be careful not to cut yourself with the scissors. Once you’ve cut out your second snowflake, unfolded both snowflakes and hold them up to the light to admire your handiwork!
Step Four: Unfold the paper and you will have eight triangles.
To make a 3D snowflake, you will need eight glitter foam sheets. Cut each sheet into four equal triangles. Unfold the paper and you will have eight triangles. Take two triangles and glue them together at the wide end. Do this with all eight triangles. Once all the triangles are glued together, you will have a 3D snowflake!
Step Five: Take two triangles and make a small cut at the bottom point.
It’s time to get creative with your snowflakes! In step five, you will take two triangles and make a small cut at the bottom point. This will create a V-shaped notch that will add interest and dimension to your finished snowflake.
When cutting the V-shaped notch, be careful not to cut too deeply or too wide. You want the notch to be just big enough to add some visual interest without compromising the overall structural integrity of the snowflake.
Once you’ve made the cut, simply fold the two triangles together, and voila! You’ve created beautiful best easy paper wall decorations that are sure to dazzle on your Christmas tree or wherever else you choose to display it. This will be where you insert the other triangle to create the 3D effect.
Step Six: Repeat Step Five with all eight triangles.
Now that you have made your first snowflake, it is time to move on to the next steps. Follow the same instructions as before, but this time use all eight of the triangles. Once you have completed this step, you will have a beautiful 3D snowflake!
Final Thoughts
In conclusion, simple paper is best easy paper wall decorations can brighten up any room without costing a lot of money. With a little bit of creativity, you can transform your home into a stylish and inviting space. So get out your scissors and glue, and start crafting!


